- 03 Oct 2022
- 1 Minute to read
- Print
- DarkLight
- PDF
Time Entries
- Updated on 03 Oct 2022
- 1 Minute to read
- Print
- DarkLight
- PDF
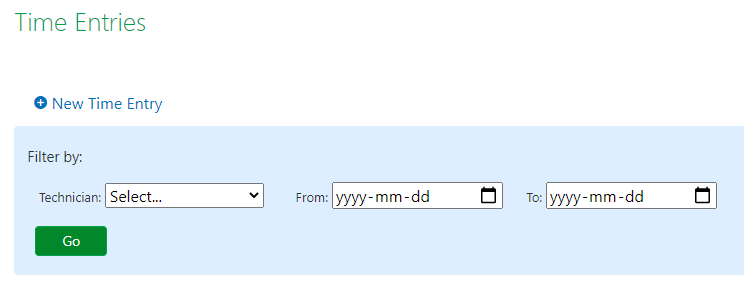
To use this feature, go to the Time Entries page, which can be found by clicking on Time Entries in the top navigation.
From here, you can either create a new Time Entry using the New Time Entry button at the top, or filter the list of Time Entries for your technicians by selecting a technician and/or a date range.

Adding a New Time Entry
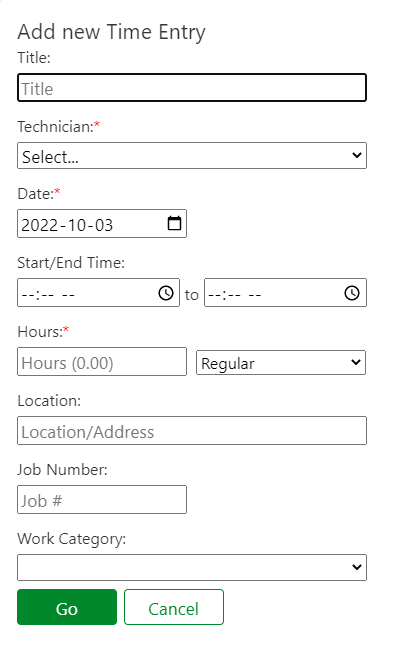
To add a new Time Entry, click the New Time Entry button at the top and fill out the following form:

Title - Enter the title of the Time Entry
Technician - select the technician whose Time Entry you are adding
Date, Start/End Time, Hours - enter the start and end time and the hours will be automatically calculated, OR simply type in the number of hours the employee worked. Proceed by selecting what type of Time Entry you're adding, whether it's Regular, Overtime or Double Time.
Location - type in the location or address where the employee worked this particular shift.
Job Number - enter the Job Number this time entry is associated with.
Editing & Deleting Time Entries
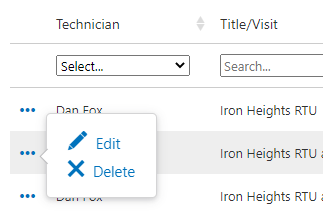
To edit or delete a Time Entry, simply hover over the 3-dot more info icon to the left of the Time Entry in question and click on Edit or Delete.


