Visits tab
- 21 Apr 2023
- 3 Minutes to read
- Print
- DarkLight
- PDF
Visits tab
- Updated on 21 Apr 2023
- 3 Minutes to read
- Print
- DarkLight
- PDF
Article summary
Did you find this summary helpful?
Thank you for your feedback!
The Visits tab allows you to set up and customize exactly the work that your technicians should do when on this Job.
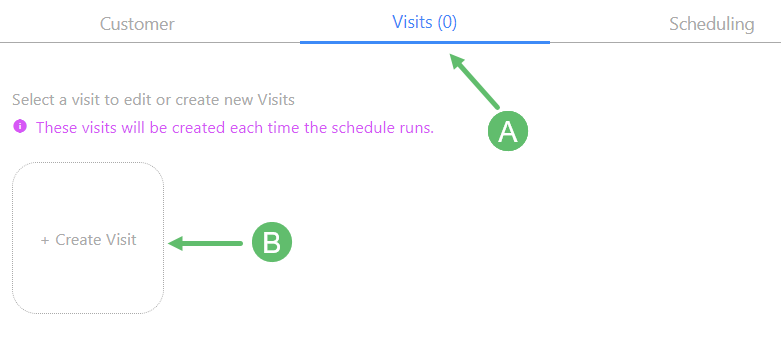
A - Number of Visits Indicator
The number you see in brackets here indicates how many Visits are in this Schedule.
B - Create Visit button
Click this button to create a new Visit. A form will appear below.
Visits Form Interface
Use the following form to define the Visit you want to include in this Schedule. In the future (depending on how you have set up your Scheduling), the Visit will be created based on these fields.
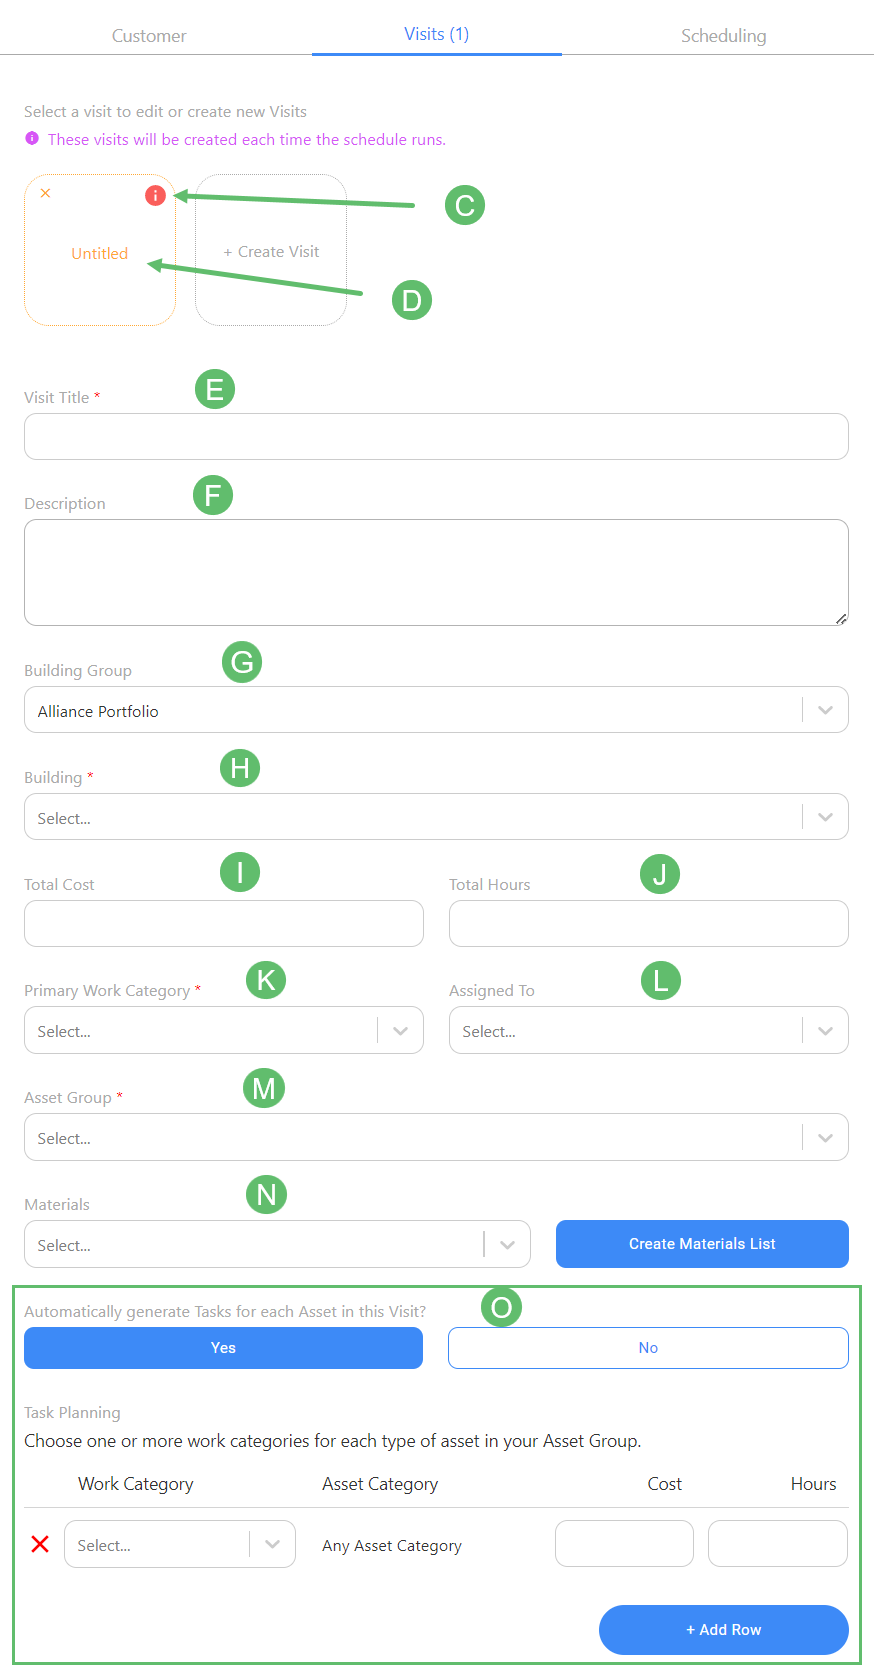
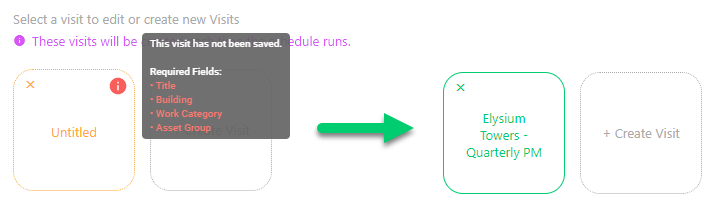
C - Required Fields Indicator
If you hover over the info icon, you will see which fields are still required in order for this Visit to be accepted by the system.
D - Visit Box Colour Coding
When all required fields in the Visit form are filled out, you will see the colour of the box change from orange to green, like so:
E - Visit Title
[required]
Enter the title of the Visit.
F - Description
[optional]
Use this textbox to further describe the Visit you are defining.
G - Building Group
By default, your organization's entire Building portfolio is selected here. This means that you will have all of the Buildings to choose from in the next field. However, if you have separated your Buildings into various groups, you can select one of those here. This will narrow down the list of Buildings in the next field.
H - Building
[required]
Select the Building where the work from this Visit is to be performed at.
I - Total Cost
[optional]
Enter the Total Cost this Visit entails, usually as per contractual agreement with the Customer.
J - Total Hours
[optional]
Enter the Total Hours agreed upon to be spent on this Visit.
K - Primary Work Category
[required]
This is a very important field as it dictates what type of work will be performed during this Visit. This will help narrow down the Procedure(s) that your technicians will be prompted with when performing their work. Work Categories are a managed list that you can make changes to by hovering over the Manage tab and clicking on Work Categories.
L - Assigned To
[optional]
If you know ahead of time which technician should be assigned to this Visit, select that person here.
M - Asset Group
[required]
In this field you can set which group of Assets are going to be worked on during this Visit. Each Asset may get one or more Tasks, depending on whether you've selected 'Yes' or 'No' in the field "Automatically generate Tasks for each Asset in this Visit?" below, as well as how you've defined the Task Planning portion.
N - Materials
[optional]
Use this field to either select or create a Materials List that you want to attach to this Visit.
Definition: Materials
A Materials definition goes here.
O - Task Planning
[optional]
After setting the Asset Group and Primary Work Category above, use this section to further define which Tasks should be created when the Visit nears its Start Date.
Automatically generate Tasks for each Asset in this Visit
If you selected 'No' for this field, you will not have access to the Task Planning section as no Tasks will be created automatically for you. You will have to create the Tasks manually later and will have the chance to hand-pick each Asset from the chosen Asset Group above.
If you selected 'Yes', however, you will get to strategically plan for which Assets should be inspected based on Work Category and Asset Category. This section also lets you set specific Costs and Hours for each Task Planning row.
An example:
Let's say you've set the Primary Work Category to be "PM Minor" and your Asset Group is set to "All Assets". This means that you will be doing a Minor PM on all of the Assets in the chosen Building.
In the Task Planning section, you will see one row defaulted to "PM Minor" and "Any Asset Category", in the first two fields. This essentially just means that a Task will be created for every Asset (because we have "Any Asset Category" selected) in our Asset Group. So, if you have 50 Assets in your Asset Group, then you will get exactly 50 Tasks (one for each Asset).
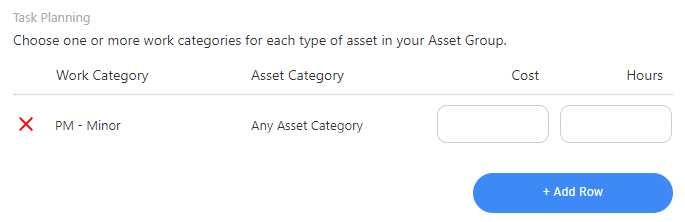
However, you also want your technician(s) to perform Boiler shutdowns on all of the Boilers. To do this, simply click Add Row to add another row. For Work Category, you might select "Boiler Shutdown" and for Asset Category you would select "Boiler". Let's pretend there are 10 Boilers in your Asset Group of 50 total Assets. This means that our newly added row here would create an additional 10 Tasks, one for each Boiler, bringing our total number of Tasks to 60 for the 50 Assets we will be inspecting. 10 of those Boilers will have 2 Tasks each.
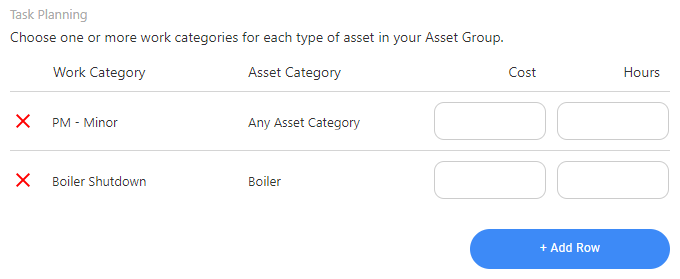
You can continue adding rows and further specifying which Assets should have additional Tasks on them.
Was this article helpful?