Notification Rules for Visits
- 07 Feb 2025
- 2 Minutes to read
- Print
- DarkLight
- PDF
Notification Rules for Visits
- Updated on 07 Feb 2025
- 2 Minutes to read
- Print
- DarkLight
- PDF
Article summary
Did you find this summary helpful?
Thank you for your feedback!
Creating a new rule for a Visit
This article will explain how to create a rule for when a change is made to a Visit.
Note:
Currently, you a create a rule for when a Visit is Deleted, Edited, or Created or has Any Change.
Here are the steps needed to set up a rule:
1. Make sure you are on the Visit tab in the top navigation, and click on + Create Notification Rule in the top-right corner.
.png)
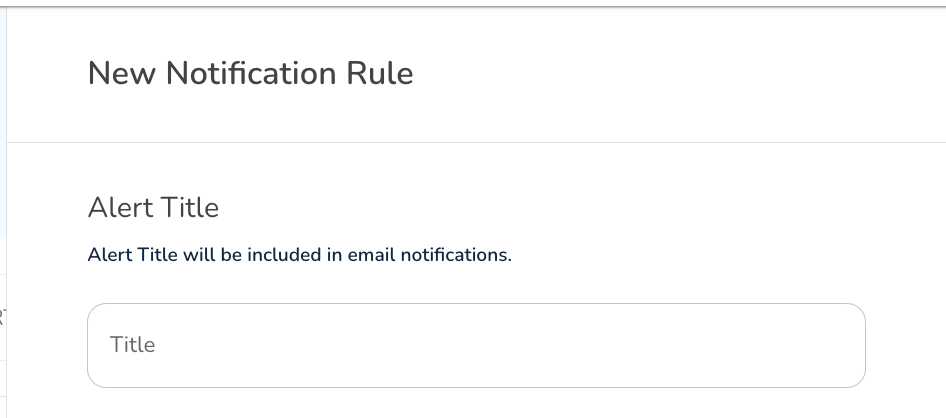
2. You can specify an Alert Title to give clear context to the email recipient about the alert's purpose.
3. Your object is automatically set to Visit, and you just simply need to select an action from the second dropdown.

4. In the next section, you have the ability to set some conditions for when this notification rule should run. By default, it will simply run on only the action set in the field above.
Note:
Choosing multiple values in a condition means “OR”.
In the recipients section, selecting multiple people means “AND”.
For example, you can make it so that this rule only runs when:
a Visit status is changed in a specific Building (or is not changed in a specific Building)

when status is changed by a specific User (or is not changed by a specific User)

when a Visit is set to a specific status (or is not set to a specific status)

when a status change is Performed By a specific User Role (or is not performed by a specific user role)

when a Visit has a specific Work Category (or does not have a specific Work Category)

when a Visit is assigned to a User (or is not assigned to that user)

when a user is unassigned from a Visit (or is not unassigned from a Visit)

You can, of course, use all the conditions at the same time. Also, please note that you can use 'IS' or 'IS NOT' when setting these conditions.
Note:
To use Performed By Role, the user must be assigned a role in the Admin Portal.
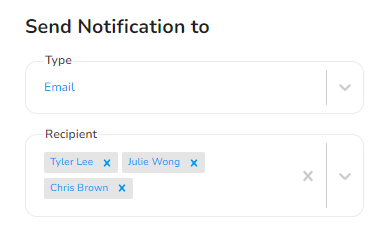
5. As a last (and maybe most important) step, we need to decide who gets the notification. There are two (2) fields here:
Type - select the type of notification that should be sent.
Note
The only 'Type' option at the moment is 'Email'.
Recipient - choose the user(s) who should be notified.
Note
You can only choose from the list of users inside your organization.
If you choose "Assigned users has changed to Any users" as a condition then you can choose "Assigned Users" as a recipient, meaning those users ADDED to the visit will get an email
Similarly, for "Unassigned users has changed" - you can notify the users who have been removed.
Here is an example. We are telling the system to send a notification by email to the users Tyler Lee, Julie Wong, and Chris Brown.
6. Click on Create when done.
Was this article helpful?