- 08 May 2024
- 2 Minutes to read
- Print
- DarkLight
- PDF
How to View Visits as a Dispatch Board
- Updated on 08 May 2024
- 2 Minutes to read
- Print
- DarkLight
- PDF
Overview
The new Dispatch View in our Web App is specifically designed to enhance the management and visibility of scheduled visits. This feature provides a comprehensive overview of both assigned and unassigned visits, facilitating better coordination and planning of resources. This guide details the functionalities of the Dispatch View and demonstrates how to utilize it effectively.
Benefits of Using Dispatch View
Enhanced Visibility: All team members can view real-time updates on scheduled visits, which helps to reduce confusion and prevent overlapping bookings.
Increased Efficiency: Manage and assign visits easily from a centralized view, which streamlines the dispatch process and improves response times.
Better Resource Allocation: With a clear view of both assigned and unassigned visits, you can optimize the use of personnel and resources.
Accessing the Dispatch View
To access the Dispatch View in the Web App, follow these steps:
Navigate to the Visits Tab: Open the Web App and click on the Visits tab located under All Work.
Filter Visits by Date: Use the date range filters to select the period for which you want to view scheduled visits. This helps in narrowing down to the specific visits you need to manage or review. You can view a maximum of 90 days of work at a time.
.png)
Open Dispatch View: After filtering the visits, click on the Dispatch View button to switch to the dispatch view layout.
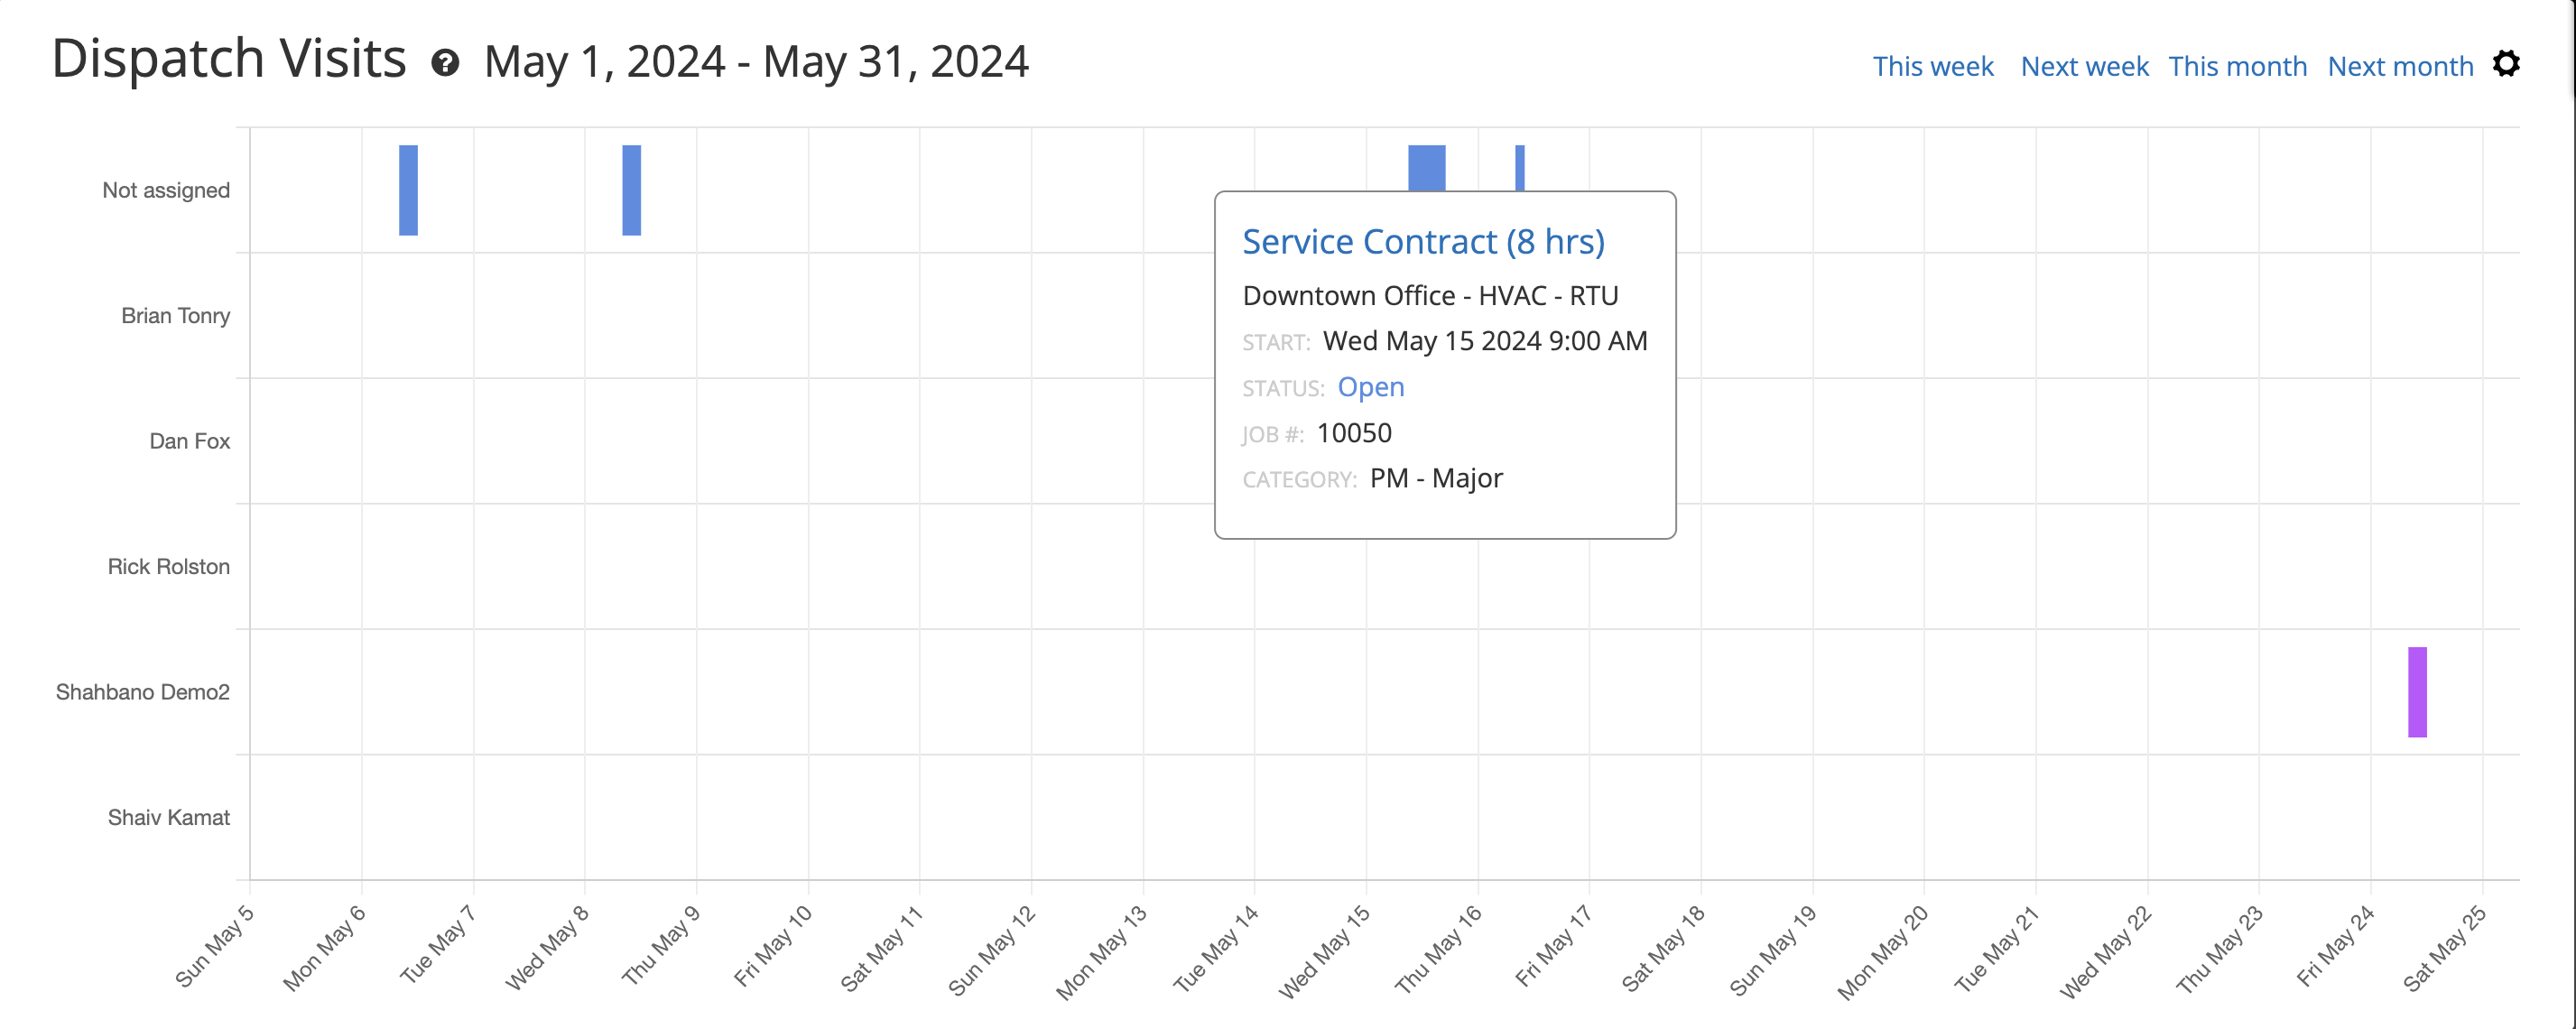
The Dispatch View shows Visits by Start Date and Estimated Hours.
If the Start Date has the Start Time equal to midnight then the grid shows it at the “Work Day Start” setting.
What happens when there is a conflict?
If any technicians have two visits scheduled at the same time, a yellow warning will show under the grid listing their names. Hover on a name to see the date(s) where they have a scheduling conflict.
If you schedule any work outside of normal work hours, a yellow warning will show under the grid.

In the Dispatch View, you will find:
Brief Visit Information: Clicking on the bar associated with any visit will display brief information about that visit. The bars are colour-coded according to the Visit’s status.
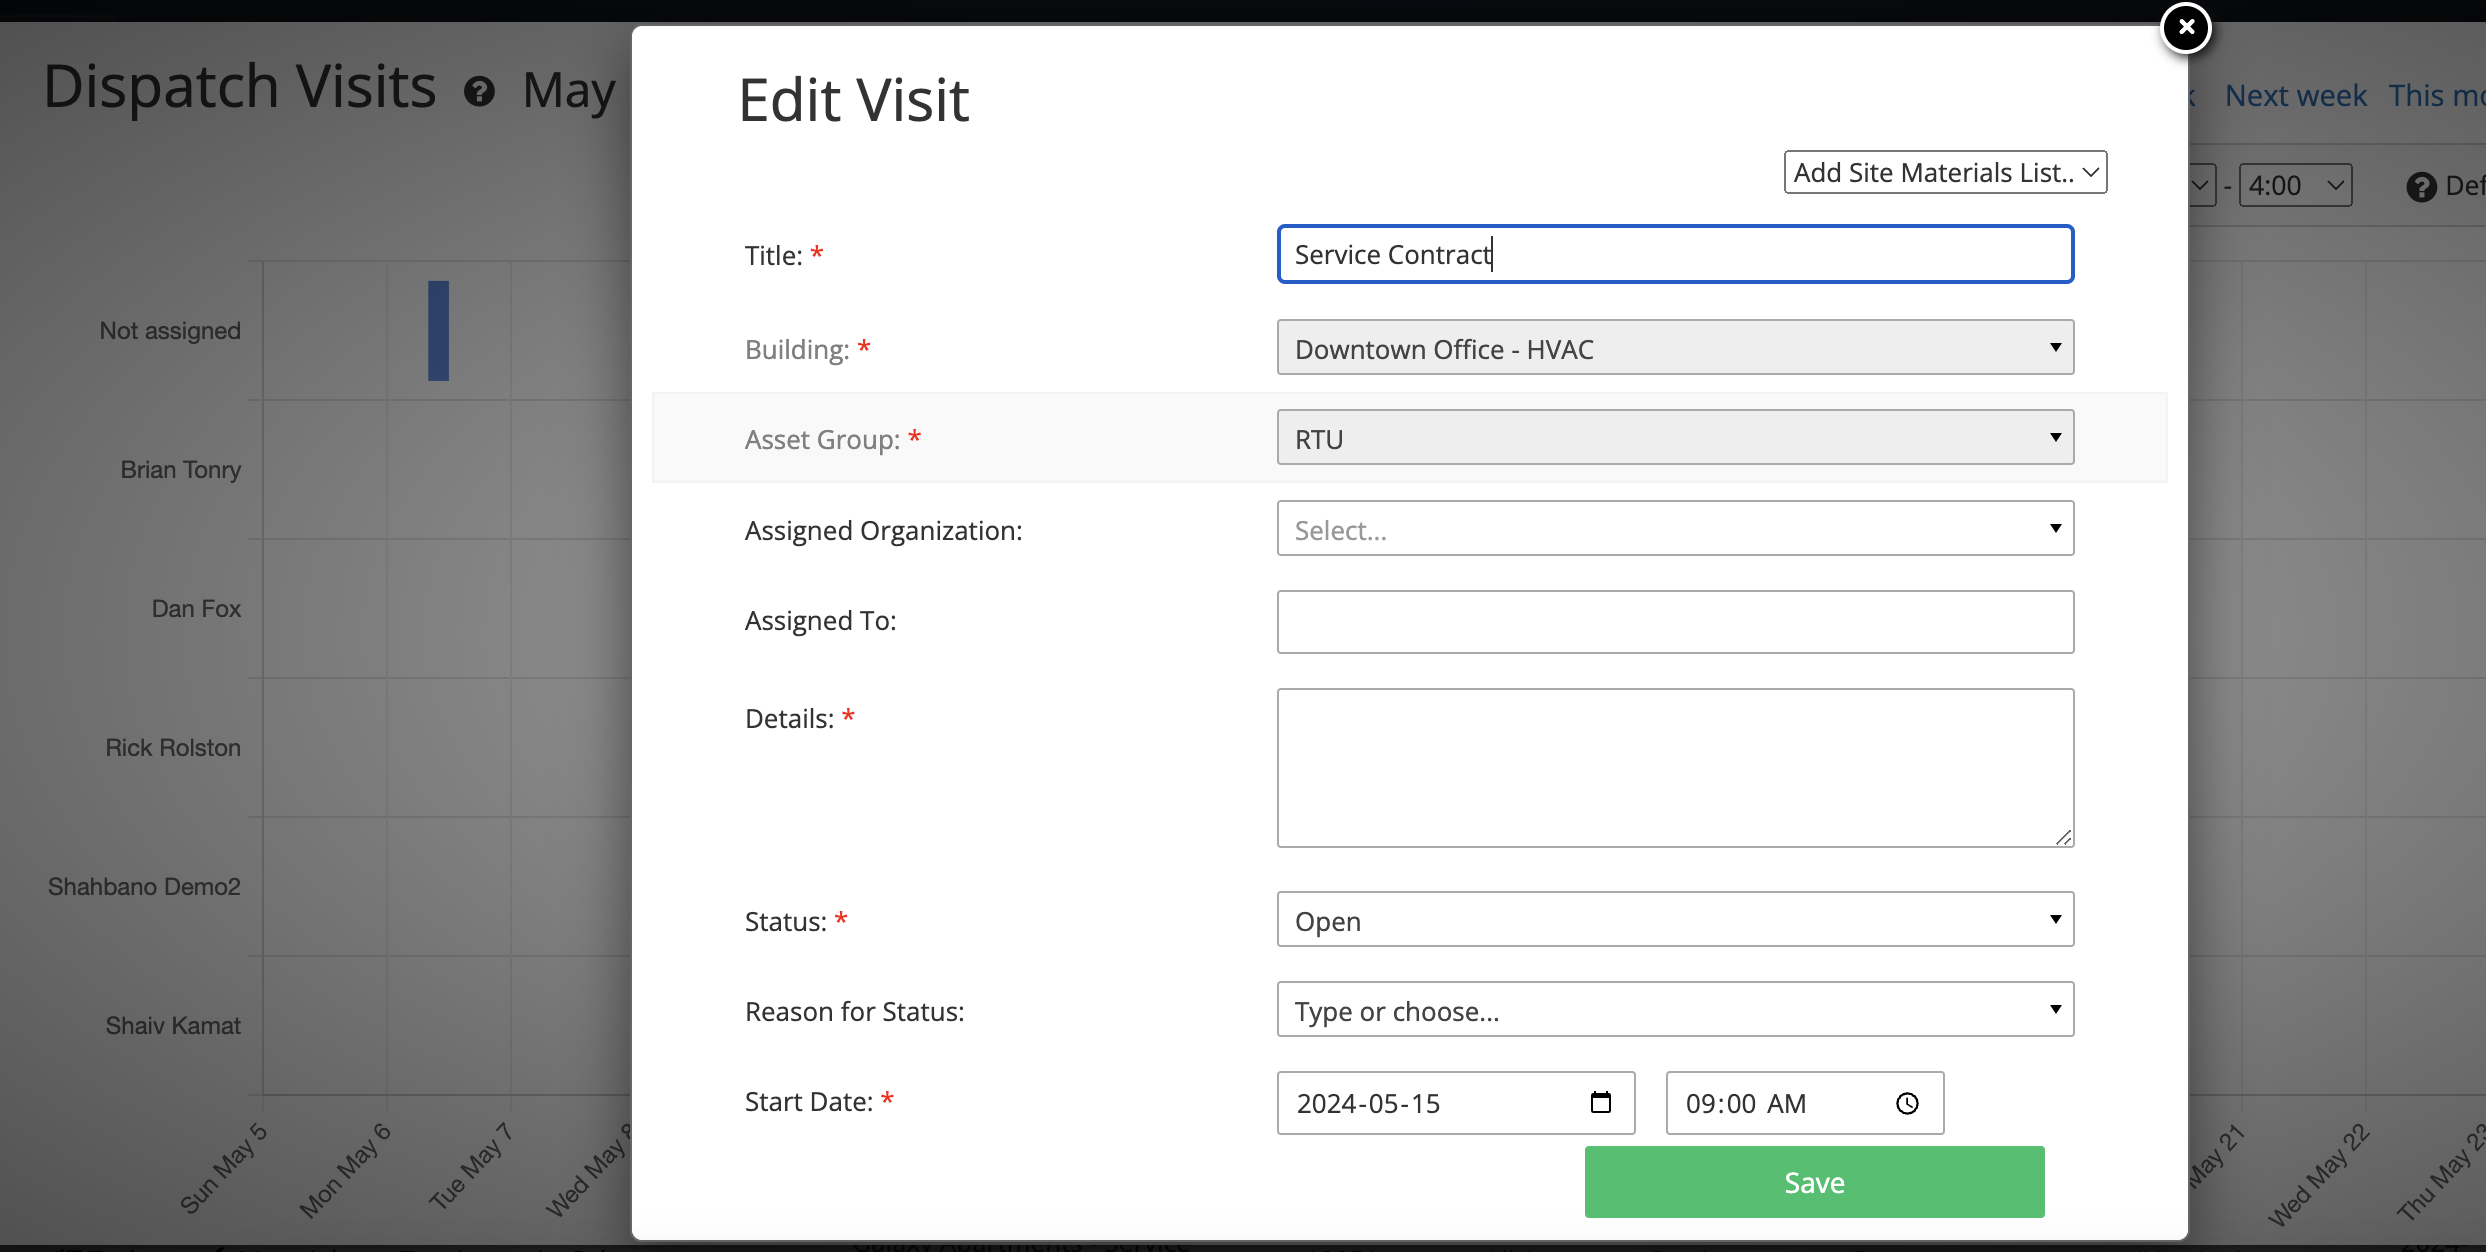
Detailed Edit Options: By clicking on the title of the visit, which is in blue, you can open the Edit Visit pop-up to access and modify detailed visit information.After editing the dispatch grid refreshes so you can see changes in Start Date, Estimated Hours and Assigned Technicians.

Settings via Gear Icon: In the top right corner, the gear icon allows you to configure additional settings such as the workday start and end times, and default visit hours when no Estimated Hours are specified in a visit.

Features of the Dispatch View
Visual Overview
The Dispatch View showcases all scheduled visits in a clear, intuitive layout.
Visits in the Dispatch View are organized as 'Unassigned' or by technician names, ensuring a balanced distribution of tasks among technicians and minimizing the risk of scheduling conflicts.
Managing Scheduled Visits
Viewing Details
Click on any visit title in blue to view detailed information such as the time, location, assigned personnel, and other relevant details.
Assigning Visits
To assign an unassigned visit, click on the visit title and add the name of the person you wish to assign it to.
Rescheduling and Modifications
Visits can be rescheduled by clicking on the visit title and editing the start date.
To modify the details of a visit, click on the visit title, which opens the Edit Visit pop-up where you can edit all the details.
Additional Settings
Click on the gear icon in the top right corner to set:
Workday start and end times
Default Visit Hours for when no specific hours are provided in a visit.


