- 21 Aug 2024
- 2 Minutes to read
- Print
- DarkLight
- PDF
Global Settings
- Updated on 21 Aug 2024
- 2 Minutes to read
- Print
- DarkLight
- PDF
This article shows you how to configure the Global Settings in the Settings tab on the left Navigation Menu on the Admin Portal.
How to configure Global Settings
1. Next PO Number
Under the Global Settings tab, click on the Next PO Number setting to open the slide-out. Here you can set the value you want the PO Number to start at and click the green checkmark to save.
The small "reset" icon (red circle arrow) next to the green checkmark means "reset to default". It shows up for any setting that has been changed from the system’s default.

2. No Notifications
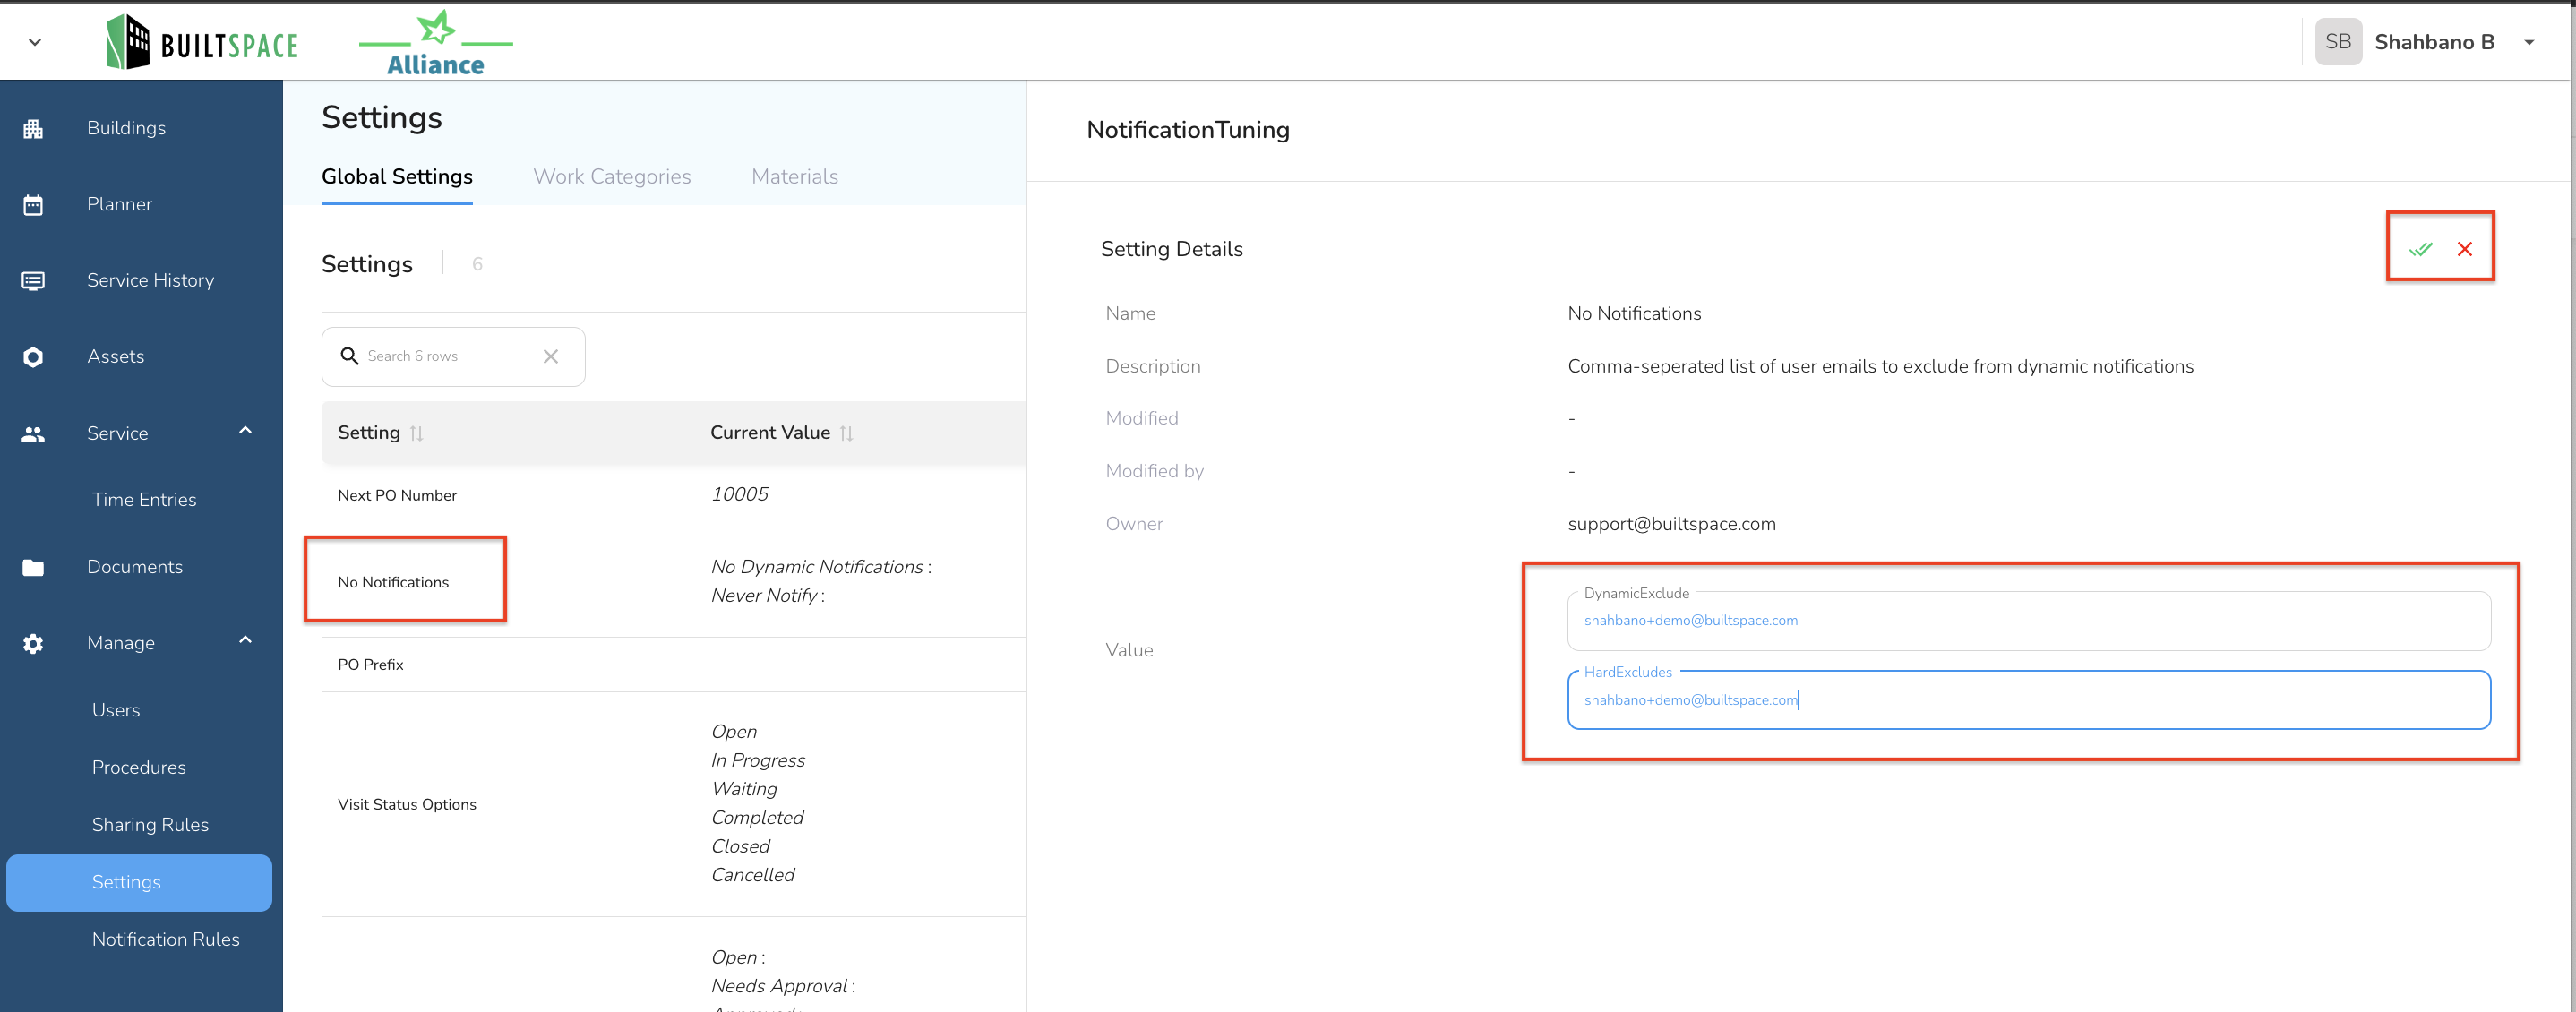
Under the Global Settings tab, click on the No Notifications setting to open the slide-out. Here you can set the value for two sub-settings by adding comma-seperated list of user emails to exclude from dynamic notifications.
DynamicExcludes - "No dynamic notifications": If you created a notification rule with a dynamic recipient(s) like "Assigned users" these email addresses will not receive a notification.
HardExcludes - "Never notify": This would cancel any notifications to this user, even if they were listed as a Recipient on a notification rule (This is planned to be released Sep 2024).

3. PO Prefix
Under the Global Settings tab, click on the PO Prefix setting to open the slide-out. Here you can set the value you want for the PO Prefix and click the green checkmark to save.
PO Prefix value can include numbers, letters and special characters like #. It is also case-sensitive.
For example, if your PO prefix is TORONTO then the PO number will be TORONTO10004 on the Job report or invoices.

4. Location
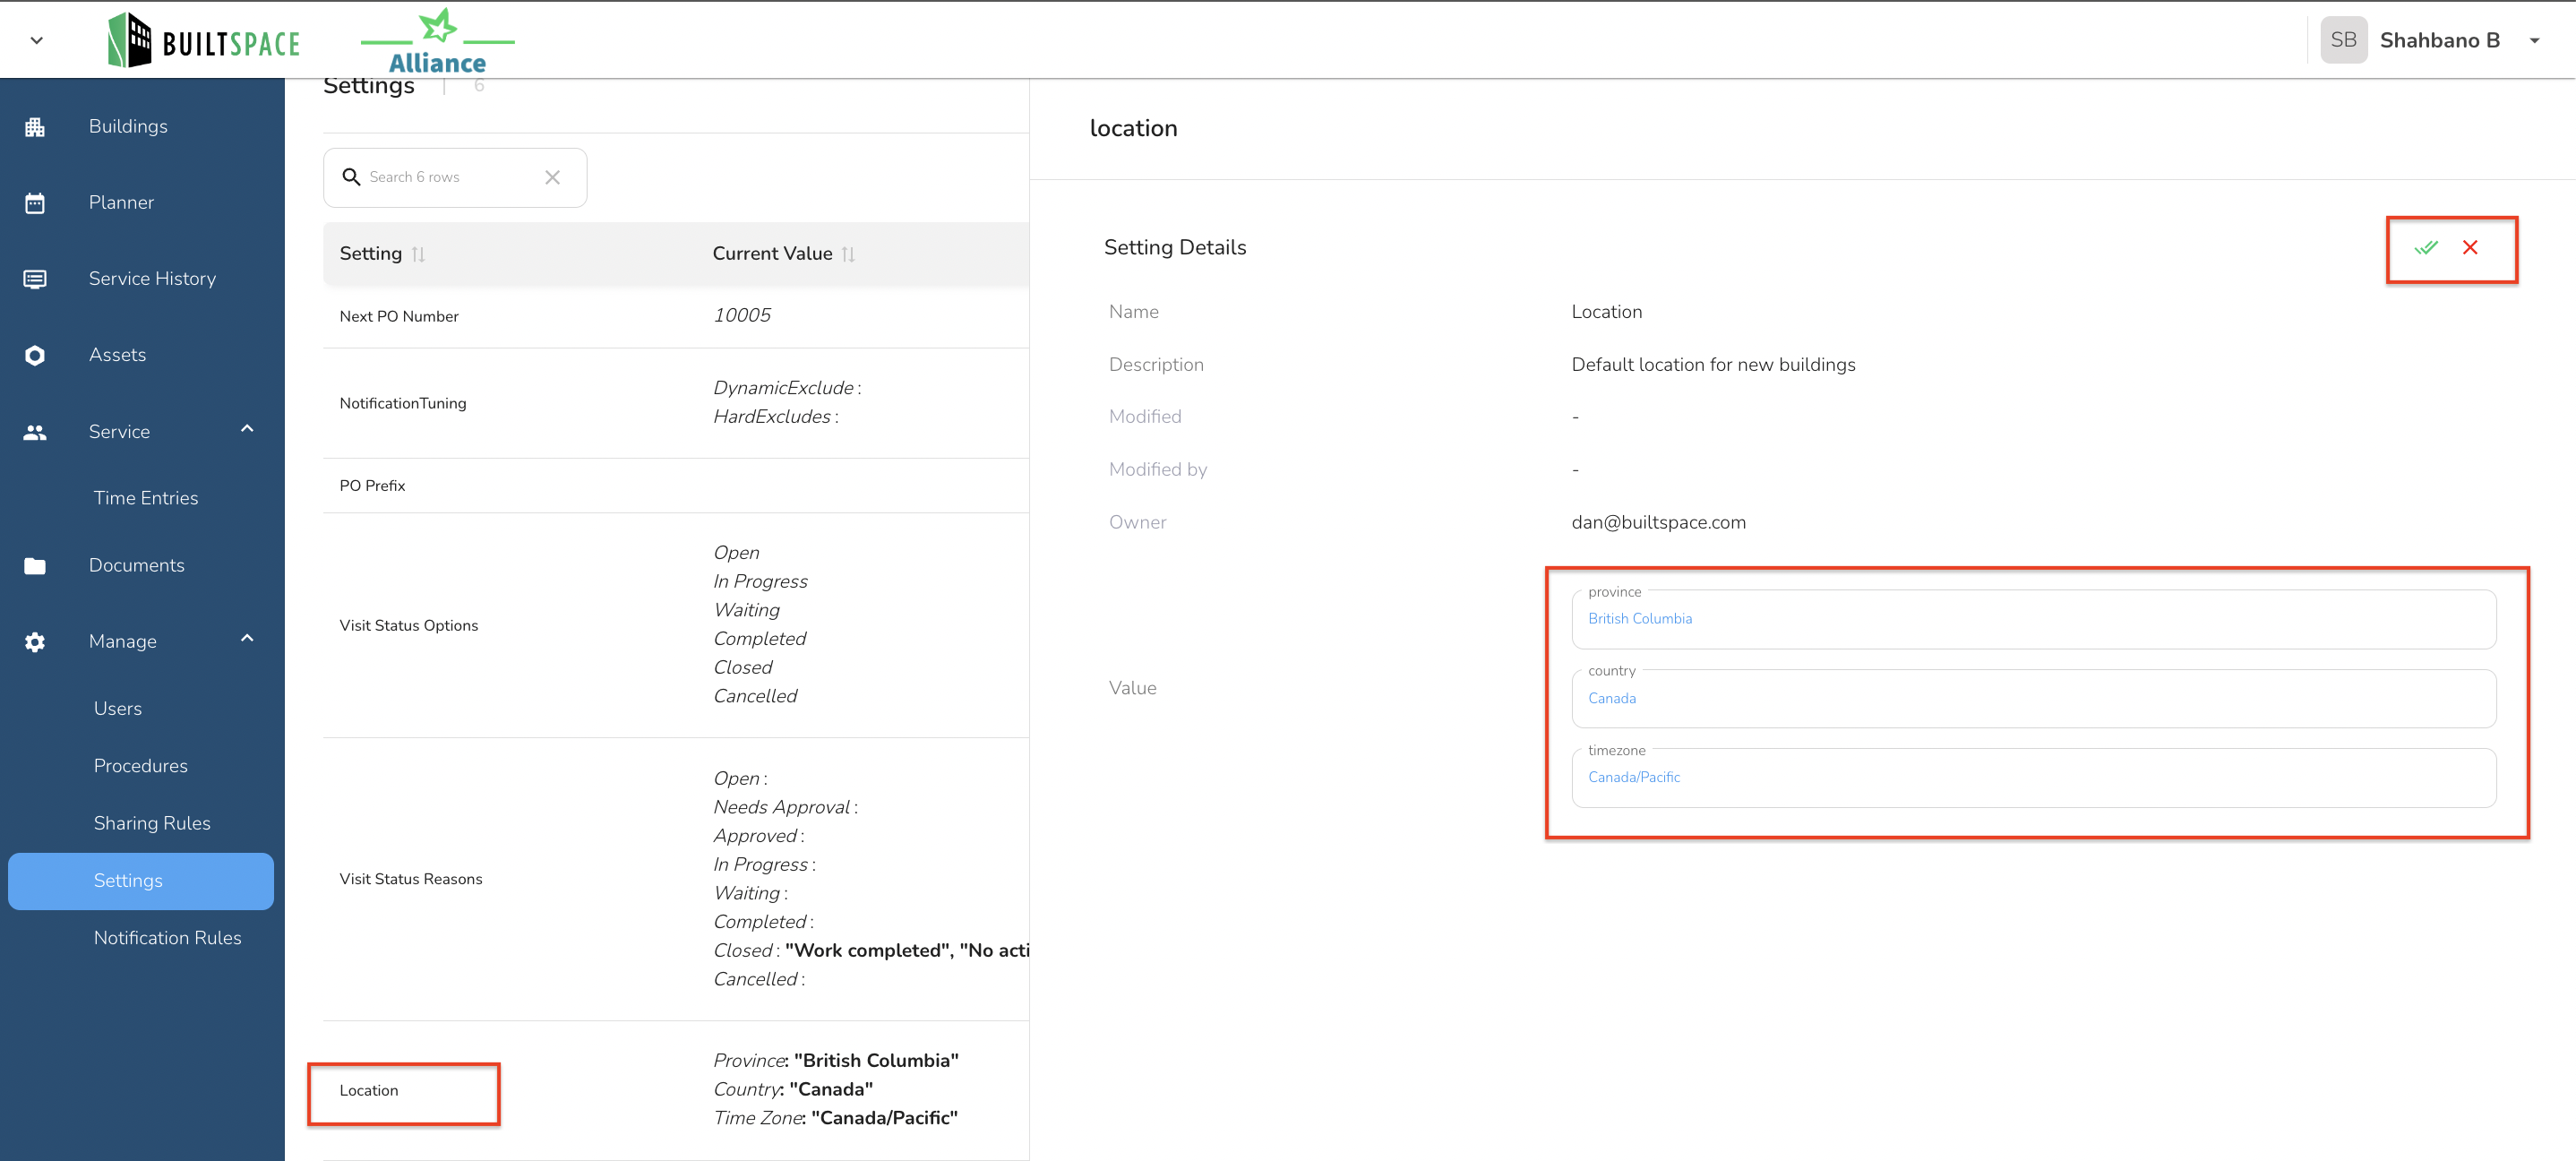
Under the Global Settings tab, click on the Location setting to open the slide-out. Here you can set the Province, Country, and Time Zone for your organization site and click the green checkmark to save.
The Time Zone you set here will be used on the inspections for the “Created Date”. If you have multiple Org sites, you can set a different timezone for each.
Time zone names are IANA timezone names. For example "Canada/Eastern" or "US/Pacific". You can find the full list here.

5. Visit Status Options
To enable or disable specific Visit Statuses:
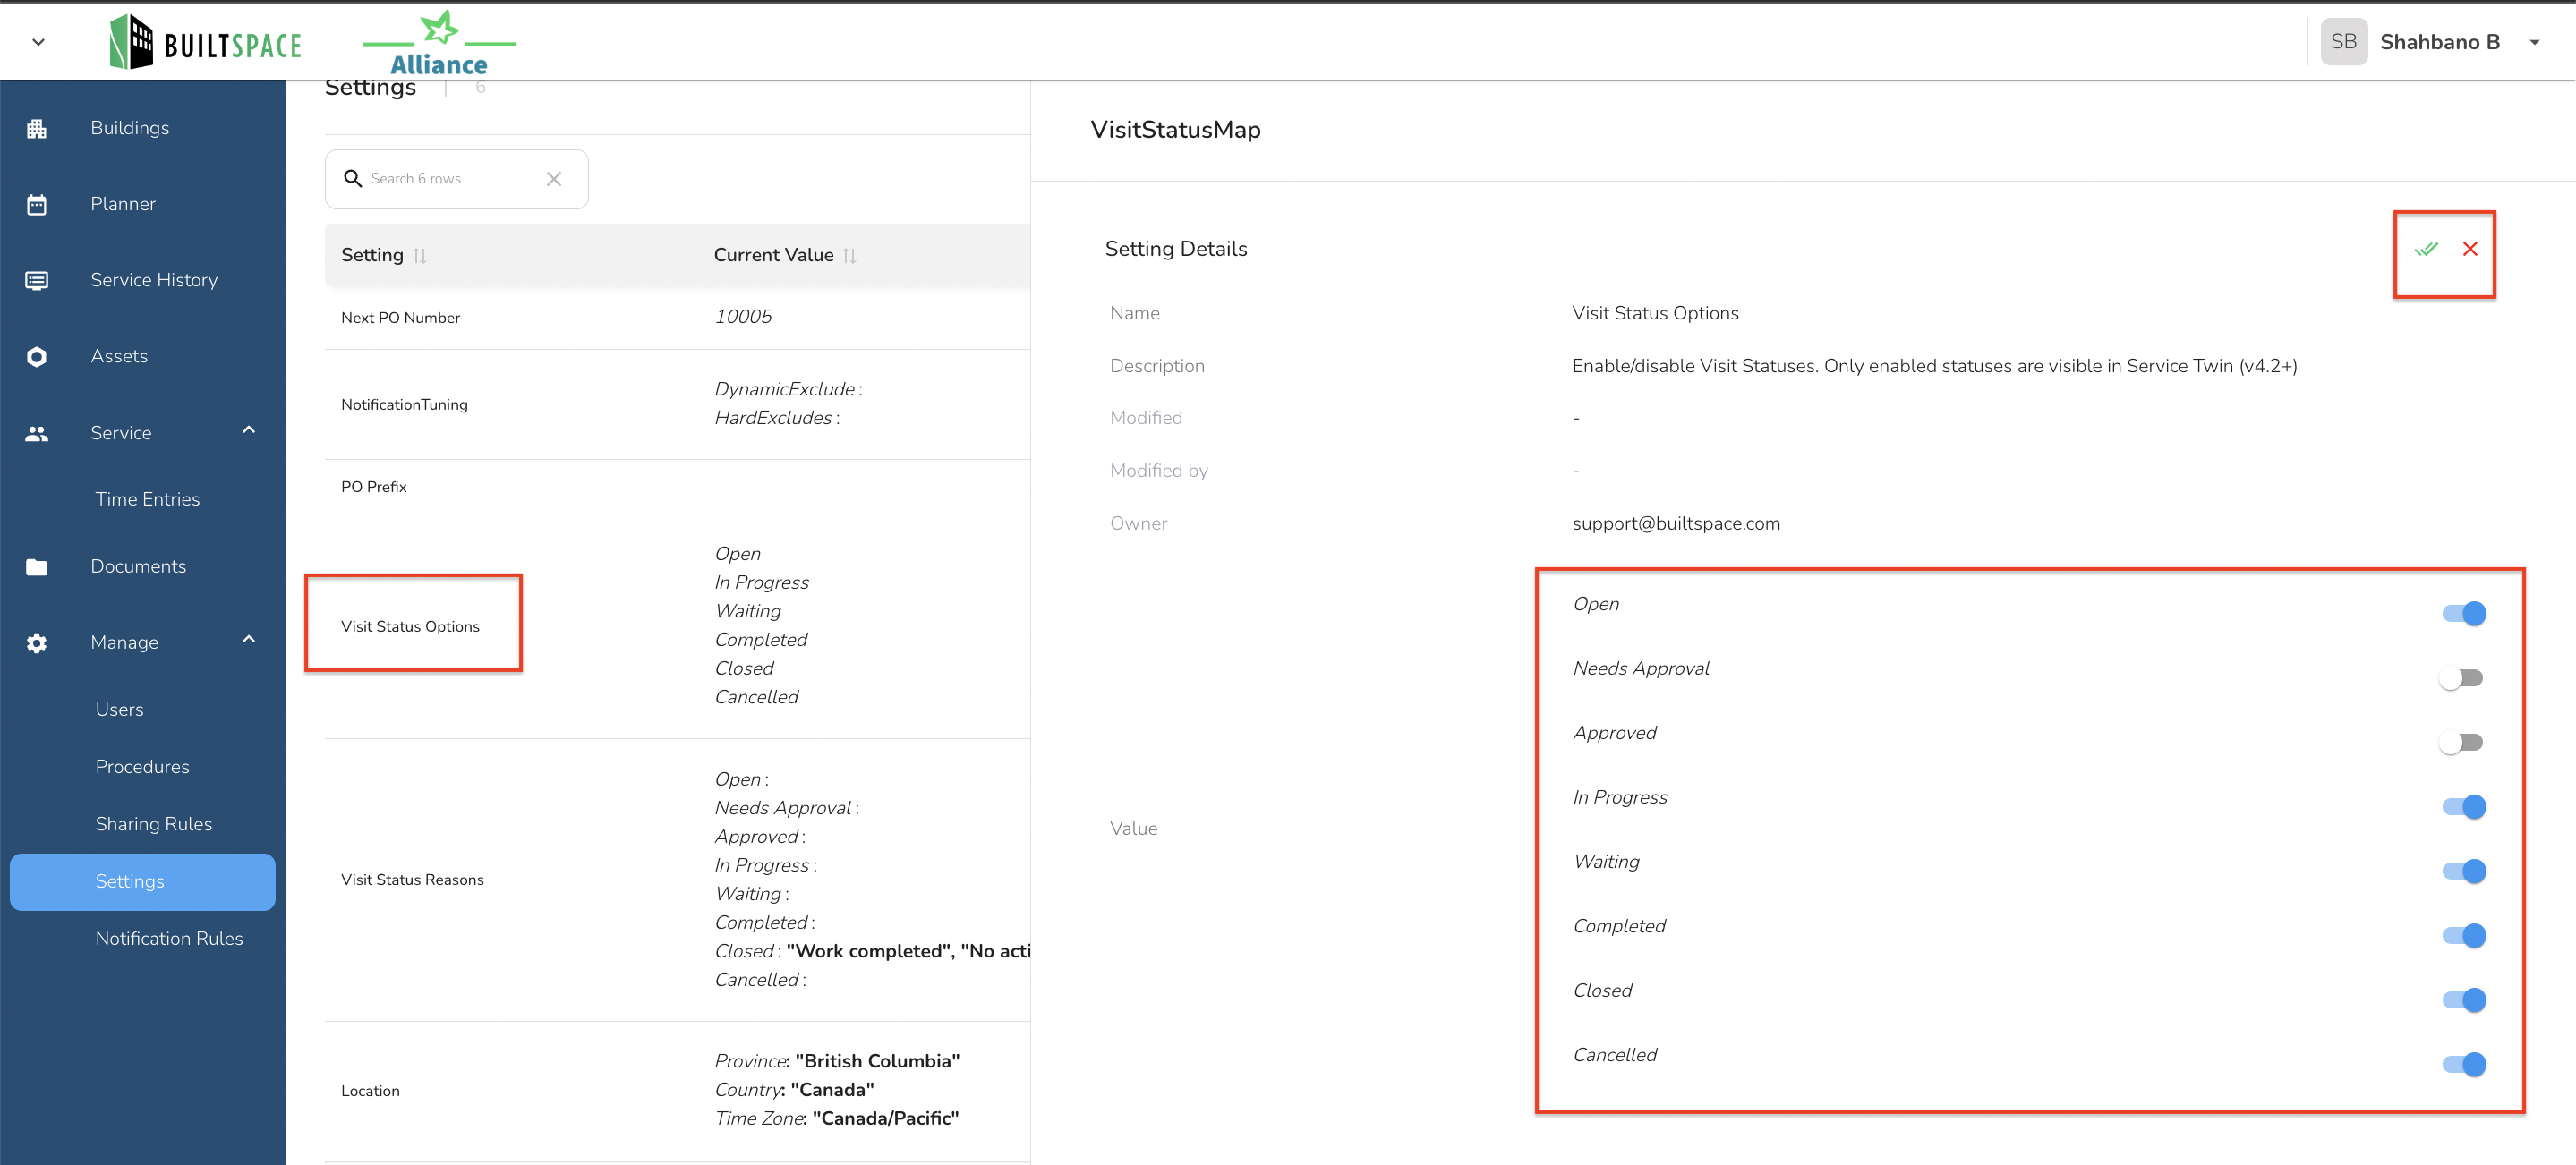
Under the Global Settings tab, click on the Visit Status Options setting to open the slide-out panel.Toggle the statuses you wish to enable or disable. Only the statuses you enable will be visible and selectable in Service Twin (v4.2+). Click the green checkmark to save your configuration.
By customizing Visit Statuses, you can control which statuses are available to your team, ensuring that only relevant options are displayed during service interactions.

6. Visit Status Reasons
To define reasons for each Visit Status:
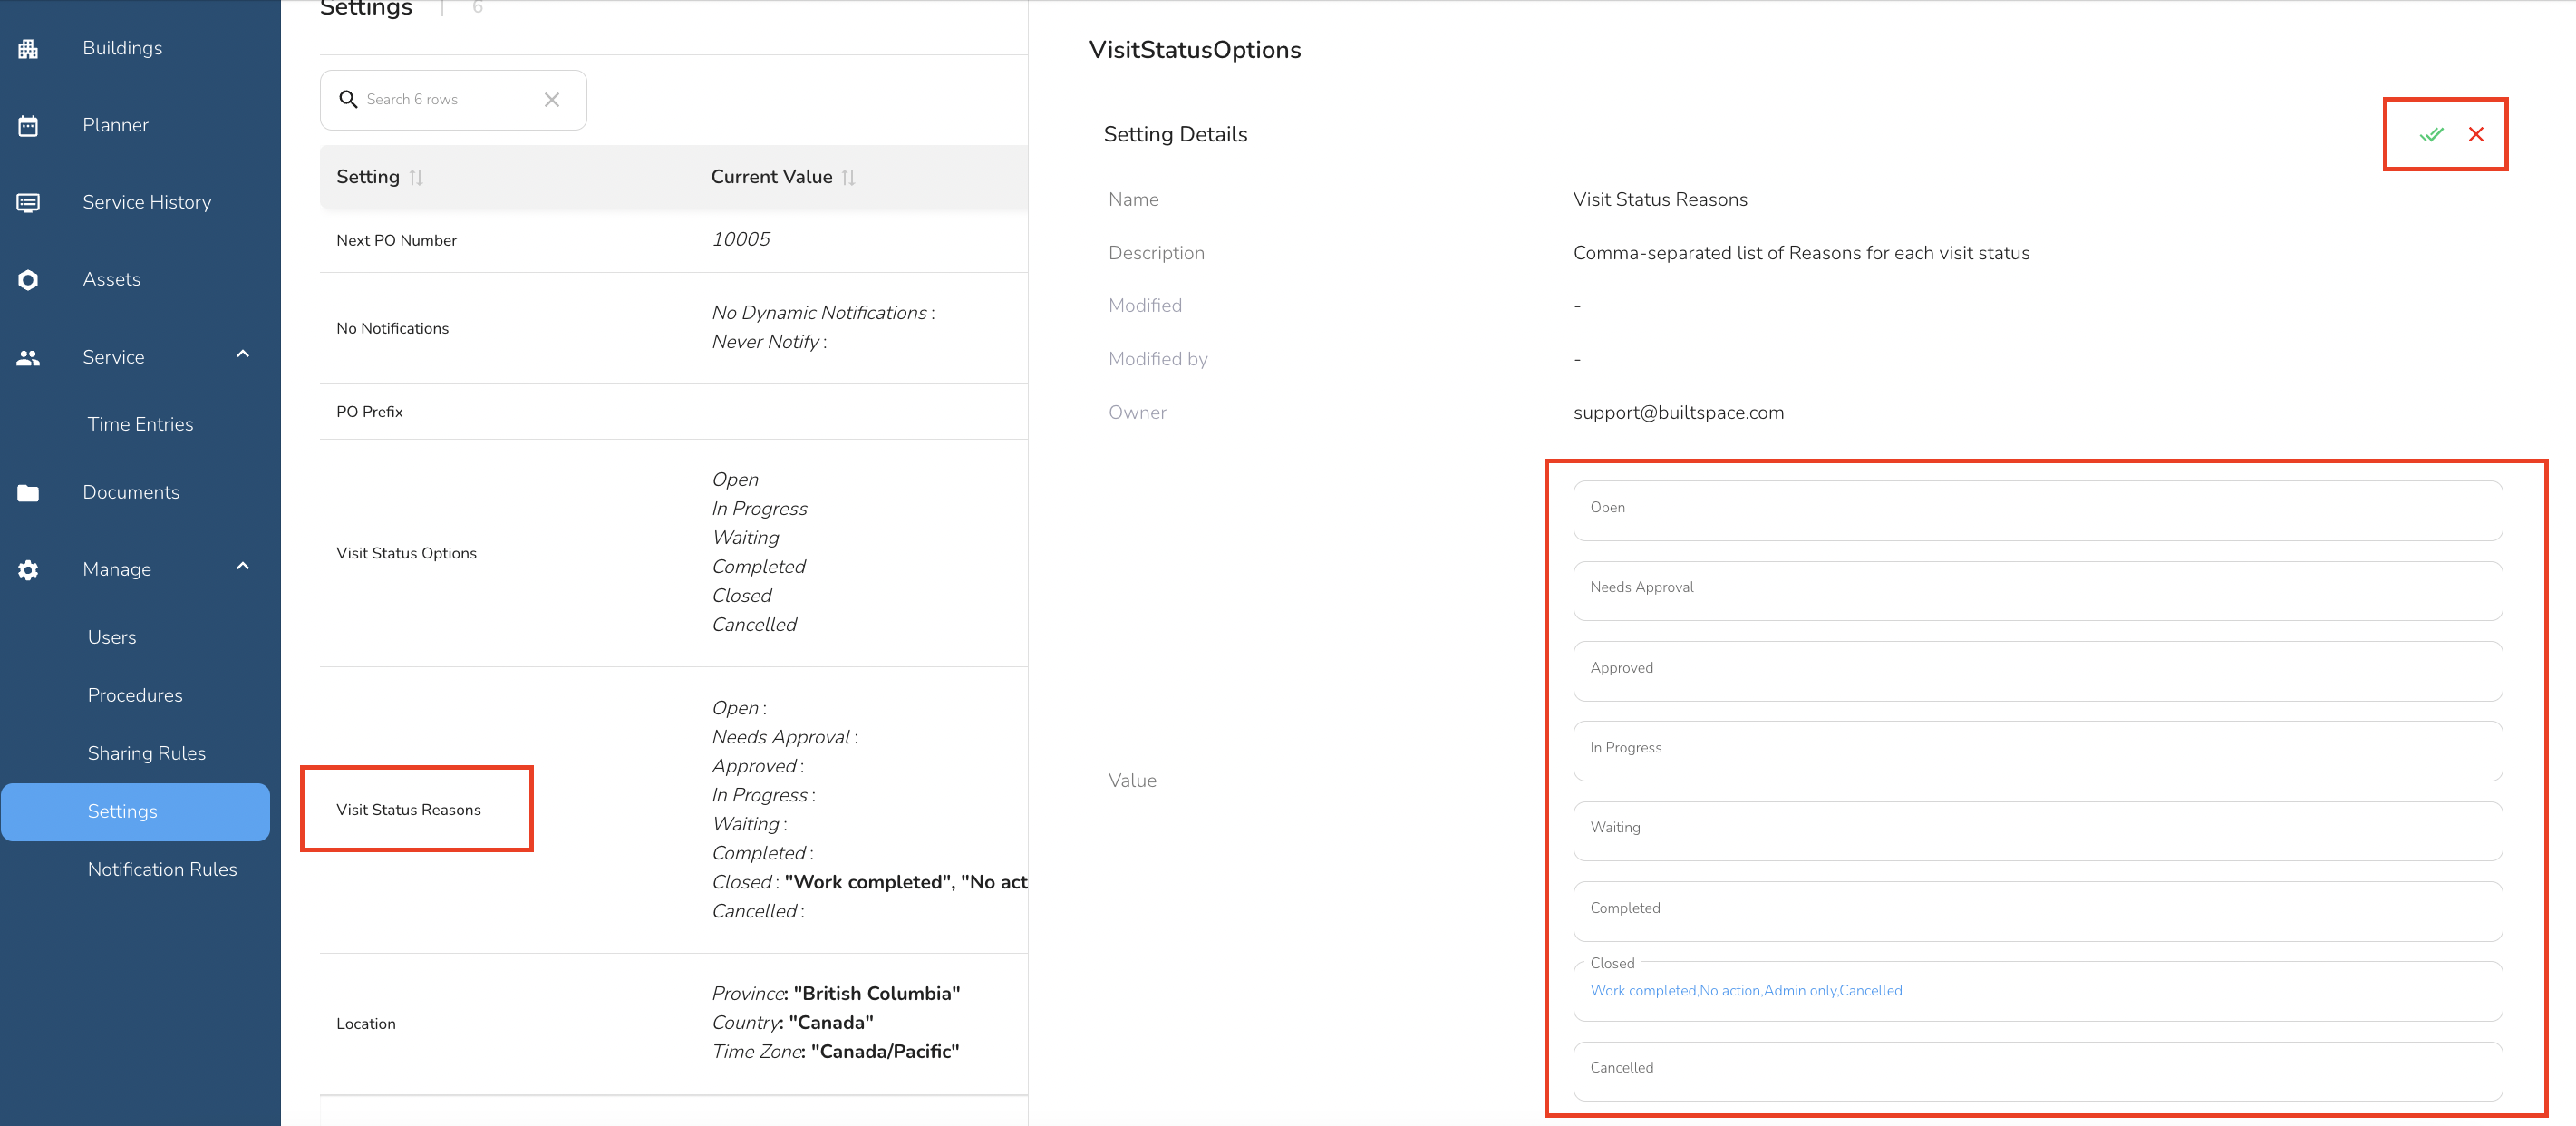
Navigate to the Global Settings tab and click on the Visit Status Reasons setting to open the slide-out panel. Enter a comma-separated list of reasons associated with each Visit Status. These reasons will be displayed as options when a technician selects a Visit Status. Click the green checkmark to save your list.

By configuring these settings, you ensure that your organization's details are correctly set up, streamlining your operational processes.


