Explore Buildings
- 18 Oct 2024
- 5 Minutes to read
- Print
- DarkLight
- PDF
Explore Buildings
- Updated on 18 Oct 2024
- 5 Minutes to read
- Print
- DarkLight
- PDF
Article summary
Did you find this summary helpful?
Thank you for your feedback!
Select a Building
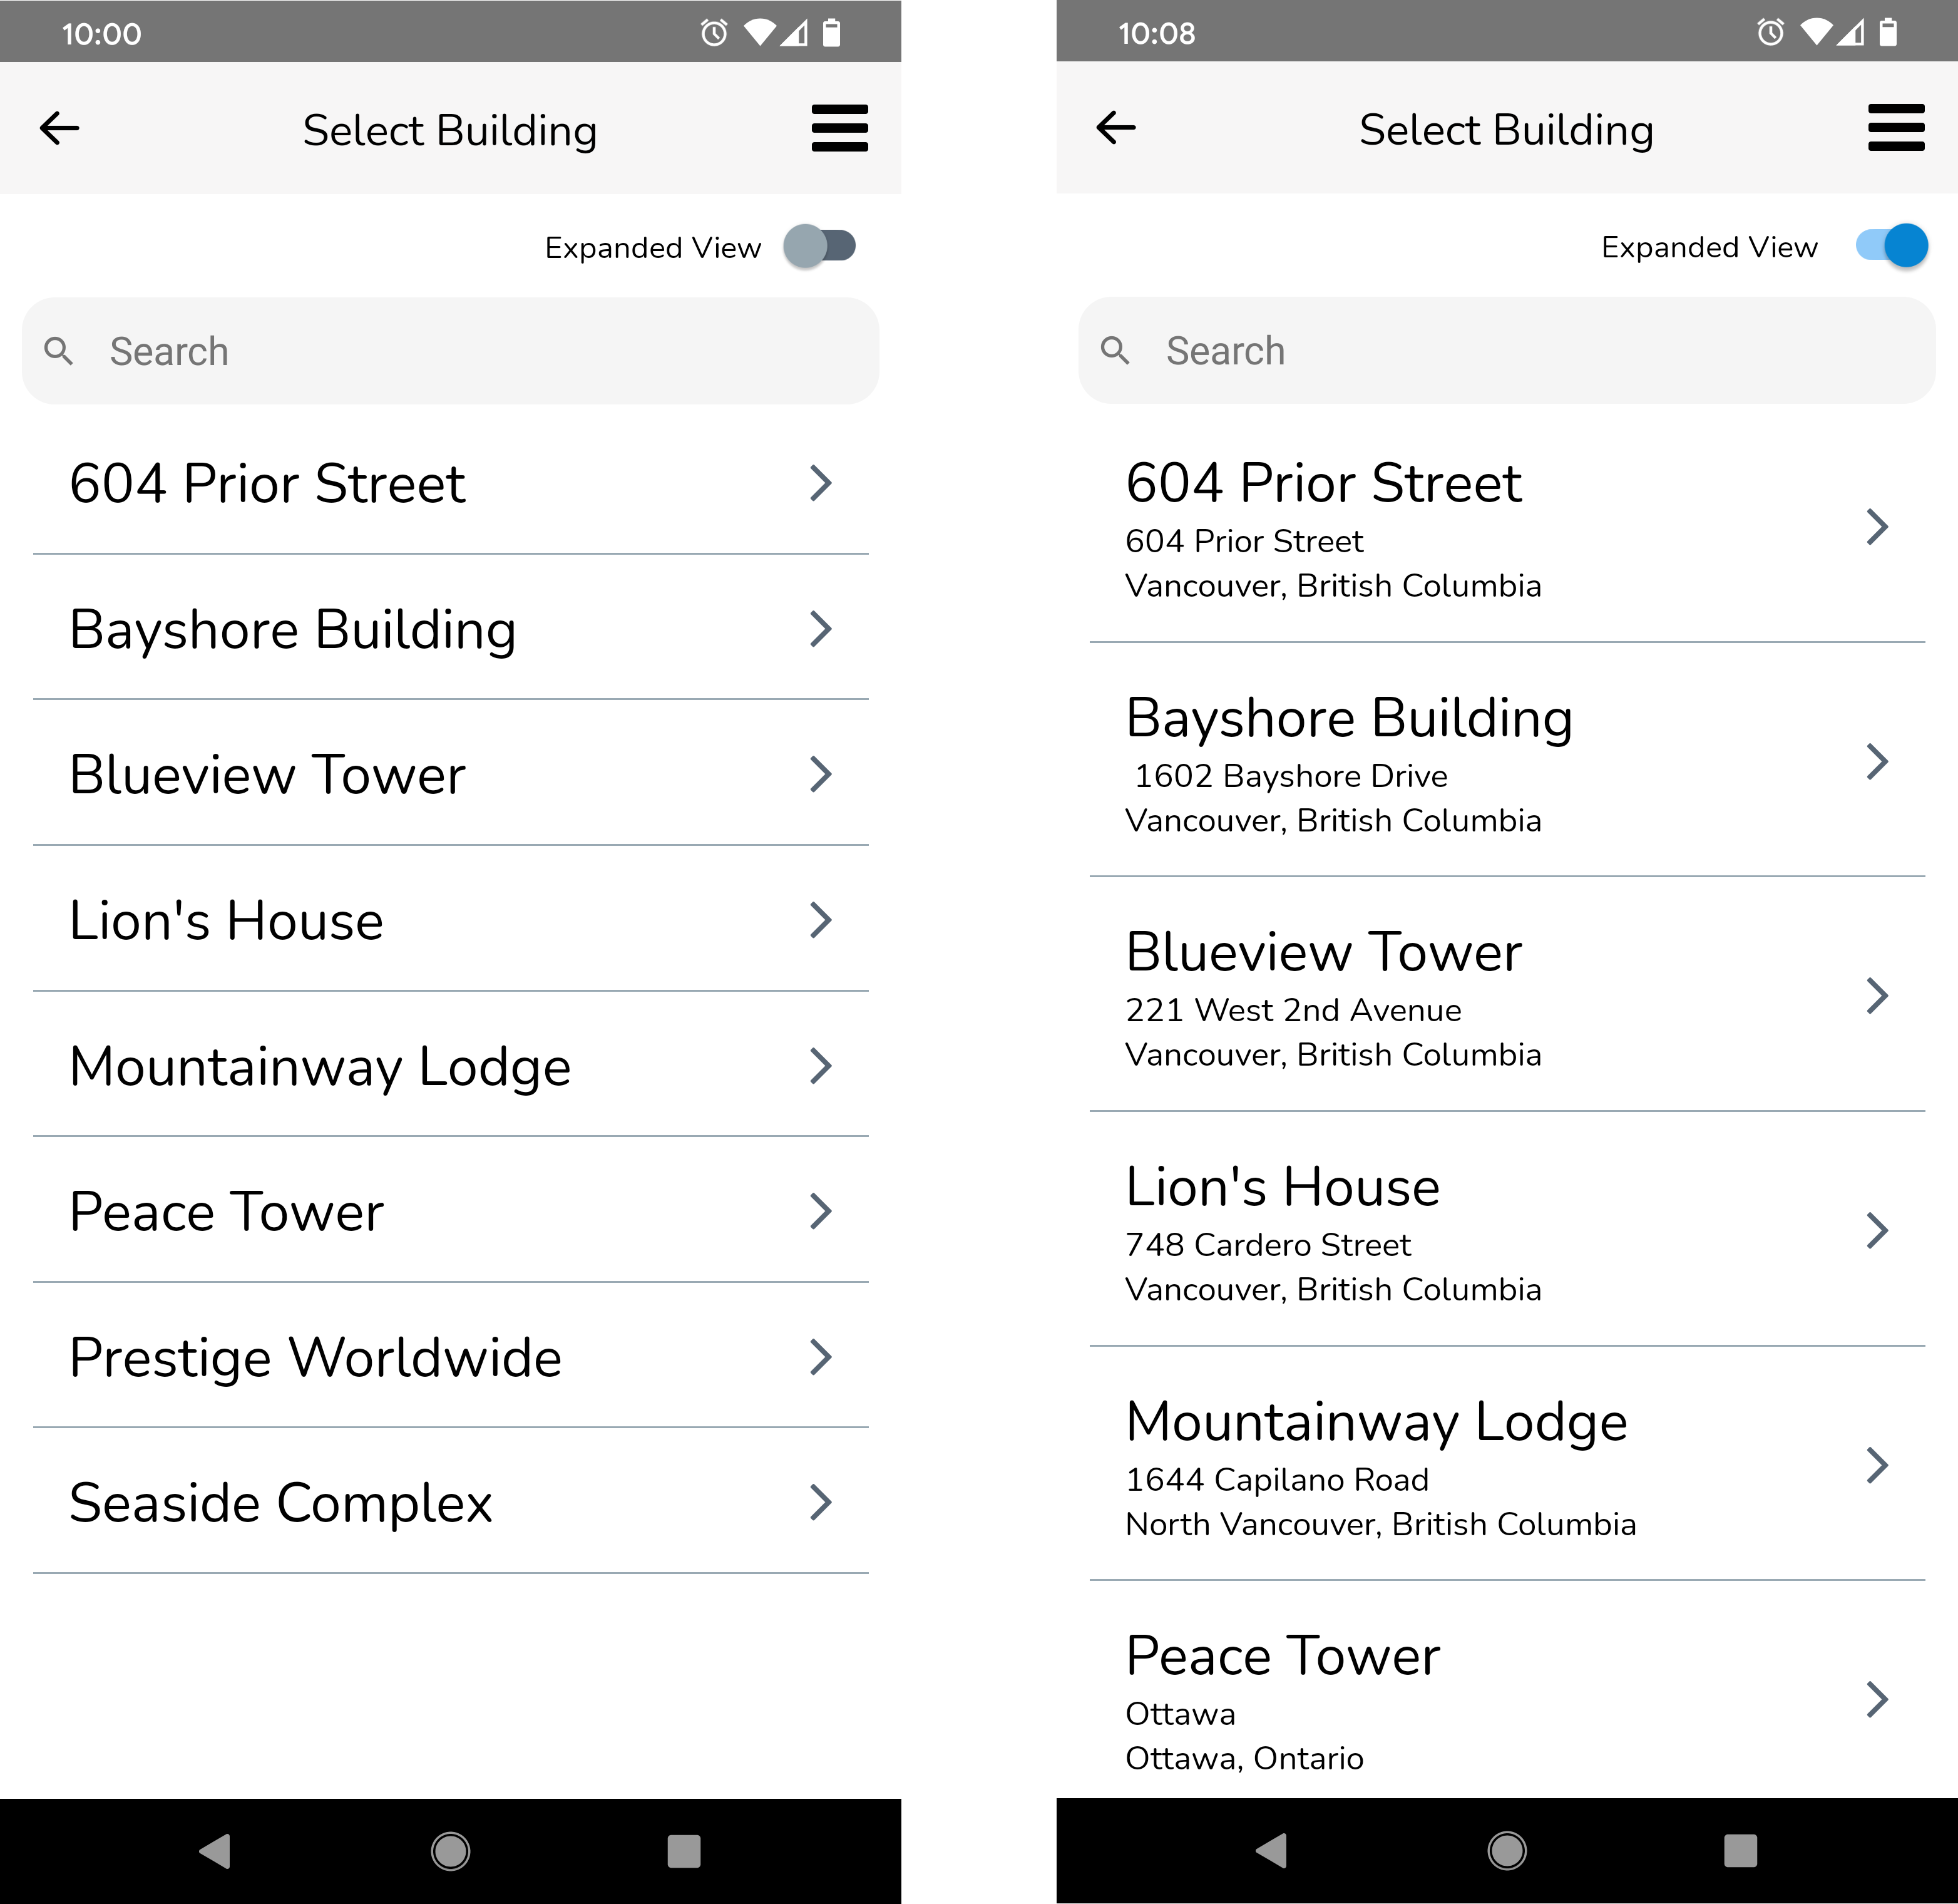
First, you will be asked to select a building. By default, you will see a list of building names and no other information. This is the "simple" view. If you want to see more information such as the address, simply tap the Expanded View toggle button in the top-right corner.
Using the Search Tool
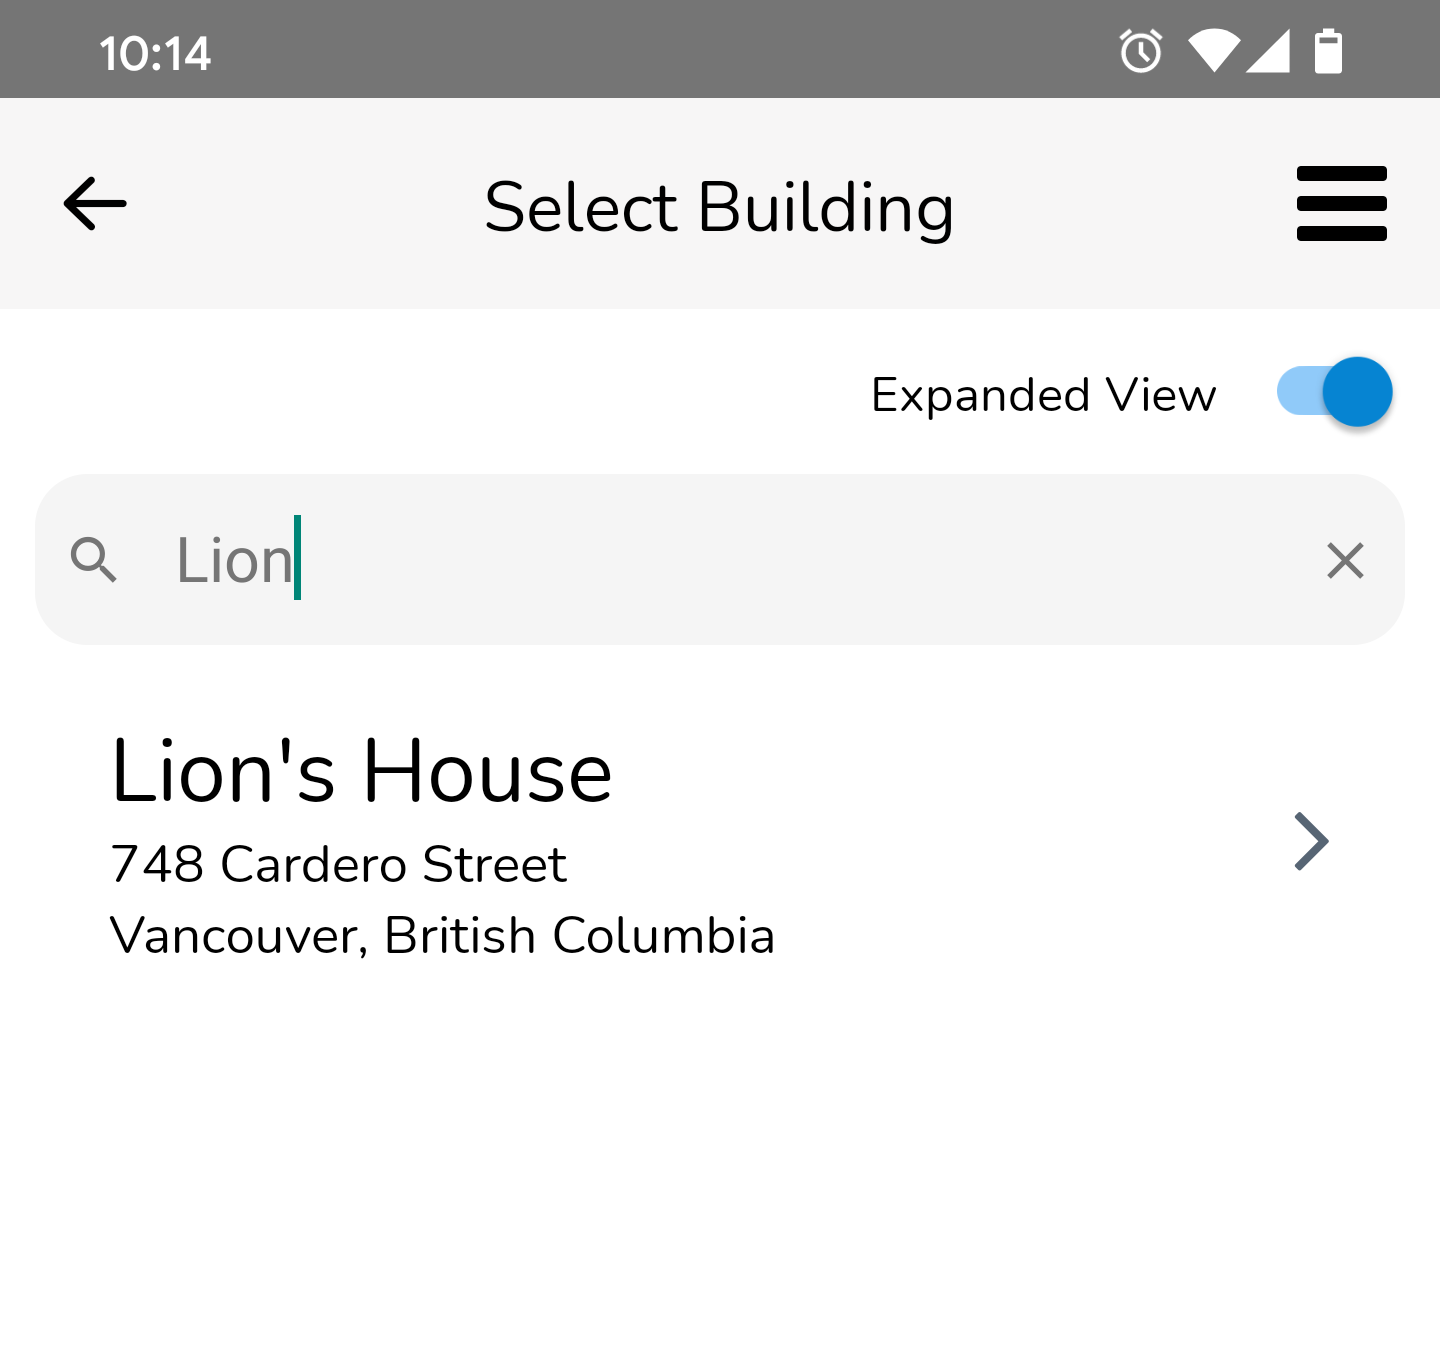
It may be difficult to locate a building if you have a large list of buildings to scroll through. In this case, simply use the search function at the top to narrow down your list of results. The results will start appearing immediately after you start typing.
Building Details
Once you have selected a building, you will be taken to that building's Building Details screen. This is where you will be able to access asset information, as well as the building address and the ability to start or continue entire visits in that building.
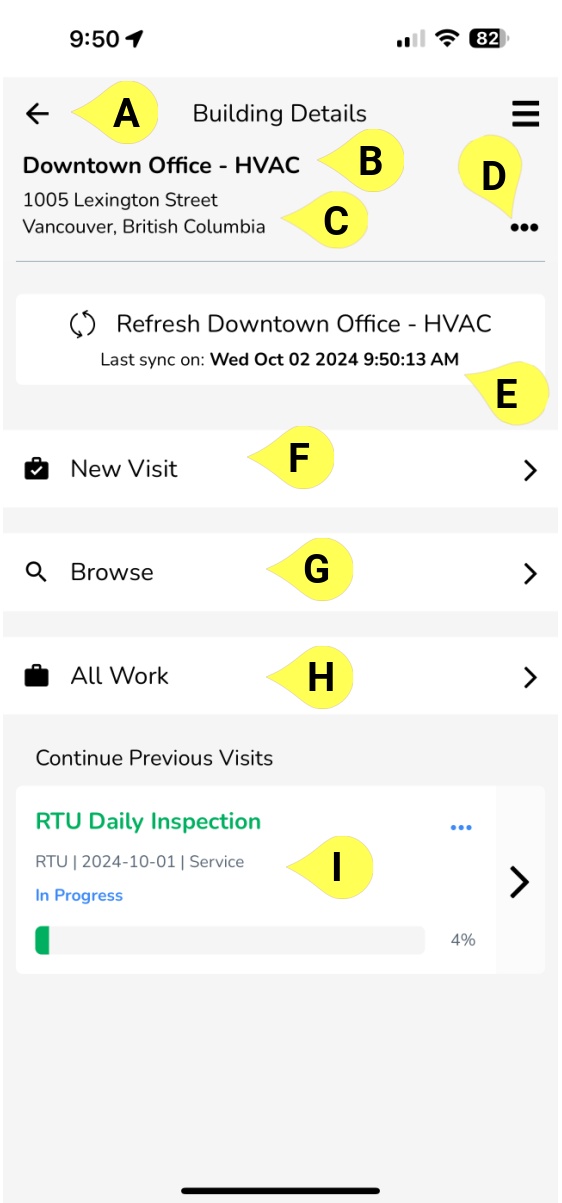
A - Back button - use the back button in the top-left corner to return to the Organization Home screen.
B - Building Name - the name of the building is listed here, in bold.
C - Building Address - the address of the building is listed here.
D - Building Information - clicking the three dots will open up the building information slide out that is explained in detail below.
E - Refresh Building - use this button to refresh building data such as spaces, assets, QR code mappings and asset properties (if you believe any of these changed since you last loaded the building). The building data will be automatically refreshed every hour.
Any pending changes (such as added/edited assets and offline QR code mappings) in the building will be synchronized and sent to the server before loading the latest building data.
F - New Visit - create a new visit in this building using this button. Click here for more info.
G - Browse - use this to search for and inspect any asset in this building. Work performed in this mode will not be connected to any Job or Visit. It's basically a one-time inspection.
H - All Work - click All Work to view all the scheduled Visits in the building. Click here for more info.
I - Continue Previous Visits - any ongoing/incomplete visits will be found here. You will be able to change the status and/or continue the visit by tapping the right-arrow on the card. Click here for more info.
Building Information
The building information slide out shows the following information:
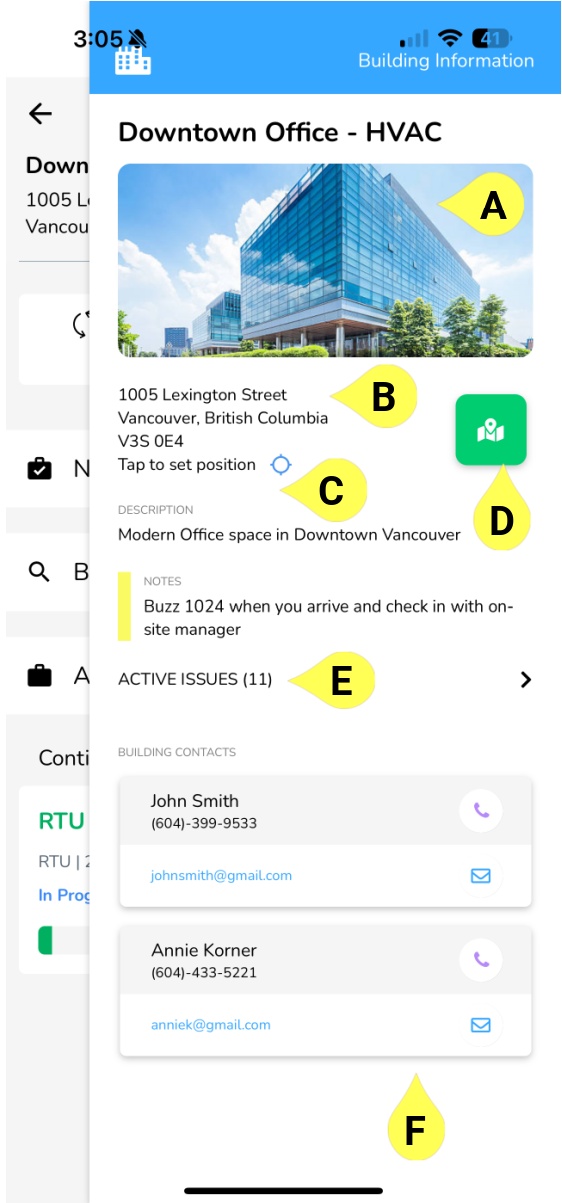
A - Building Photo - click on the photo to change the photo of the building, if required. You can also upload a new photo here if none has been added previously.
Note:
To add a photo of a building to your site, ensure you either own the copyright for the image or have obtained explicit permission from the copyright holder to use it.
B - Building Address - the address of the building is listed here.
C - Distance from the building - this shows you the distance you are located from the building. You can tap it to set it if not already set, when you are at the building.
Note: You need to enable location permissions on your phone for this feature to work properly.
D - Building location - click on the map icon to show the location of the building on Google Maps.
E - Active Issues - click on the Active Issues tab to view the list of issue(s) for this building, along with any attachments in it.
F - Building Contacts - here you can view the building contacts and their information.
Browse
From this screen, you will be able to select any asset from the building you're in. You will have the ability to:
view information about assets
edit assets
add new assets
perform inspections
assign/map QR codes to assets
First, here is an overview of what the Browse screen looks like and its various functions:
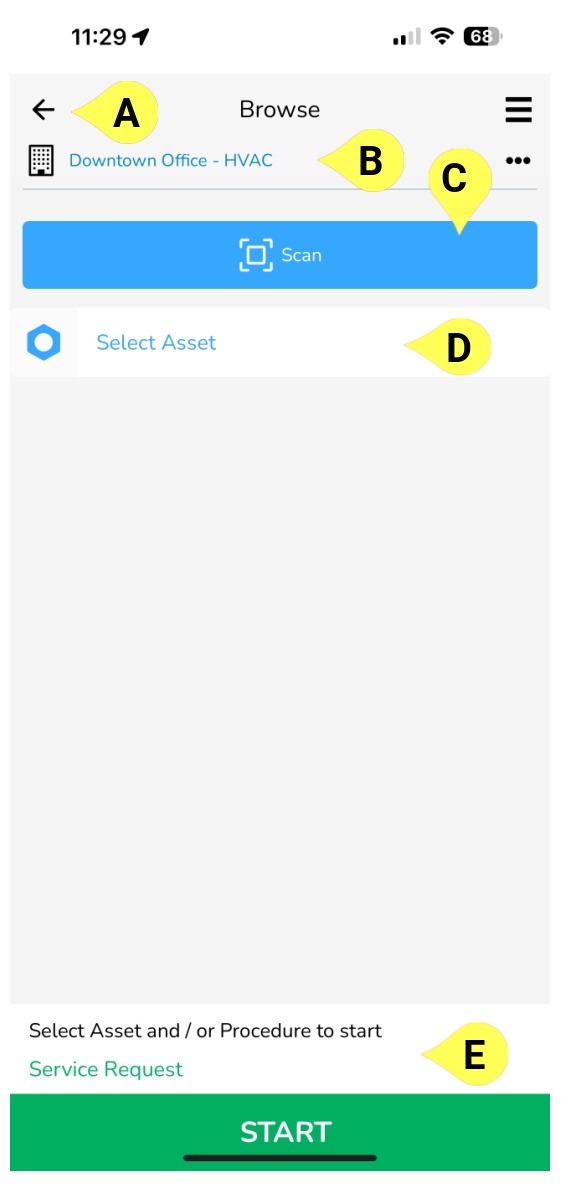
A - Back button - use the back button in the top-left corner to return to the Building Details screen.
B - Building Name - the name of the building you're currently browsing is listed here.
C - Scan QR - use the Scan QR button to scan a QR code and quickly pull up an asset.
D - Select Asset - use this to manually select an asset from the building you're in.
E - Select Procedure - you can select your procedure and start an inspection on the building as well.
Viewing Information about Assets
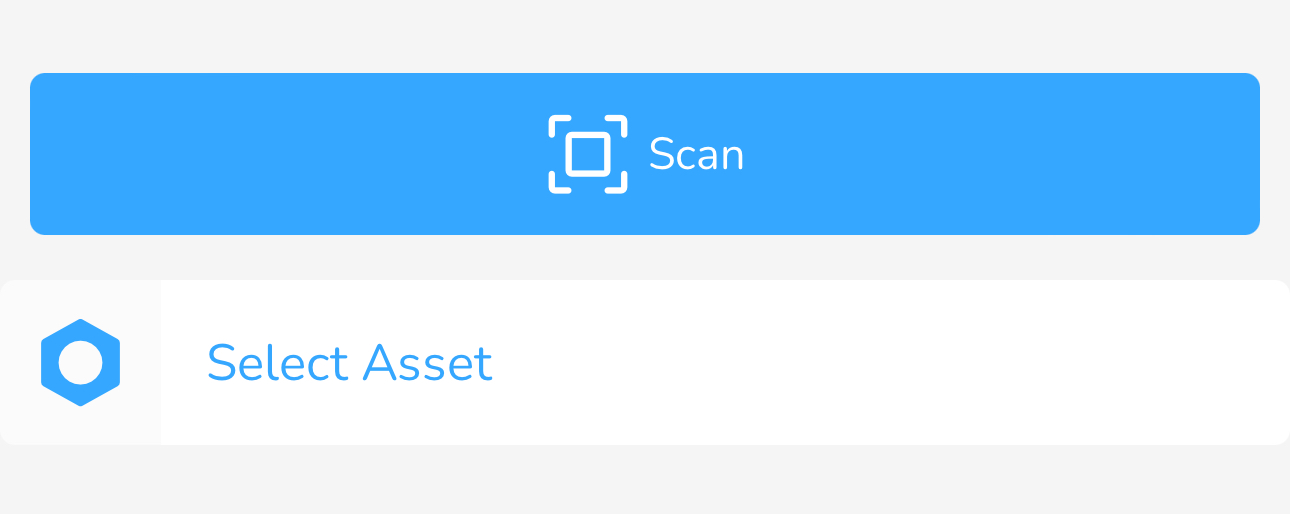
In order to see information about an asset, you must first select an asset. You can do this by scanning a QR code or by tapping on Select Asset.
After you have selected an asset, you will see the following screen:
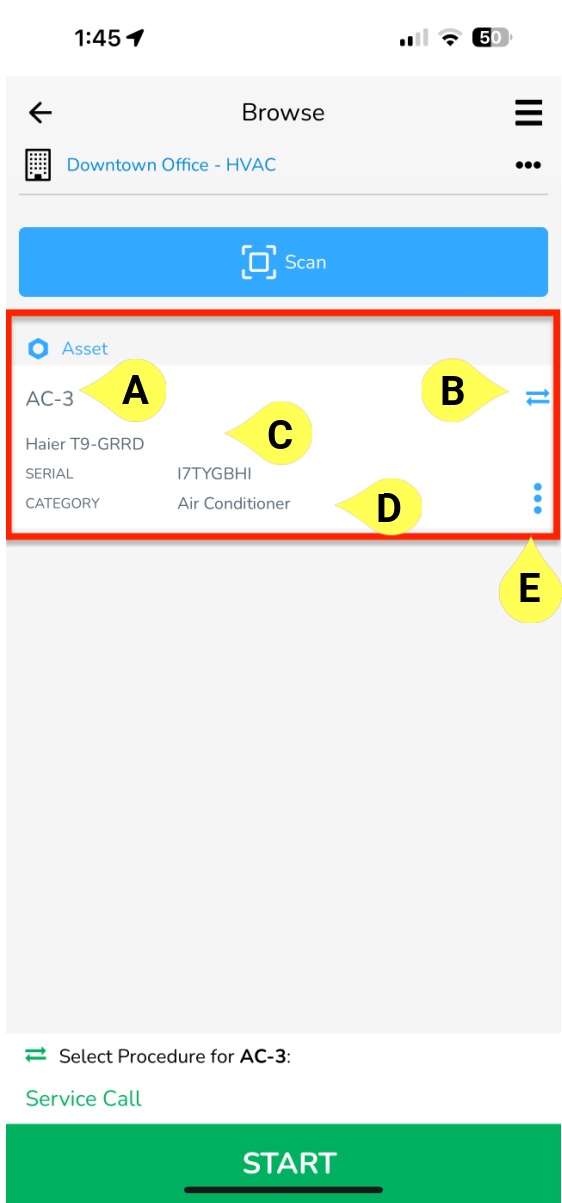
The asset selection card has the following information:
A - Asset Name - the name of the asset you have currently selected.
B - Change icon - tap anywhere in the white area to change the selected asset.
C - Make/Model - the make and model of the asset.
D - Serial Number/Category - the serial number of the asset and the Asset category.
E - More Information - tap on the three dots to see more information about the asset in question.
For more information on the asset information card, click here.
Editing Assets
For more information on editing assets, click here.
Adding new Assets
For more information on adding assets, click here.
Performing Inspections
To perform an inspection from the Browse screen, simply select the asset you want to inspect.
Once you have an asset selected, choose a Procedure from the bottom. Clicking on the procedure title will show you the list of procedures available to choose from.
.PNG)
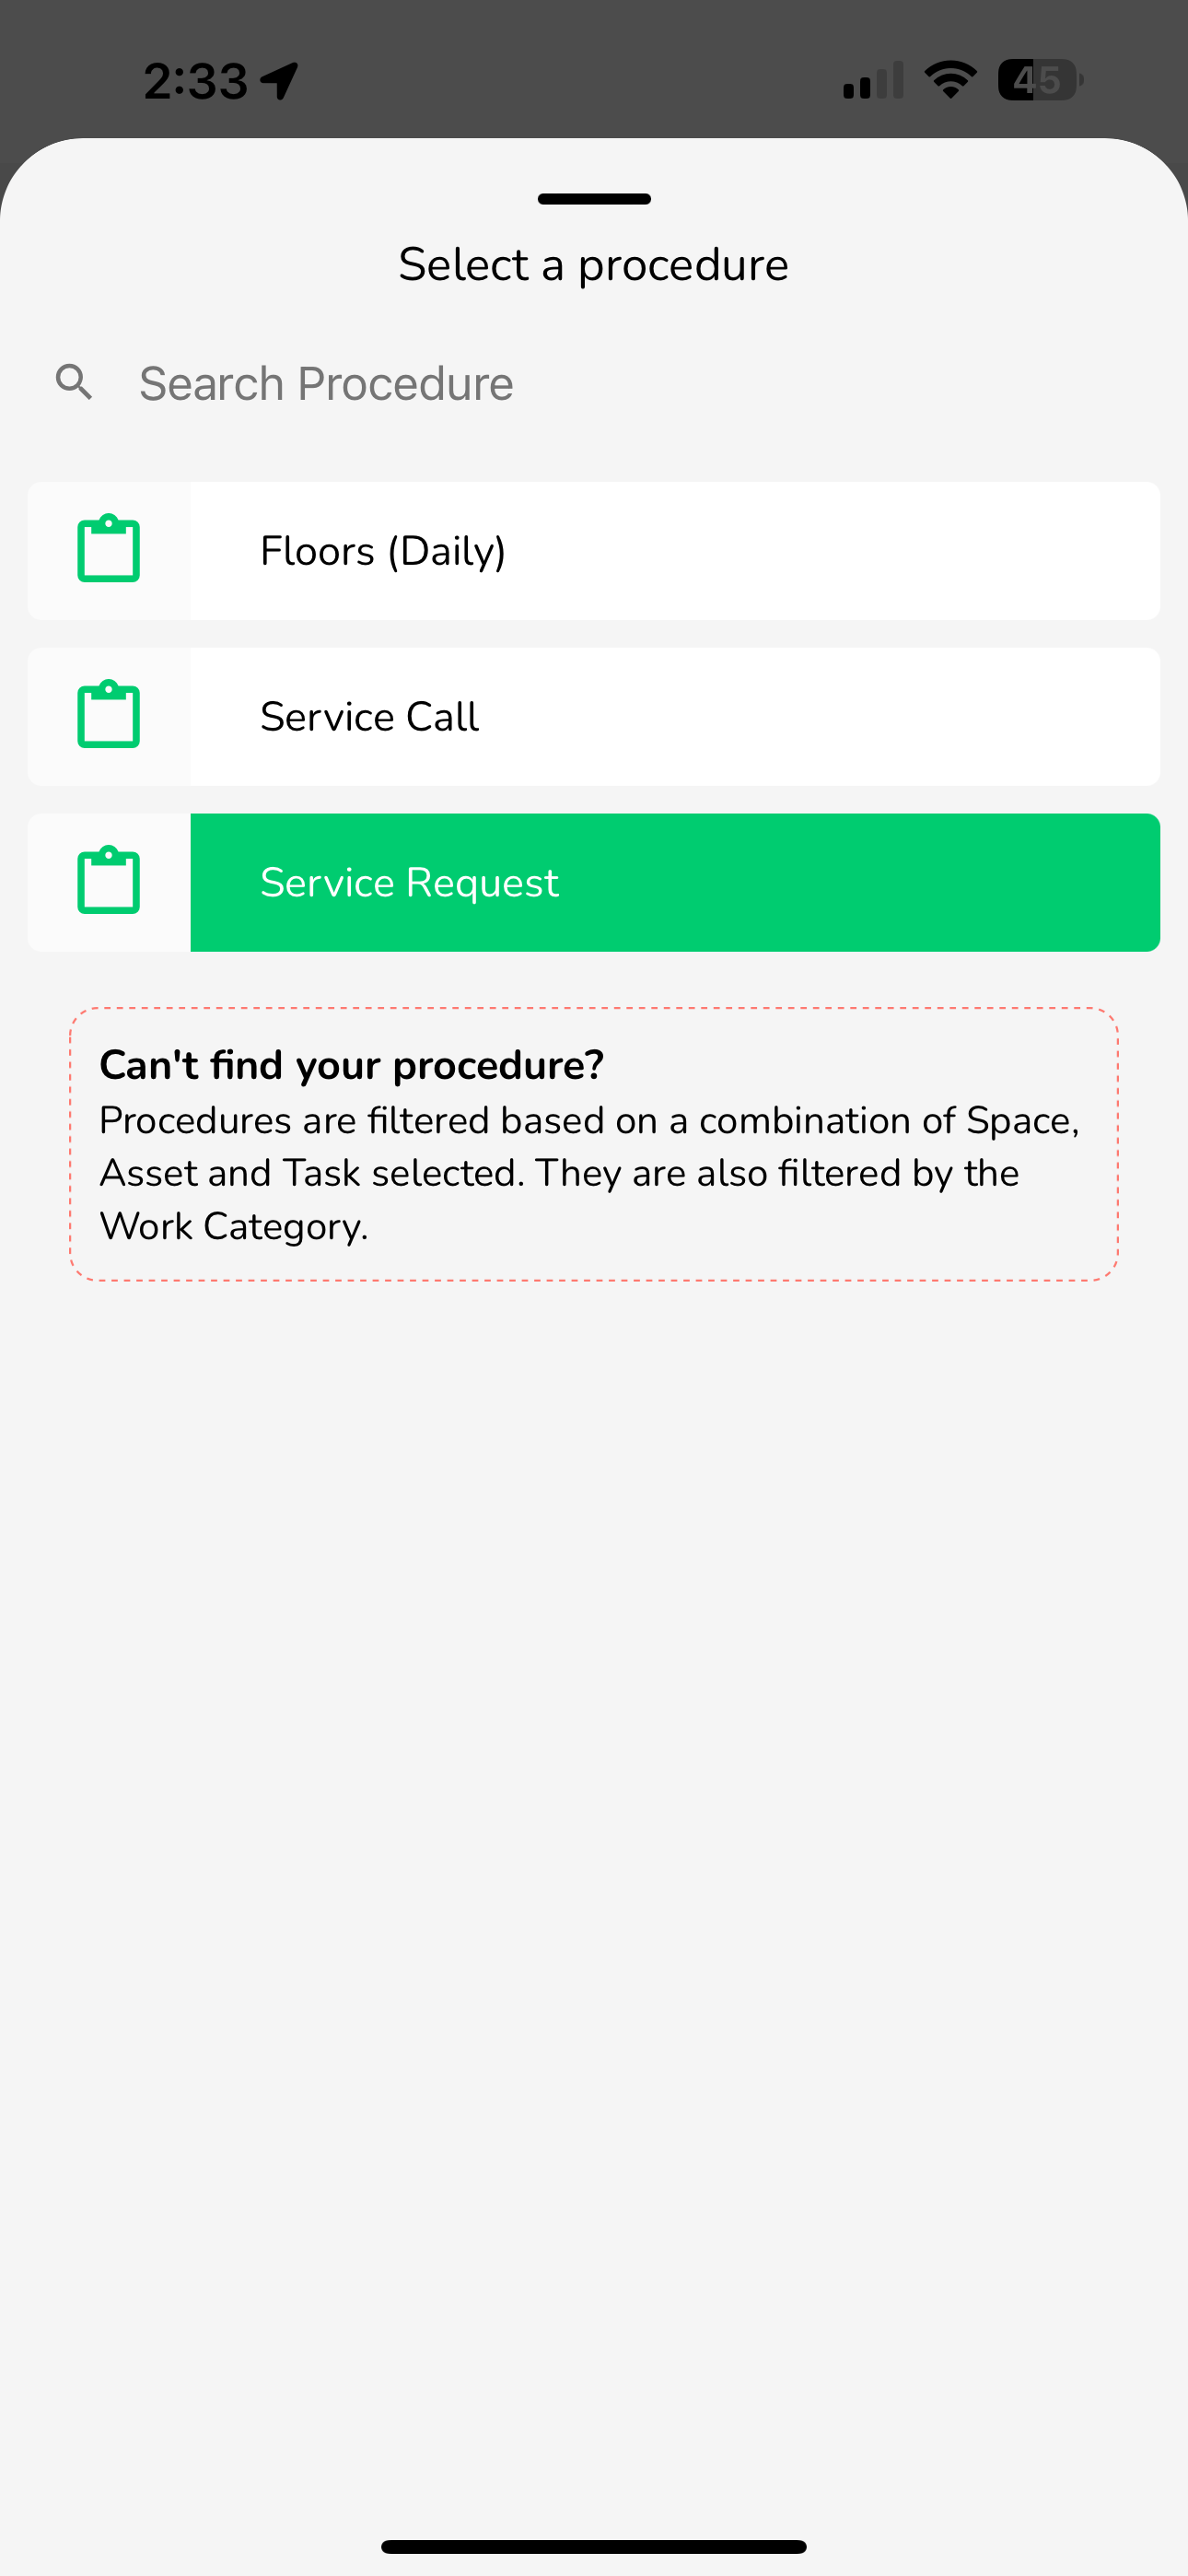
When you are ready, simply tap the START button at the bottom of the Browse screen. This will take you to the inspection screen. For more detailed information on how to perform an inspection, click here.
Assigning/Mapping QR codes to Assets
When you initially buy QR codes from BuiltSpace, they will be unassigned/unmapped, meaning that when you scan them, they won't be attached to any asset. It will be the responsibility of technicians to map (i.e. "connect") the blank QR codes to a specific asset.
This process is very easy to do. For more detailed information on mapping QR codes with the Service Twin app, click here.
Was this article helpful?