Creating a Schedule
- 13 May 2023
- 6 Minutes to read
- Print
- DarkLight
- PDF
Creating a Schedule
- Updated on 13 May 2023
- 6 Minutes to read
- Print
- DarkLight
- PDF
Article summary
Did you find this summary helpful?
Thank you for your feedback!
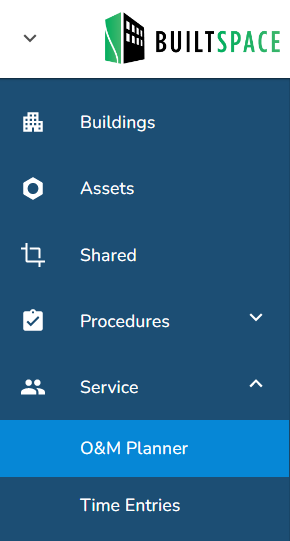
The O&M Planner can be accessed from under Service in the left-hand navigation panel.
From the O&M Planner page, tap the + New Schedule button in the top-right.

You will see a form pop out from the right side of the screen. There are two tabs + a 'setting a reoccurrence patter' section here:
- Setup tab - enter the main information about the schedule including its title, a description and any customer/invoicing details.
- Visits tab - pre-create one or more visits for when the schedule runs.
- Setting a recurrence pattern - set how often you want your schedule to run and how many days prior to each scheduled event you want your work to be created in All Work so that you can start planning for it.
The Interface - Setup tab
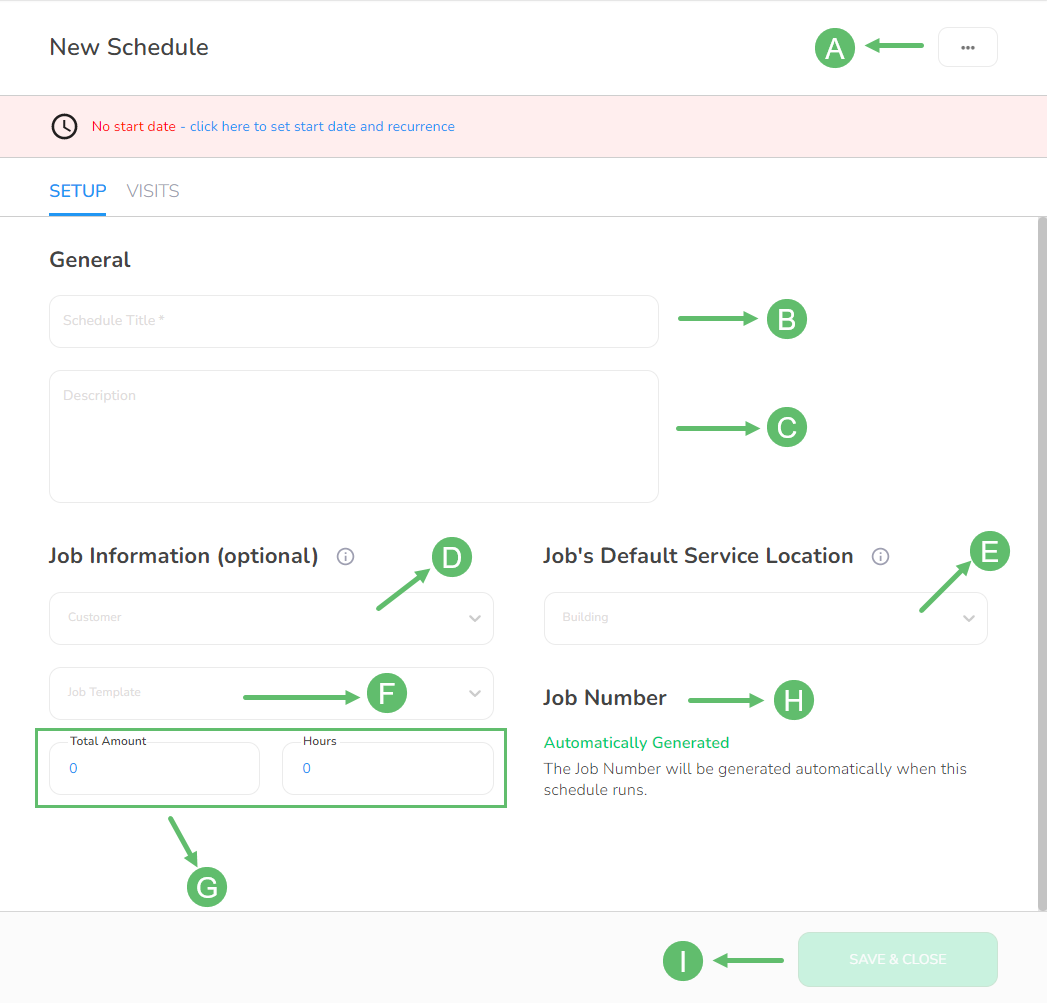
A - Menu
Use this menu to perform any actions pertaining to the schedule itself, such as closing or deleting (if editing an existing one) the schedule.
B - Schedule Title
[required]
This is the title of the Schedule (or contract) you're creating. Keep this short and concise. An example of this might be: "Elysium Towers - Quarterly PM".
C - Description
[optional]
Use this field to add a more detailed description of the Schedule you're creating.
D - Customer
Select the Customer from this drop-down. The Customer will be the organization to whom you will send the bill to. If the Customer doesn't exist, go to the Customer page first (Service tab > Customers) to create one.
E - Building
Select the Building where reoccurring work of this schedule will be performed.
F - Job Template
Select the Job Template you want to use for the customer. The Job Template will set out the specific charges, materials, taxes, and terms & conditions that are to be used when billing the customer at the end of each Job that comes from this Schedule.
Note!
You can add additional charges to the Job after it has been created.
G - Total Amount and Hours
These fields are automatically populated based on the Job Template you selected in the drop-down above. They indicate the contracted Total Amount and estimated Hours that are going to be charged for this Job.
H - Job Number
By default this field is set to 'Automatic' and cannot be changed. This indicates that during every instance where this Schedule creates a Job or a Visit (or both), the Job Number will be automatically generated in sequential numeric order.
I - Save & Close
When all required fields in the form are filled out, this button will turn green. Click on it to save the Schedule. You may however, want to set up some visits first. To learn more about that, please refer to the section below.
The Interface - Visits tab
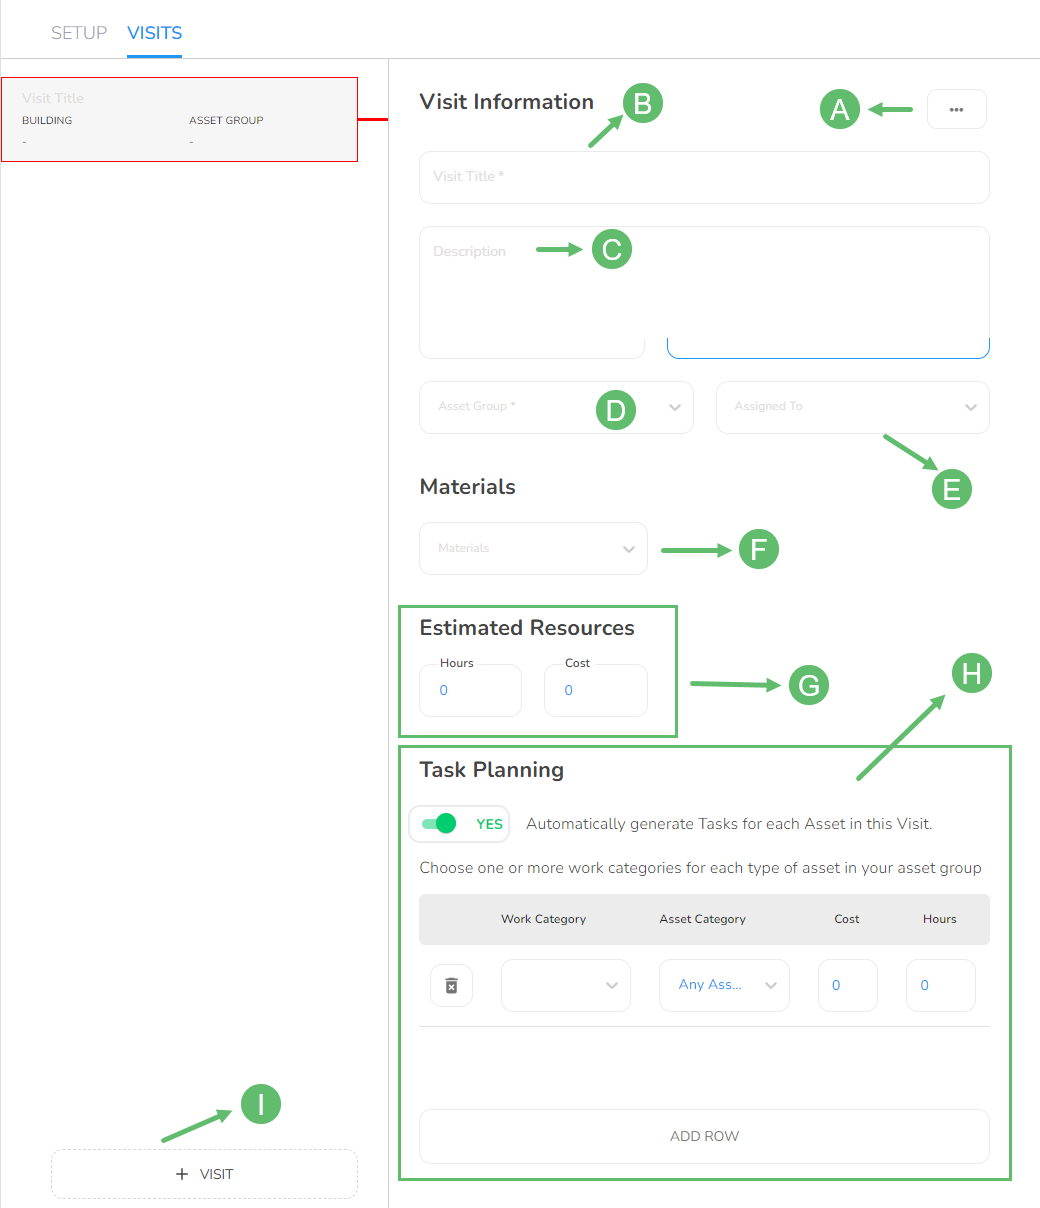
A - Visit Menu
Use this menu to perform any actions pertaining to the selected visit, such as deleting the visit.
B - Visit Title
[required]
This is the title of the Visit you're creating. An example of this might be: "Service Call - Spring Start-up".
C - Description
Use this field to add a more detailed description of the Visit you're creating or working on.
D - Asset Group
[required]
Select the group of Assets that need to be worked on during this Visit.
E - Assigned To
If you know ahead of time which technician should be assigned to this Visit, select that person here. If you leave this blank you will still be able to assign it to a specific person later when this schedule runs and the visit gets created.
F - Materials
Use this field to either select or create a Materials List that you want to attach to this Visit.
By default, your organization comes with the following types but these can be edited, or new ones can be created: PO, Tools, Truck Stock, 3rd party, or Other.
If you add a Materials List to a Visit, the Charges will show up on the Job. Technicians will also be able to review the list before they start the Visit.
G - Hours and Cost
Enter the Total Cost this Visit entails, usually as per contractual agreement with the Customer.
Also, enter the (estimated) Total Hours agreed upon to be spent on this Visit.
H - Task Planning
Depending on whether you've selected 'Yes' or 'No' in the field "Automatically generate Tasks for each Asset in this Visit?" below, as well as how you've defined the Task Planning portion, each Asset may get one or more Tasks.
After setting the Primary Work Category and Asset Group, use this section to further define which Tasks should be created when the Visit nears its Start Date.
Automatically generate Tasks for each Asset in this Visit
If you selected 'No' for this field, you will not have access to the Task Planning section as no Tasks will be automatically created for you. You will have to manually create the Tasks later where you will have the chance to hand-pick each Asset from the chosen Asset Group above.
If you selected 'Yes', however, you will get to strategically plan for which Assets should be inspected based on Work Category and Asset Category. This section also lets you set specific Costs and Hours for each Task Planning row.
An example:
Let's say you've set the Primary Work Category to be "PM Minor" and your Asset Group is set to "All Assets". This means that you will be doing a Minor PM on all of the Assets in the chosen Building.
In the Task Planning section, you will see one row defaulted to "PM Minor" and "Any Asset Category", in the first two fields. This essentially just means that a Task will be created for every Asset (because we have "Any Asset Category" selected) in our Asset Group. So, if you have 50 Assets in your Asset Group, then you will get exactly 50 Tasks (one for each Asset).
However, let's say you also want your technician(s) to perform Boiler shutdowns on all of the Boilers. To do this, simply click Add Row to add another row. For Work Category, you might select "Boiler Shutdown" and for Asset Category you would select "Boiler". Let's assume there are 10 Boilers in your Asset Group of 50 total Assets. This means that our newly added row here would create an additional 10 Tasks, one for each Boiler, bringing our total number of Tasks to 60 for the 50 Assets we will be inspecting. 10 of those Boilers will have 2 Tasks each.
You can continue adding rows and further specifying which Assets should have additional Tasks on them.
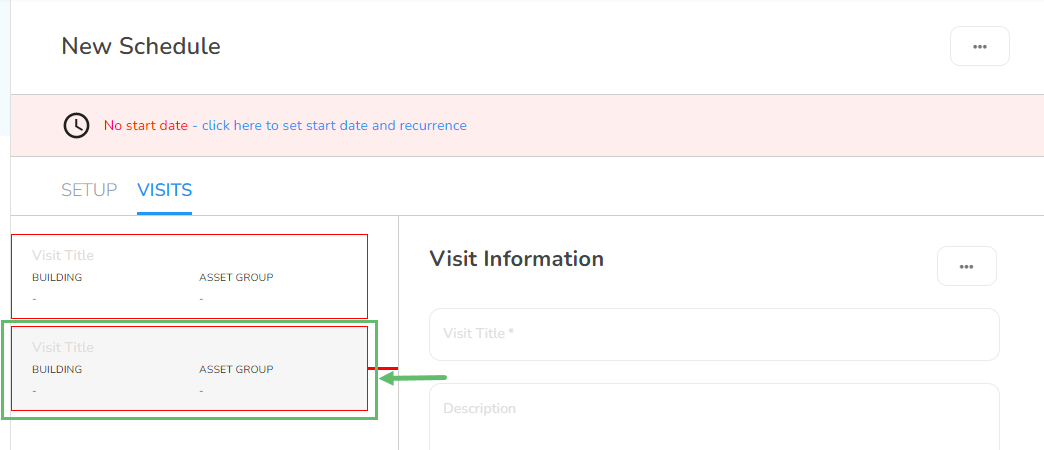
I - + Visit
Click this button to create a new Visit. A new visit form will appear on the right.
Setting a recurrence pattern
The Recurrence pattern will allow you to set when the Schedule should run and create a Visit.
Note!
The recurrence pattern can be set before creating a schedule, and a visit, or after.
1. Click anywhere on the strip across the top to begin creating a recurrence pattern.

2. Fill out the form presented to you.
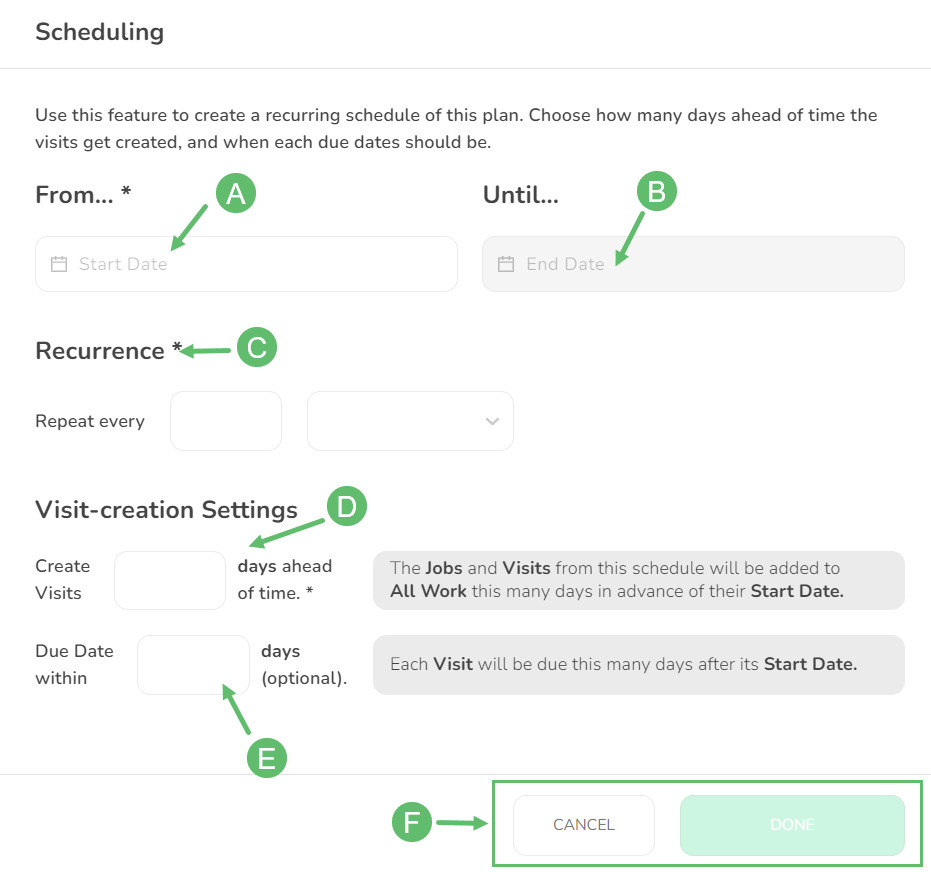
A - Start Date
[required]
Set the Start Date and Time of the first occurrence of this Schedule. Use the Recurrence field below to specify how often and when you want it to repeat.
B - Until
This field lets you set exactly when you want this Schedule to stop generating work. As an example, this could be the date when your contract with a Customer ends.
C - Recurrence
[required]
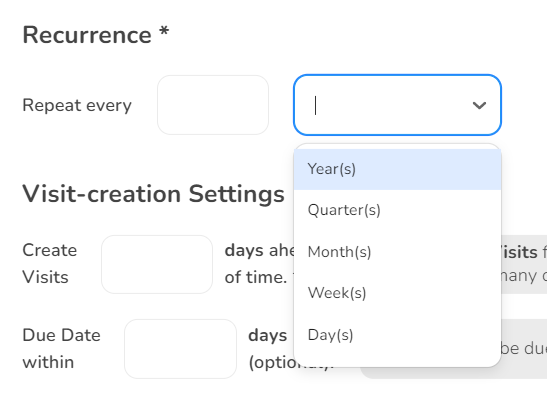
The Recurrence field lets you set up a repeating pattern for this Schedule. Simply type in the number of years, quarters, months, weeks, or days you want this to repeat. The system will then repeat this Schedule according to these settings. For example, if you type in '3' and select 'Months', the system will create Jobs & Visits every 3 months until its End Date.
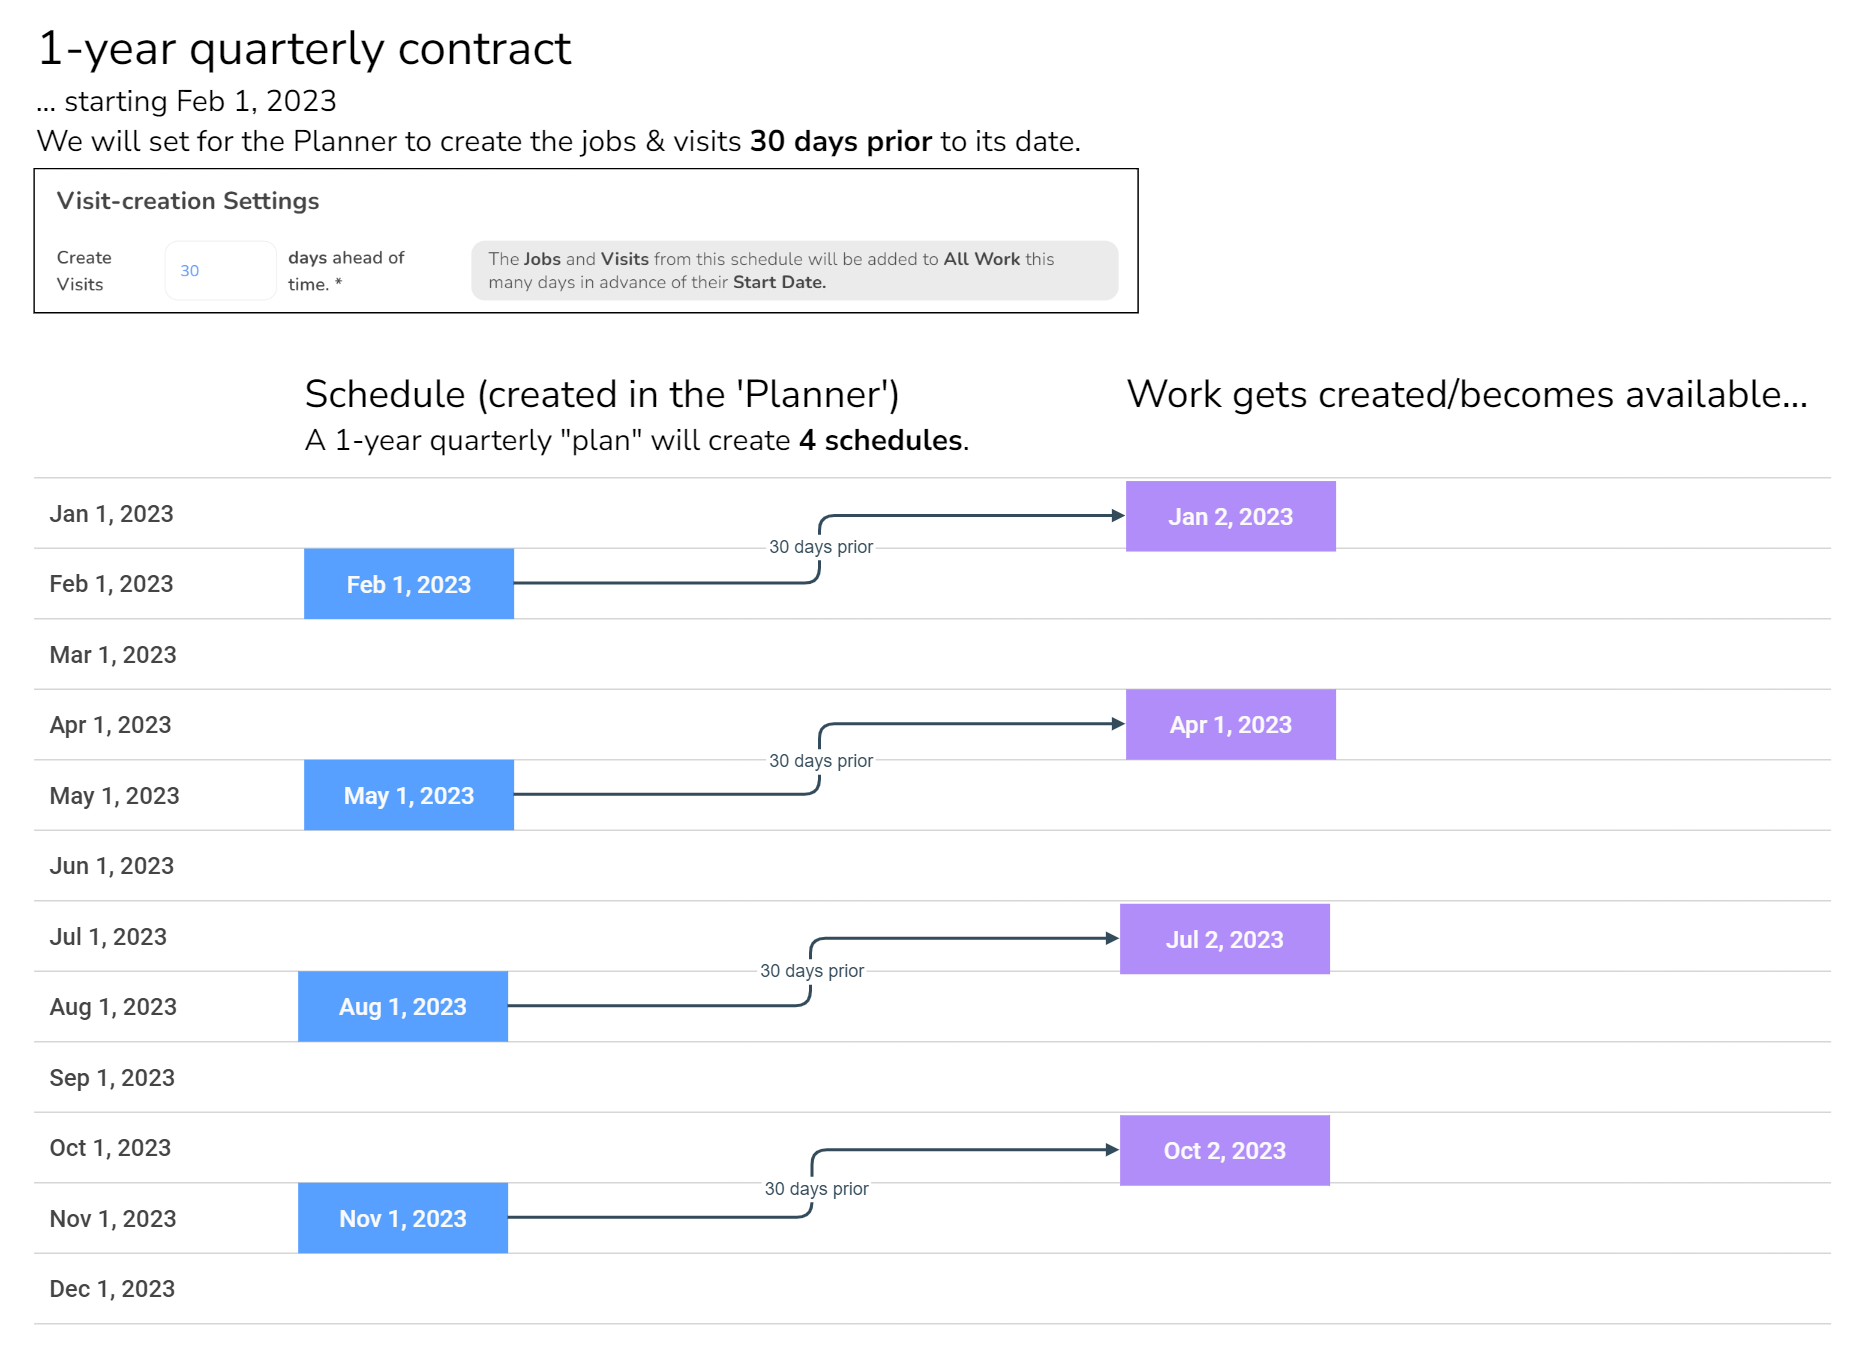
D - Create Visits (days ahead of time)
[required]
Enter the number of days prior to each Start Date in the repeating pattern of this Schedule you want your Visits to be created. For example, if you set this value to '30' you will see each the Visits created for dispatch 30 days prior to when they are set to begin. This gives you the flexibility and freedom to decide what you want to do with the work as it nears its Start Date. Please see the infographic below to see an example of how this works.
E - Due Date Within (days)
[optional]
This field lets you set the Due Date of each Visit created from this Schedule. Simply enter the number of days after each visit's scheduled date this should be due.
Was this article helpful?