- 18 Oct 2024
- 1 Minute to read
- Print
- DarkLight
- PDF
Asset Information
- Updated on 18 Oct 2024
- 1 Minute to read
- Print
- DarkLight
- PDF
The Asset Information screen offers quick and easy access to detailed information about a specific asset from various parts of the app. This article will outline the types of information you can gather from this screen and explain how to access them efficiently.
Accessing the Asset Information screen
You can access detailed information about an asset from the following two (2) screens:
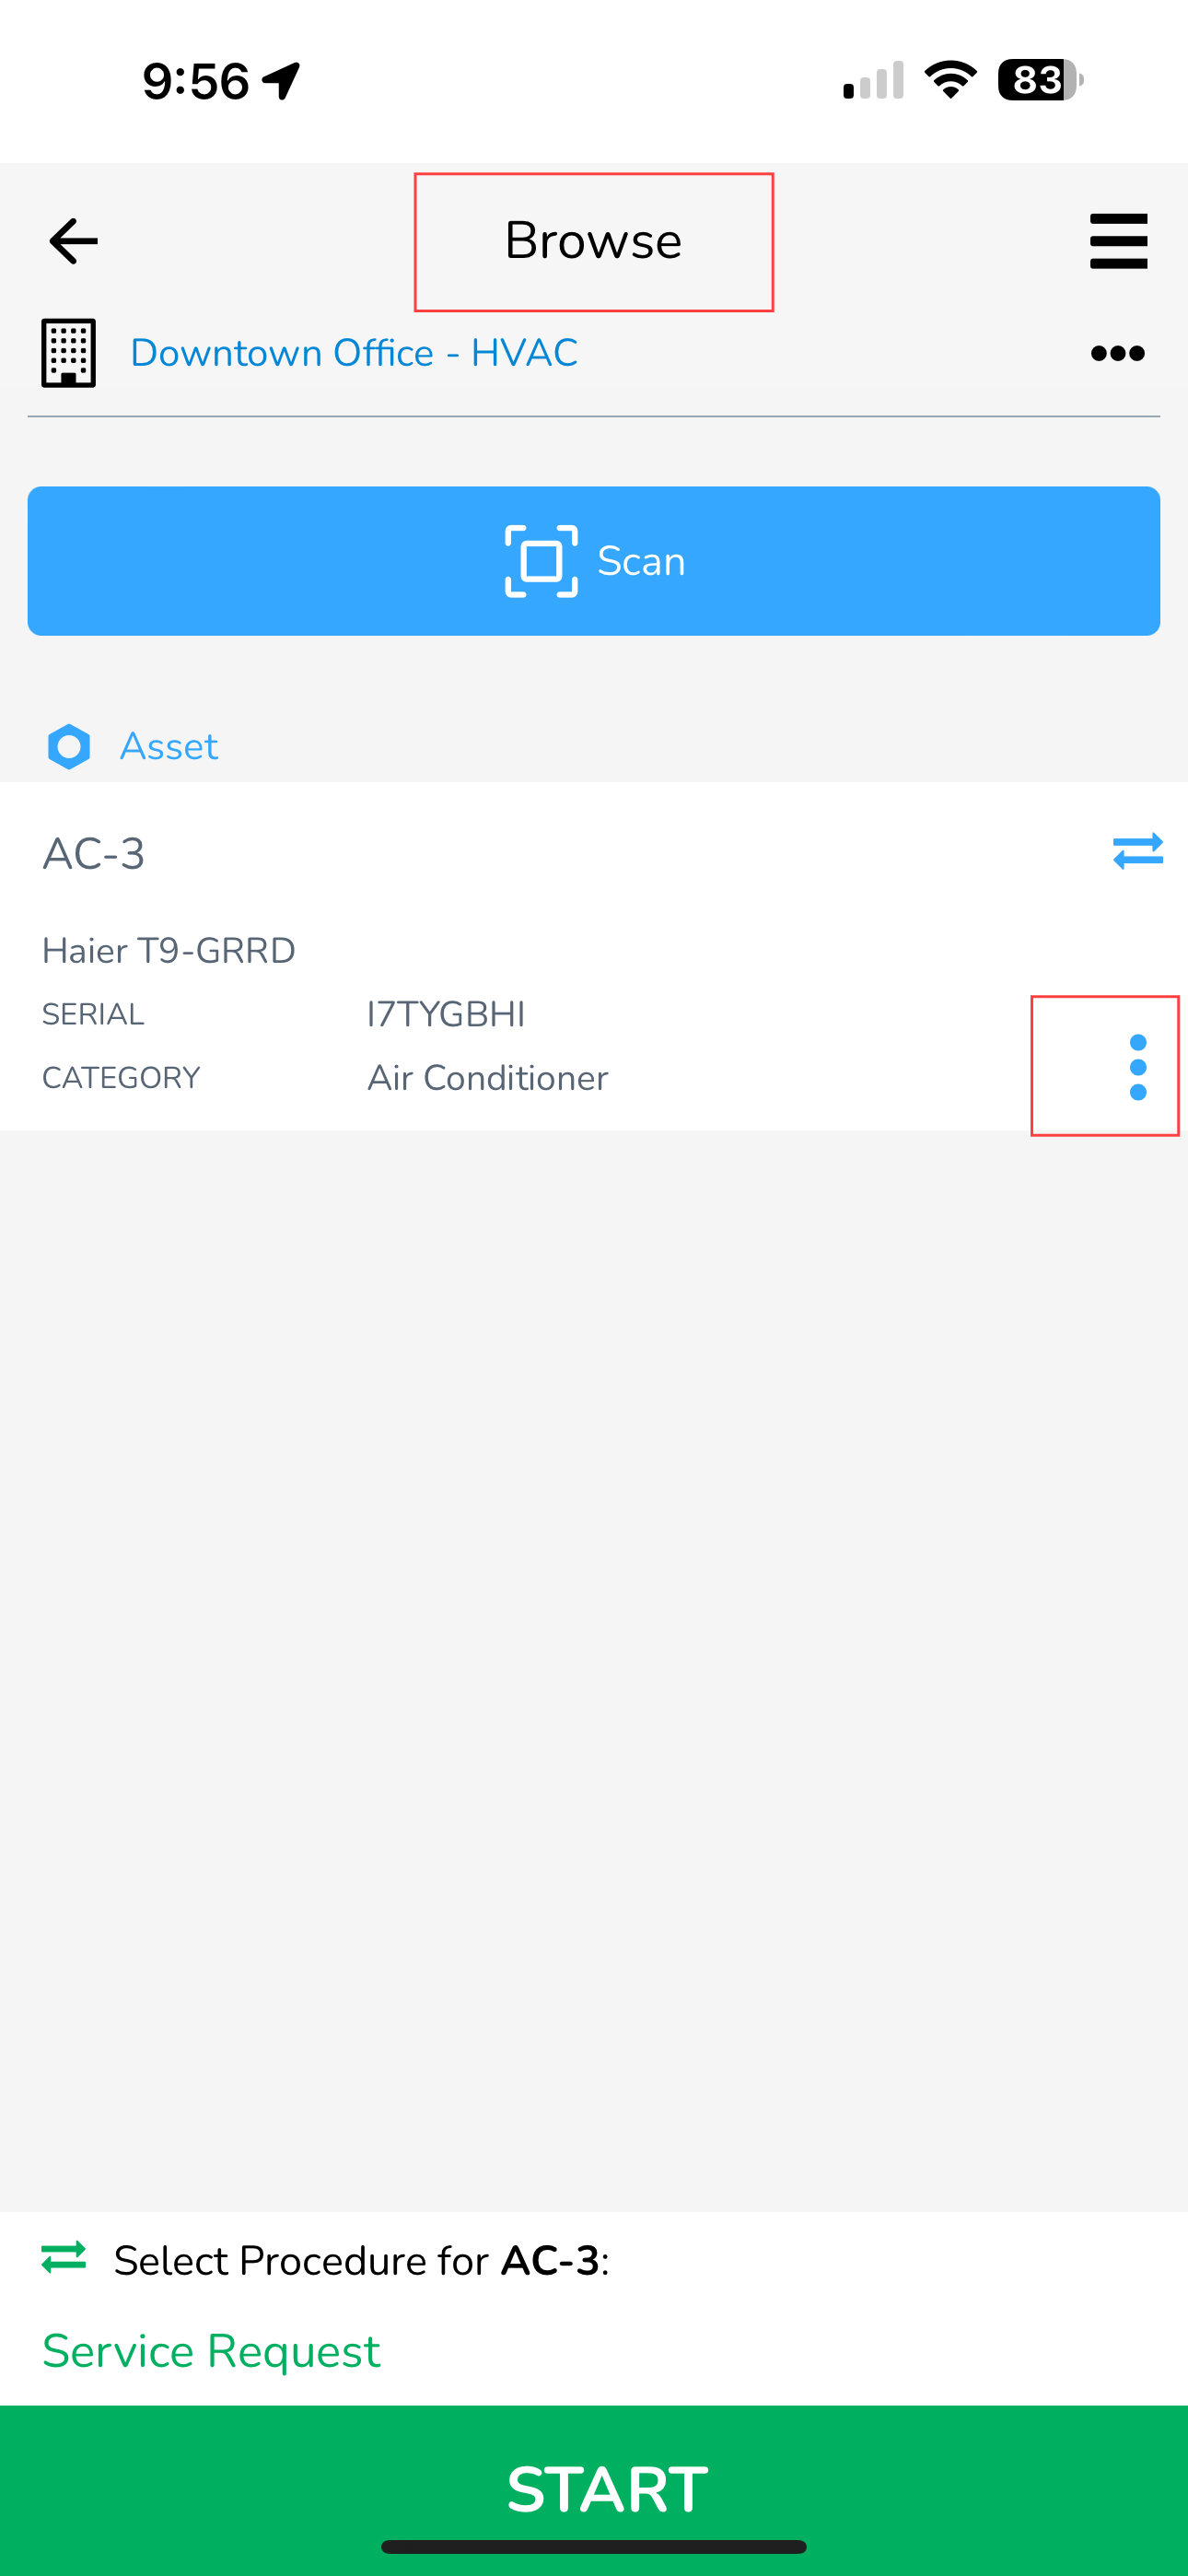
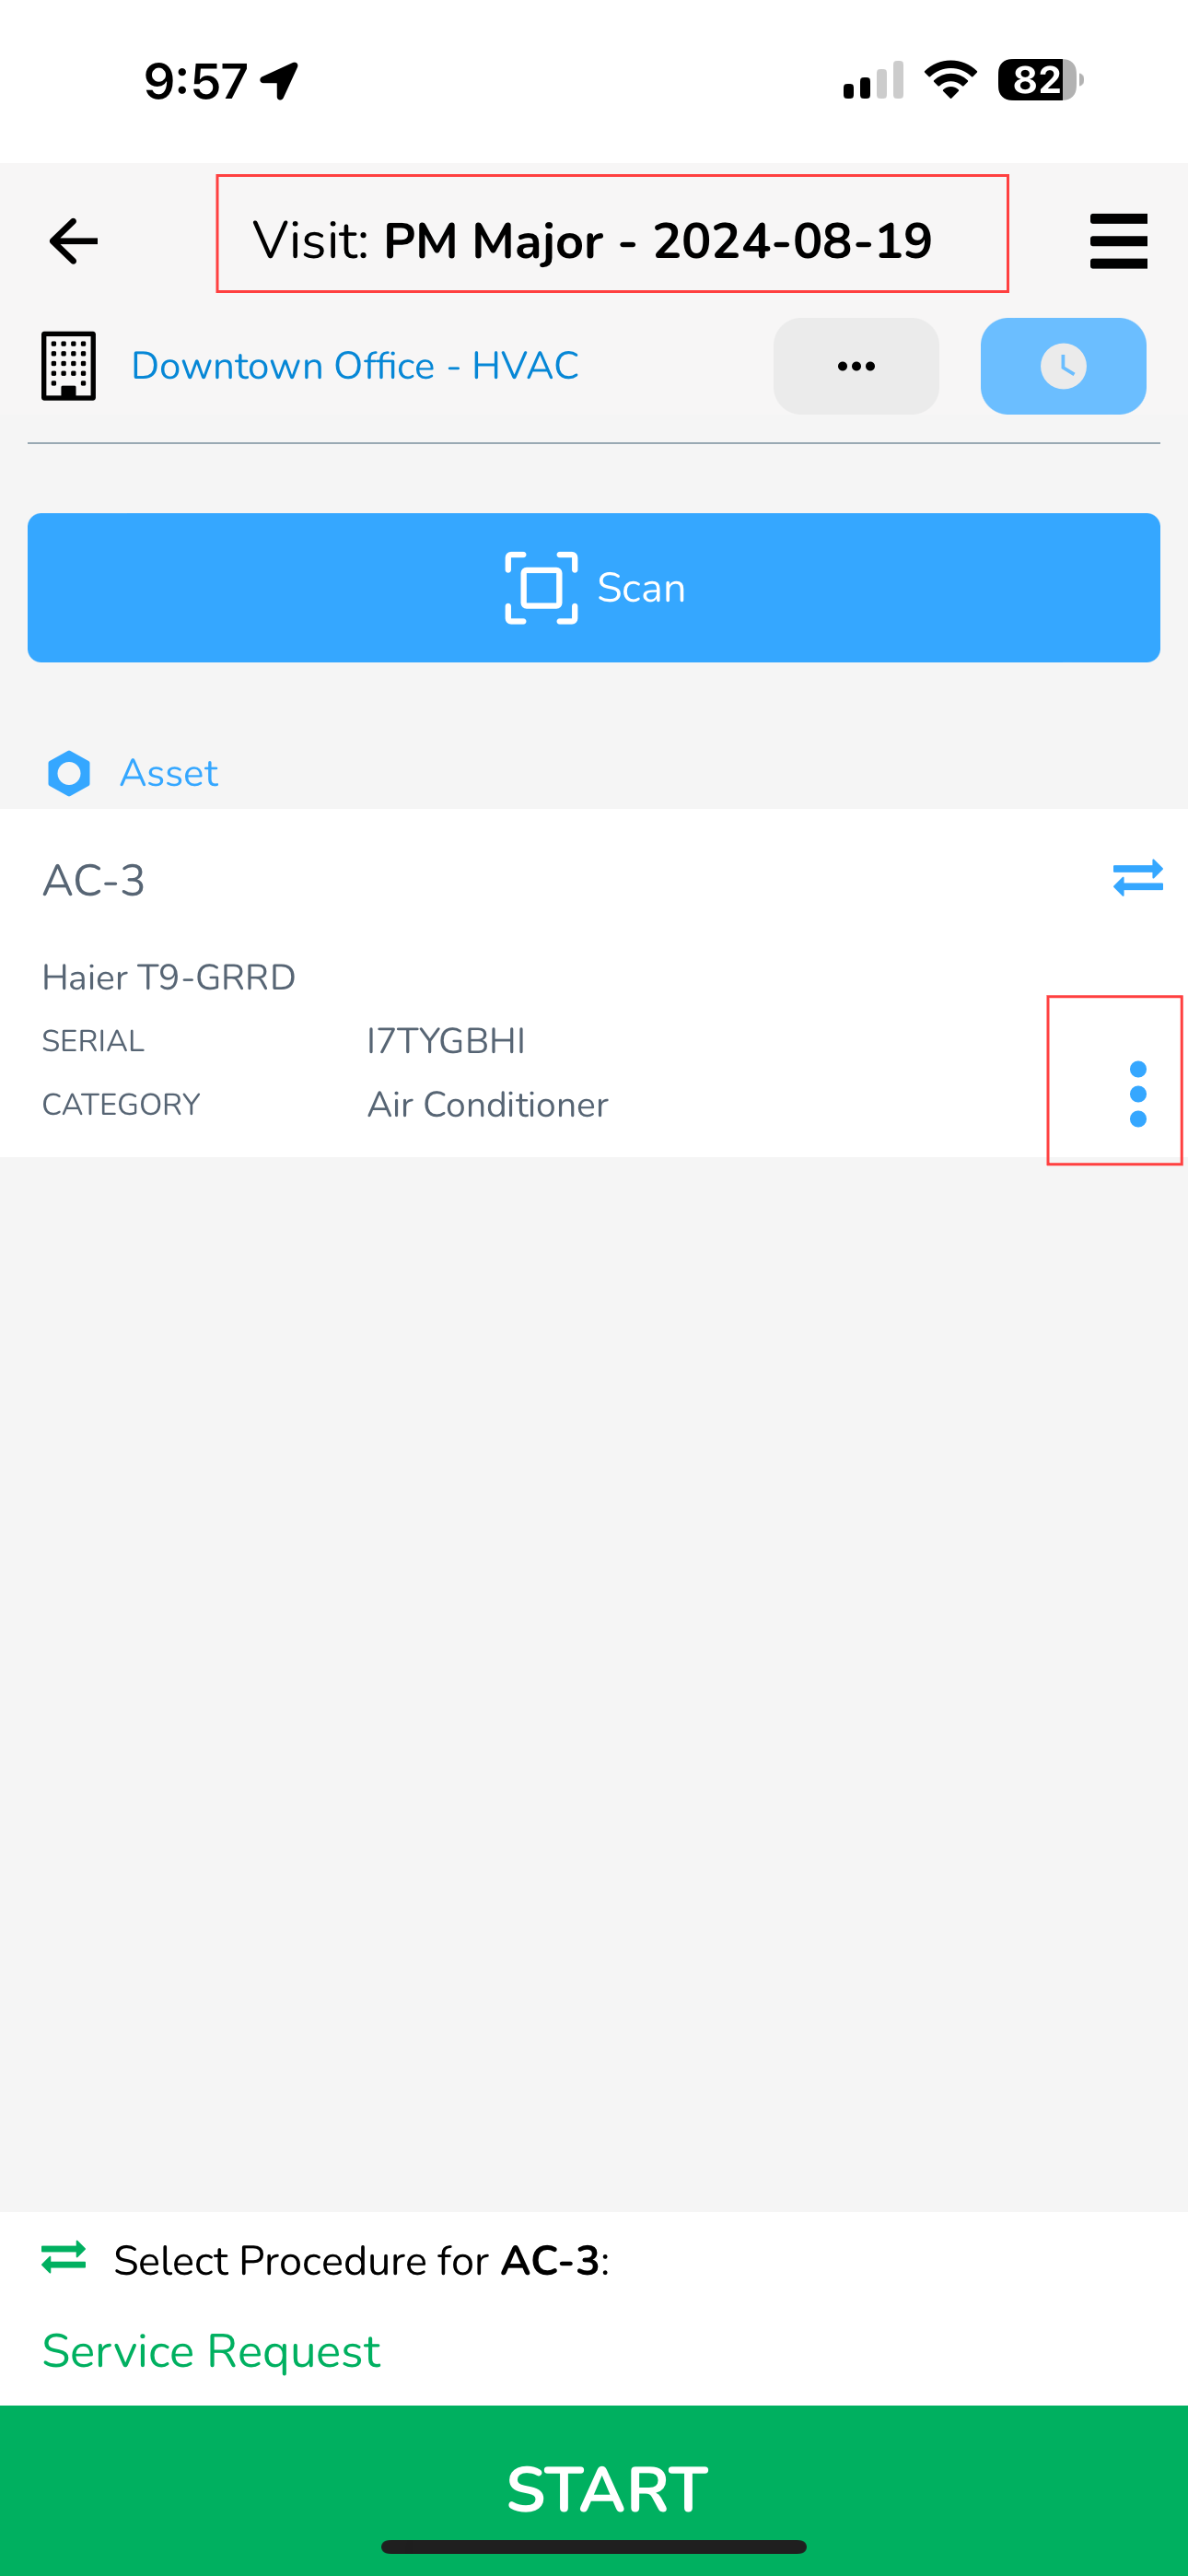
1. Browse Screen / Visit Home Screen
After selecting an asset, you will see 3 blue vertical dots to the right of the asset card. Tap this icon to access the Asset Information screen.


2. From the main Inspection Info pull-up during an inspection
During an inspection, you will see a blue bar at the bottom. This is the Inspection Info pull-up bar. When you open this, you will see all kinds of information that may be useful to you while you are performing your work. At the top of this screen you will see the Asset section. From here, simply tap the blue 3 blue vertical dots to access the Asset Information screen.
Asset Information Overview
The Asset Information screen will give you all the information you need about the visit you're on. The screenshot and text below will explain each item in more detail.
.png)
The asset information slide out has the following information:
A - Asset Name - the name of the asset you have currently selected.
B - Edit Asset - click on the pencil icon to edit information about the asset.
C - Distance from the asset - this shows you the distance you are located from the asset.
Note: You need to enable location permissions on your phone for this feature to work properly.
D - Asset location - click on the map icon to show the location of the asset on Google Maps.
E - Active Issues - click on the Active Issues tab to view the list of issue(s) for this asset, along with any attachments in it.
F - Extended Properties - click on the Extended Properties tab to view the list of properties for this asset.
G - View more information - click on the View More Info tab to view more information about the asset online on the website. You will be asked to login again after you are redirected to the browser.


.PNG)

