All Work
- 11 May 2023
- 9 Minutes to read
- Print
- DarkLight
- PDF
All Work
- Updated on 11 May 2023
- 9 Minutes to read
- Print
- DarkLight
- PDF
Article summary
Did you find this summary helpful?
Thank you for your feedback!
The All Work page lets you manage your organizations Jobs and Visits. This article will also teach you how to create a Materials List.
Creating a new Job
Note!
Some of the features may require configuration before they are ready to use. To create a new Job, it is required to create a Customer and a Job Template first.
To find out more about creating a Customer, click here.
To find out more about creating a Job Template, click here.
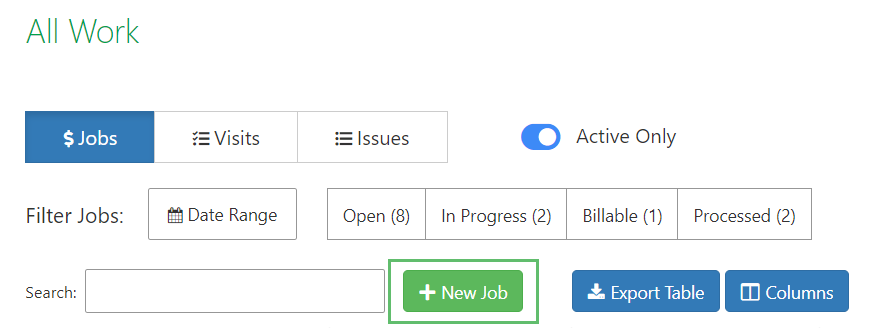
1. From the top navigation, click on All Work.

2. Click on + New Job.
3. Fill out the form presented to you.
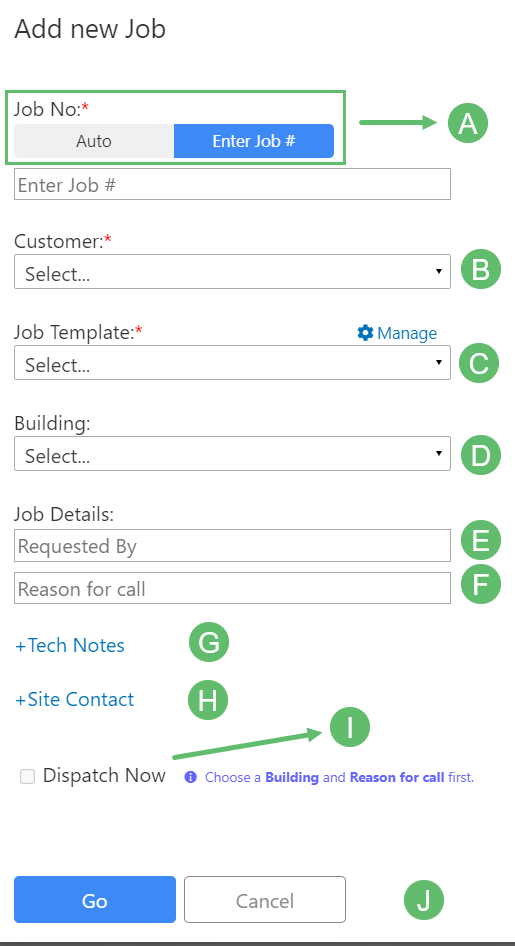
A - Job Number
Use this field to type your own Job Number or select Auto and get the latest from the system.
B - Customer
Select the Customer from this drop-down. The Customer will be the organization to whom you will send the bill. If the Customer doesn't exist, click here to find out how you can create one.
C - Job Template
Select the Job Template you want to use for this Job. This field is filtered down to the Customer you selected in the drop-down above (meaning the most relevant Job Template will be used based on the chosen Customer). The Job Template will set out the specific Charges, Materials, taxes, and terms & conditions that are to be used when billing the Customer at the end of the Job. If you haven't created a Job Template yet, click here to find out more.
D - Building
Select the Building where the work of this Job will primarily be done. Later, you will be able to send technicians out to different Buildings across multiple Visits under the same Job.
E - Requested By
Use this field to enter the name of the person who reported the Issue. This information will show on the Job report.
F - Reason for call
Enter a short description for the Reason for call. This information will show on the Job report.
For example: "Heater not working"
G - Tech Notes
Use this field to enter any specific notes that you may have for your field technicians. The information entered here will only be shown to your techs and not to anyone else. Your Customer will not see this.
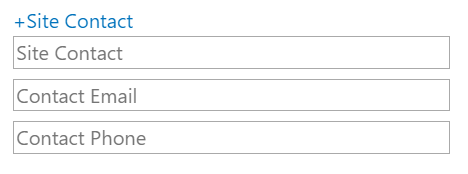
H - Site Contact
Use this field to enter the contact details of the person available on-site.
I - Dispatch Now
This feature lets you automatically create the first Visit for the Job, saving you time by allowing you to select the Work Category and the Asset Category and dispatching it out to your technicians immediately.

J - Go
Once done, click on Go.
Creating a new Visit
In BuiltSpace, work is organized into Visits, and Visits are grouped by Jobs. This means that any Job can have multiple Visits underneath it.
- Visits are a collection of Tasks that tell the technicians what needs to be done while they're on site.
- Some Visits have no Tasks in them, like when there's a service call and you don't know which Assets may need inspecting.
- When problems are identified during an inspection or during maintenance, they will create Issues in BuiltSpace. Issues are Tasks that have not been put into a new Visit yet. On All Work, you can create new Visits from a list of outstanding Issues, or you can add existing Issues into another Visit (as long as they're in the same Building).
Note:
Visits, Tasks, and Issues are visible to all members of the Building. If you need to put private notes on a Visit, you can do that in the Tech Notes field of a Job.
As long as a Visit has Tasks in it, all technicians who work on that Visit can see the same list of work remaining. The Service Twin® app (and our older Inspections app) both support live updating the list of remaining Tasks through a feature we call LiveSync.
Technicians can see all active visits in the app (on the app's All Work screen). By default they see the items assigned to them first, but they can turn the "Assigned To Me" filter off and will be able to see all of the work that is not assigned to any one particular tech.
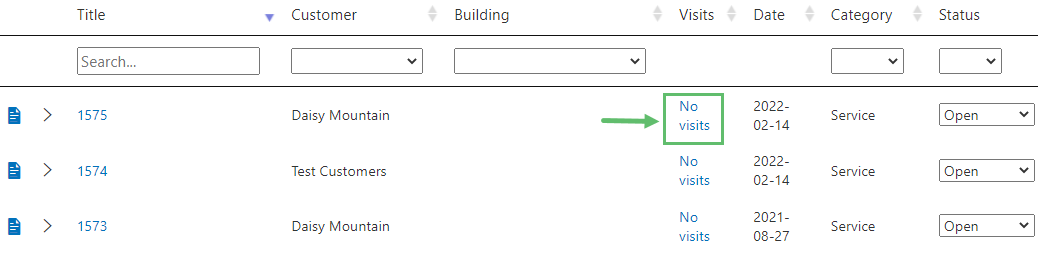
1. To create a new Visit inside a Job, simply go to the Jobs tab and locate the Visits column in the table. Here you will see whether any Visits have been created under this Job. If there are none, you will see the words "No Visits". Click on this to begin the process of creating a new Visit (skip to step 3 below).
2. Another way to create a new Visit is from the Visits tab and by clicking on the + New Visit button.
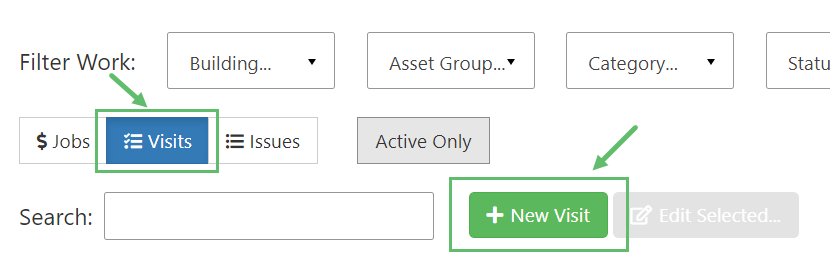
3. Fill out the form presented to you. Fields indicated by a red asterisk (*) denote a required field.
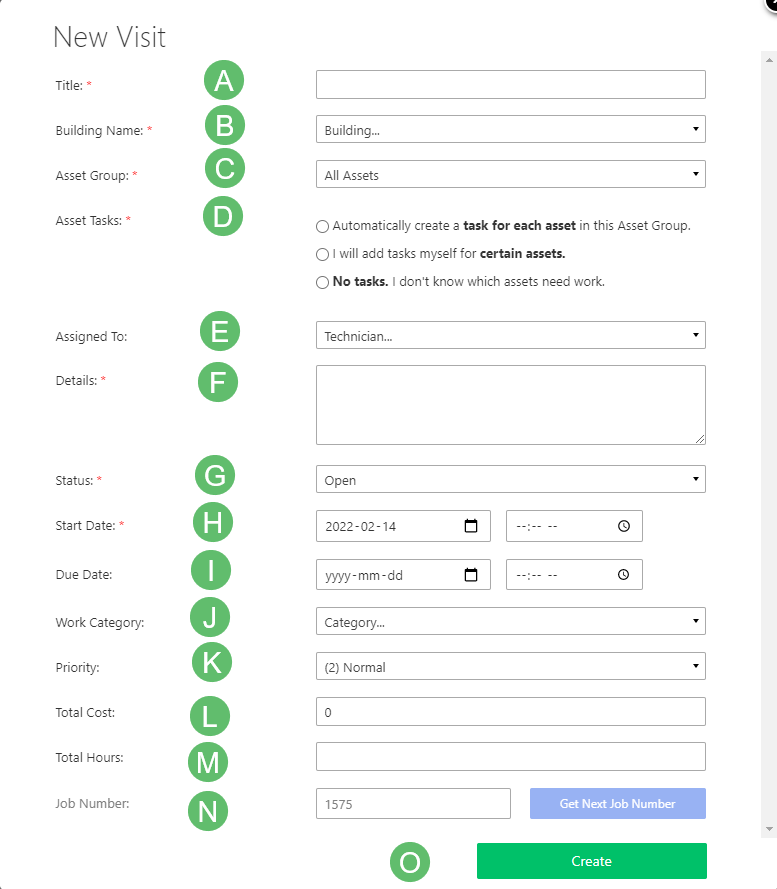
A - Title
Enter a Title for the Visit.
B - Building Name
Select the Building (or work site) of this Visit.
C - Asset Group
In this field you can set which group of Assets are going to be worked on during this Visit. Each Asset may get one or more Tasks, depending on the option you select in the Asset Tasks section below.
D - Asset Tasks
Use this section to define which Tasks should be created when the Visit nears its Start Date.
Automatically generate Tasks for each Asset in this Visit.
Select this to create 1 Task for each Asset. This is useful if you are doing a walkthrough or preventative maintenance on a group of Assets in a Building.
I will add tasks myself for certain assets.
Choose this option if you want to manually choose the Assets and Tasks in this Visit. After the Visit is created, you'll be taken to a form explained below.
No tasks. I don't know which assets need work.
Choose this option to create zero Tasks but give the technician the option to choose from all of the Assets in the selected Asset Group. Because there will be no Tasks, that means the progress tracking will not be enabled as it's unknown as to how much work there is to be done.
E - Assigned To
If you know ahead of time which technician should be assigned to this Visit, select that person here.
F - Details
Use this textbox to further describe the Visit you are creating.
G - Status
This feature lets you set the opening status of the Visit. The Status can be changed throughout the life of the Visit. The options are: Open, To be Quoted, Needs Approval, In Progress, Waiting, Completed, and Closed.
H - Start Date
Set the Start Date and Time for the Visit.
I - Due Date
This field lets you set the Due Date of the Visit.
J - Work Category
This is a very important field as it dictates what type of work will be performed during this Visit. This will help narrow down the Procedure(s) that your technicians will be prompted with when performing their work. Work Categories are a managed list that you can make changes to by hovering over the Manage tab (from the main user interface) and clicking on Work Categories.
K - Priority
This feature lets you set the urgency of the Visit.
L - Total Cost
Enter the Total Cost this Visit entails, usually as per contractual agreement with the Customer.
M - Total Hours
Enter the Total Hours agreed upon to be spent on this Visit.
N - Job Number
Type your own number or get the latest from the system by tapping the Get Next Job Number button. Assigning a Job Number to a Visit will help to group together the work for billing purposes later.
O - Create
Once done, click on Create.
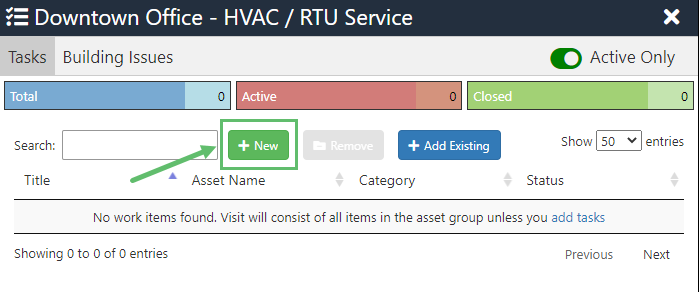
I will add tasks myself for certain assets
1. Selecting this option on the + New Visit form will take you to the following screen which will let you add Tasks to your Visit. Click on New to get started.
2. Fill out the form presented to you. Each field is explained in more detail below.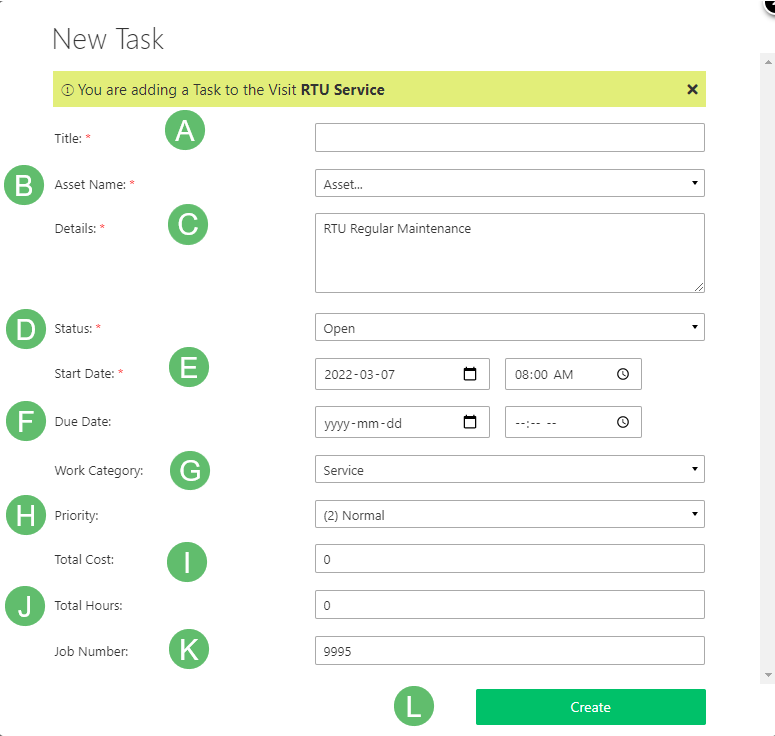
A - Title
Enter the title for the Task.
B - Asset Name
Select the Asset for which you would like to create this Task.
C - Details
The Details section here will inherit the information from the Details section of the Visit form. However, you will still have the ability to add more information or change it.
D - Status
By default the Status is set to 'Open'. As you start working on the Task, the Status will get updated to 'In Progress'.
E - Start Date
Enter the Start Date of when you would like the Task to begin.
F - Due Date
Enter the Due Date for this Task.
G - Work Category
The Work Category field will inherit the information from the Work Category field of the Visit form. However, you still have the ability to change it to a different Work Category.
H - Priority
By default the Priority is set to 'Normal'. You can change it to 'Low' or 'High' depending on the urgency.
I - Total Cost
Enter the Total Cost for this Task.
J - Total Hours
Enter the Total Hours for this Task.
K - Job Number
The Job Number will be inherited from the Job Number of the Visit. You may change it by typing in a new one.
L - Create
Once done, click on Create to create the Task.
How to track the progress of Visit
As long as a Visit has Tasks in it, all technicians assigned to that Visit can see the same list of work remaining (this list is updated live using our LiveSync feature.
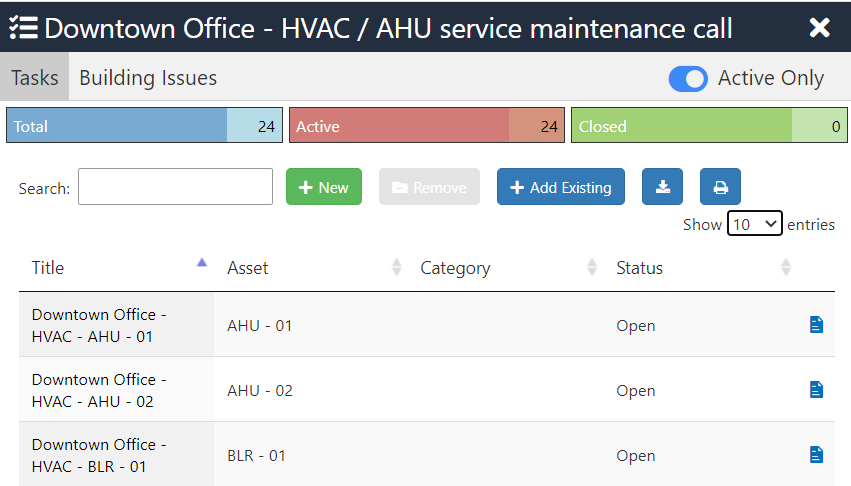
After a Visit has been created, click on Tasks in the left-most column.
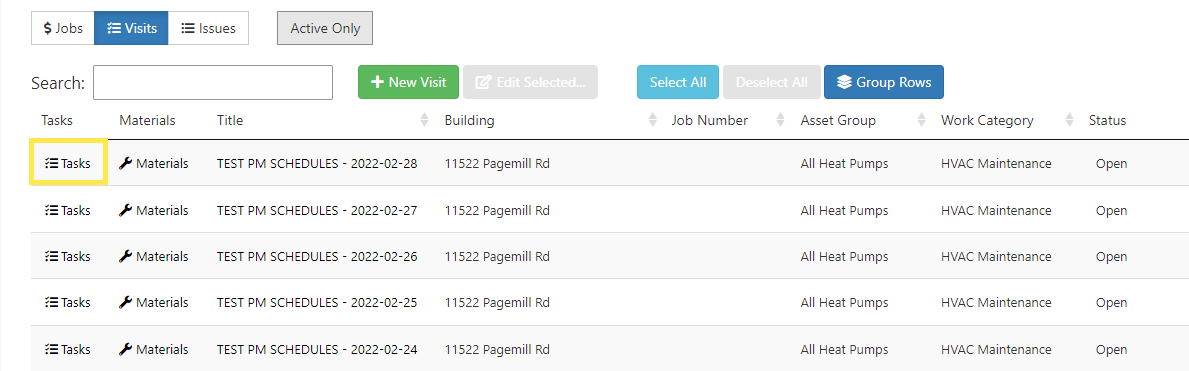
You will see a list of Tasks associated with that Visit slide out from the right.
Adding Materials Lists to a Visit
If you add a Materials List to a Visit, the Charges will show up on the Job's. Technicians will also be able to review the list before they start the Visit.
Technicians cannot edit the Materials List themselves, but if they need to add Charges such as Labour hours or any Materials they used, they can do that in the app while completing any Procedure that has Hours and Materials enabled.
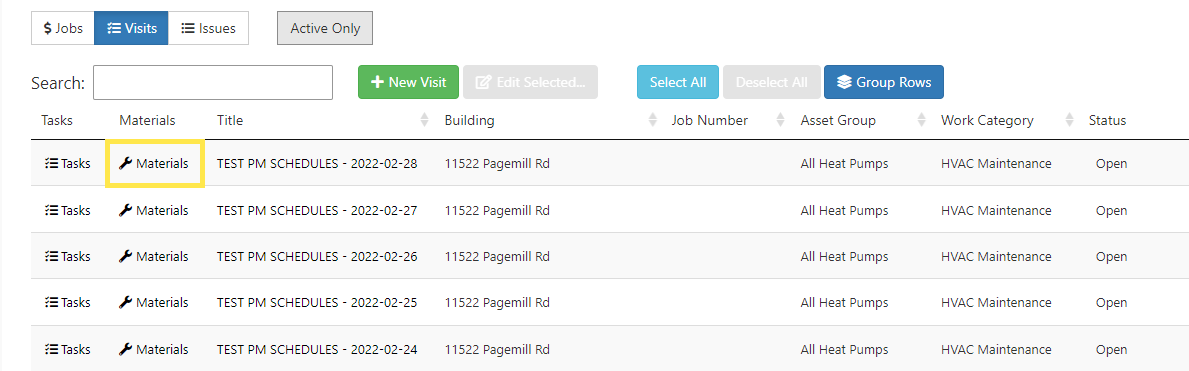
To add Materials to a Visit, simply follow the steps below:
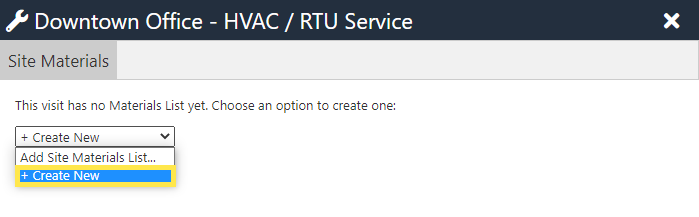
1. Locate the Visit you want to add Materials to and click on Materials under the Materials column.
2. This will slide out the Materials List. If it's blank, you will see a drop-down. You can choose an existing Materials List or can click on + Create New and create a new one.
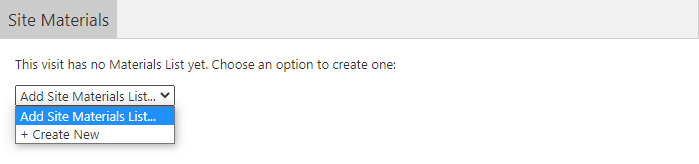
Creating a New Materials List
1. Click on + Create New.
2. Select the type of Charge and fill in the details.
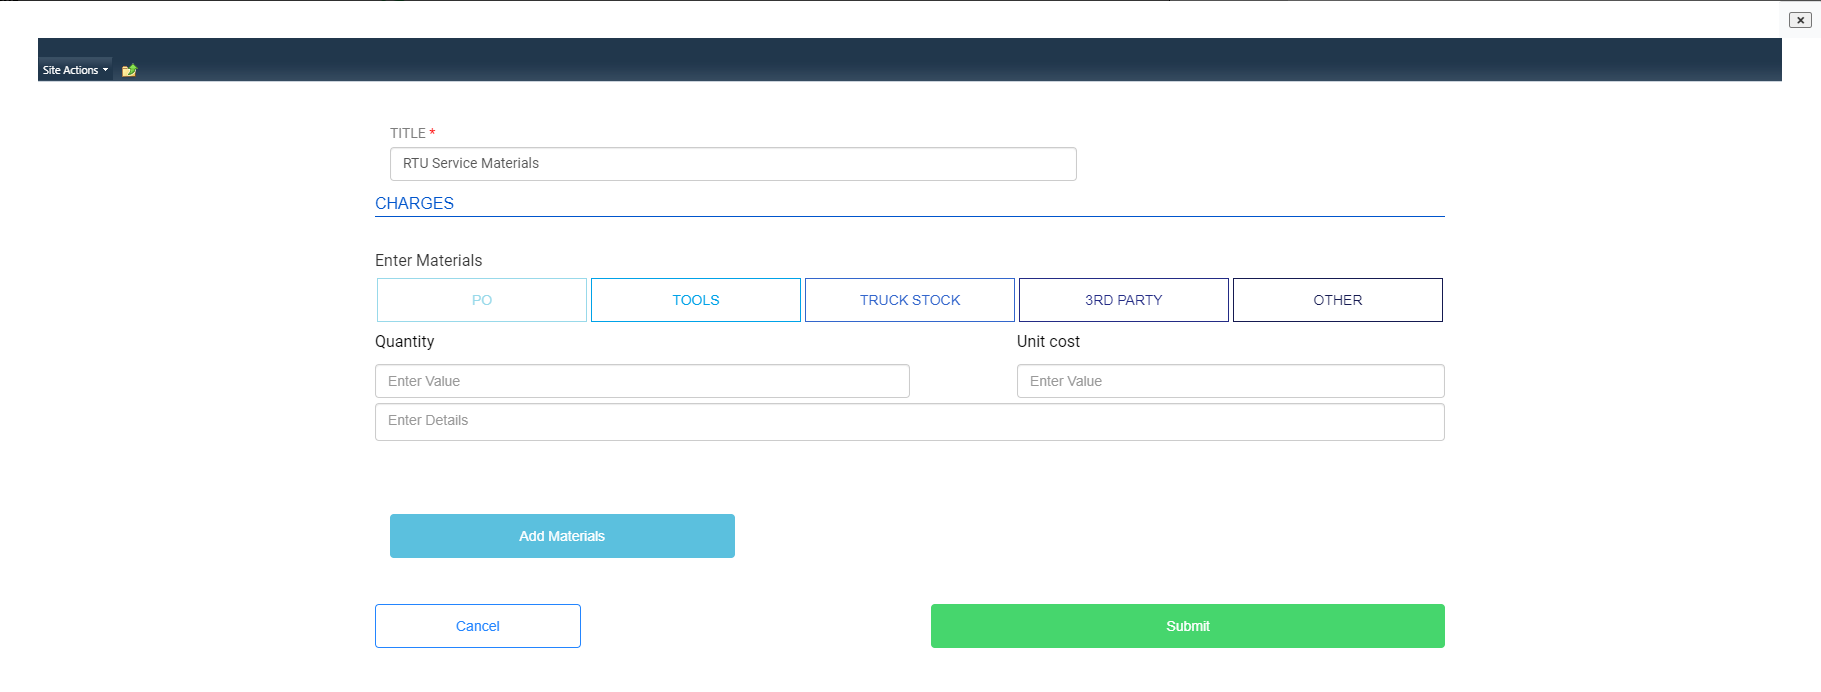
3. Once done, click Submit.
How to edit and update a Job Number
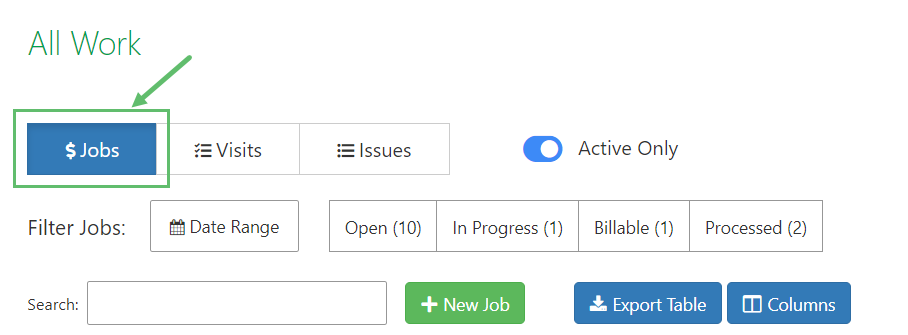
1. From the top navigation click on All Work.

2. On the All Work, click on Jobs tab.
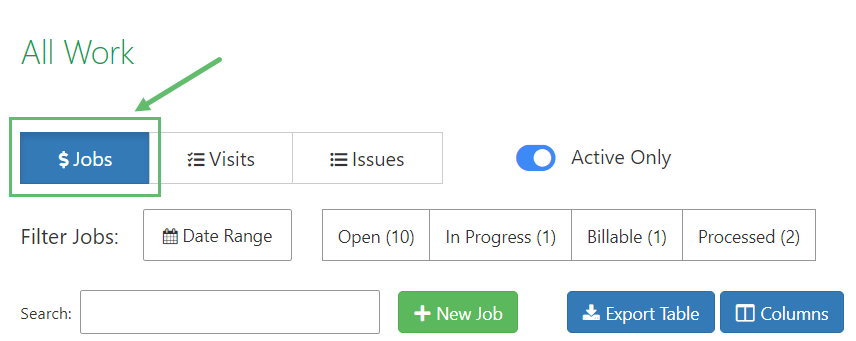
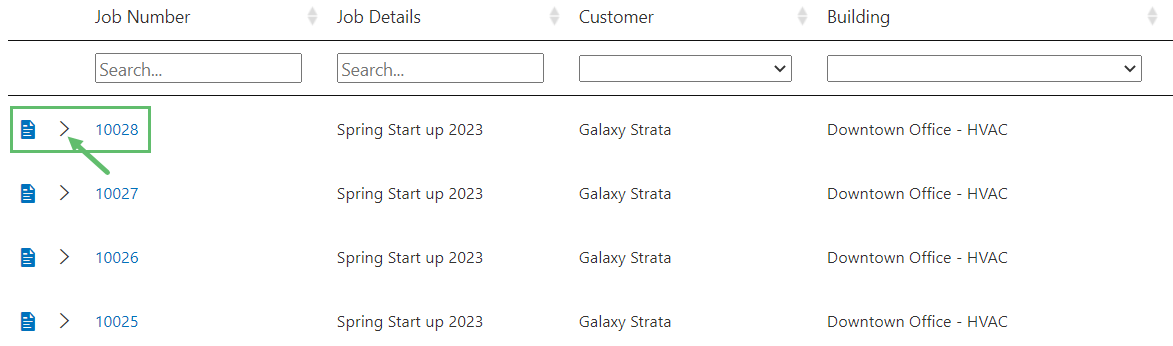
3. On the Jobs tab, click to expand the Job Details for a selected Job Number.
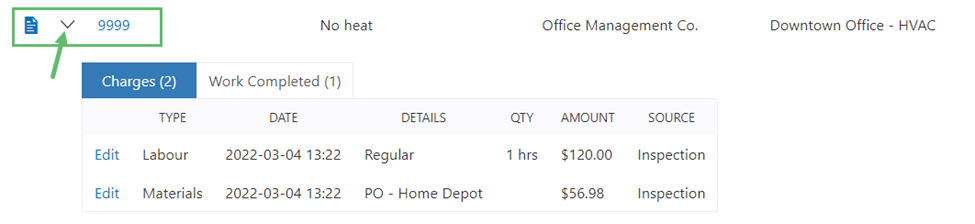
4. Select Work Completed and click on Edit.

5. Update the Job Number.
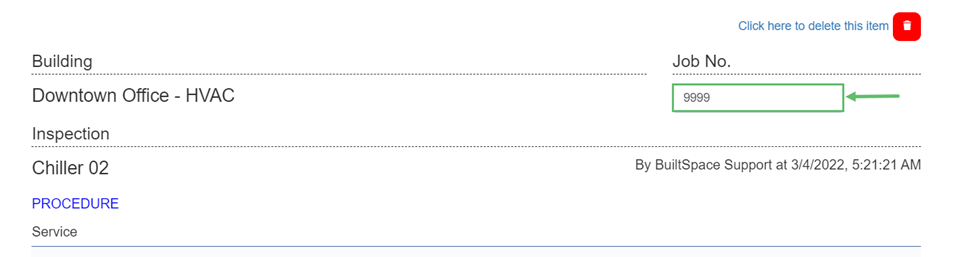
6. Click on Submit at the bottom of the page.
How to add Work Performed in Jobs
1. From the top navigation, click on All Work.

2. Select the Jobs tab.
3. On the Jobs tab, click to expand the Job Details for the selected Job Number.
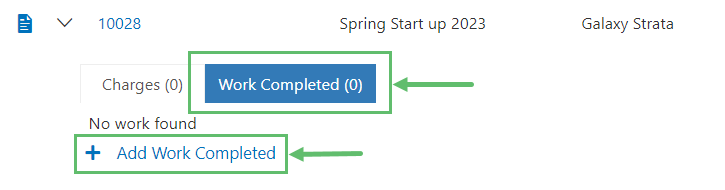
4. Select Work Completed and click on + Add Work Completed.
5. Select the Asset and the Procedure and answer the Questions associated with the Procedure.

6. Once done, click on the Submit.
Was this article helpful?