Adding/Editing Assets
- 18 Oct 2024
- 4 Minutes to read
- Print
- DarkLight
- PDF
Adding/Editing Assets
- Updated on 18 Oct 2024
- 4 Minutes to read
- Print
- DarkLight
- PDF
Article summary
Did you find this summary helpful?
Thank you for your feedback!
Editing Assets
To edit an asset, choose an asset by tapping on Select Asset. Then click the three blue vertical dots on the right side of the asset card to open the asset information slide out.
 .
. .png "image(4).png")
Tap on the pencil icon on the more information slide out of an asset.
.png "image(1).png")
This will bring up the Edit Asset screen. Make your edits by changing the necessary fields. Tap Done when you are finished editing.

A - Name
Enter the name of the asset here.
B - Make
Enter the make of the asset here (if you know it).
C - Model
Enter the model of the asset here (if you know it).
D - Serial Number
Manually enter the serial number of the asset here (if you know it), or tap the scan icon on the right to scan the barcode of the asset and retrieve the serial number automatically. This feature ensures that you will not be prone to human error and possibly mistype the serial number.
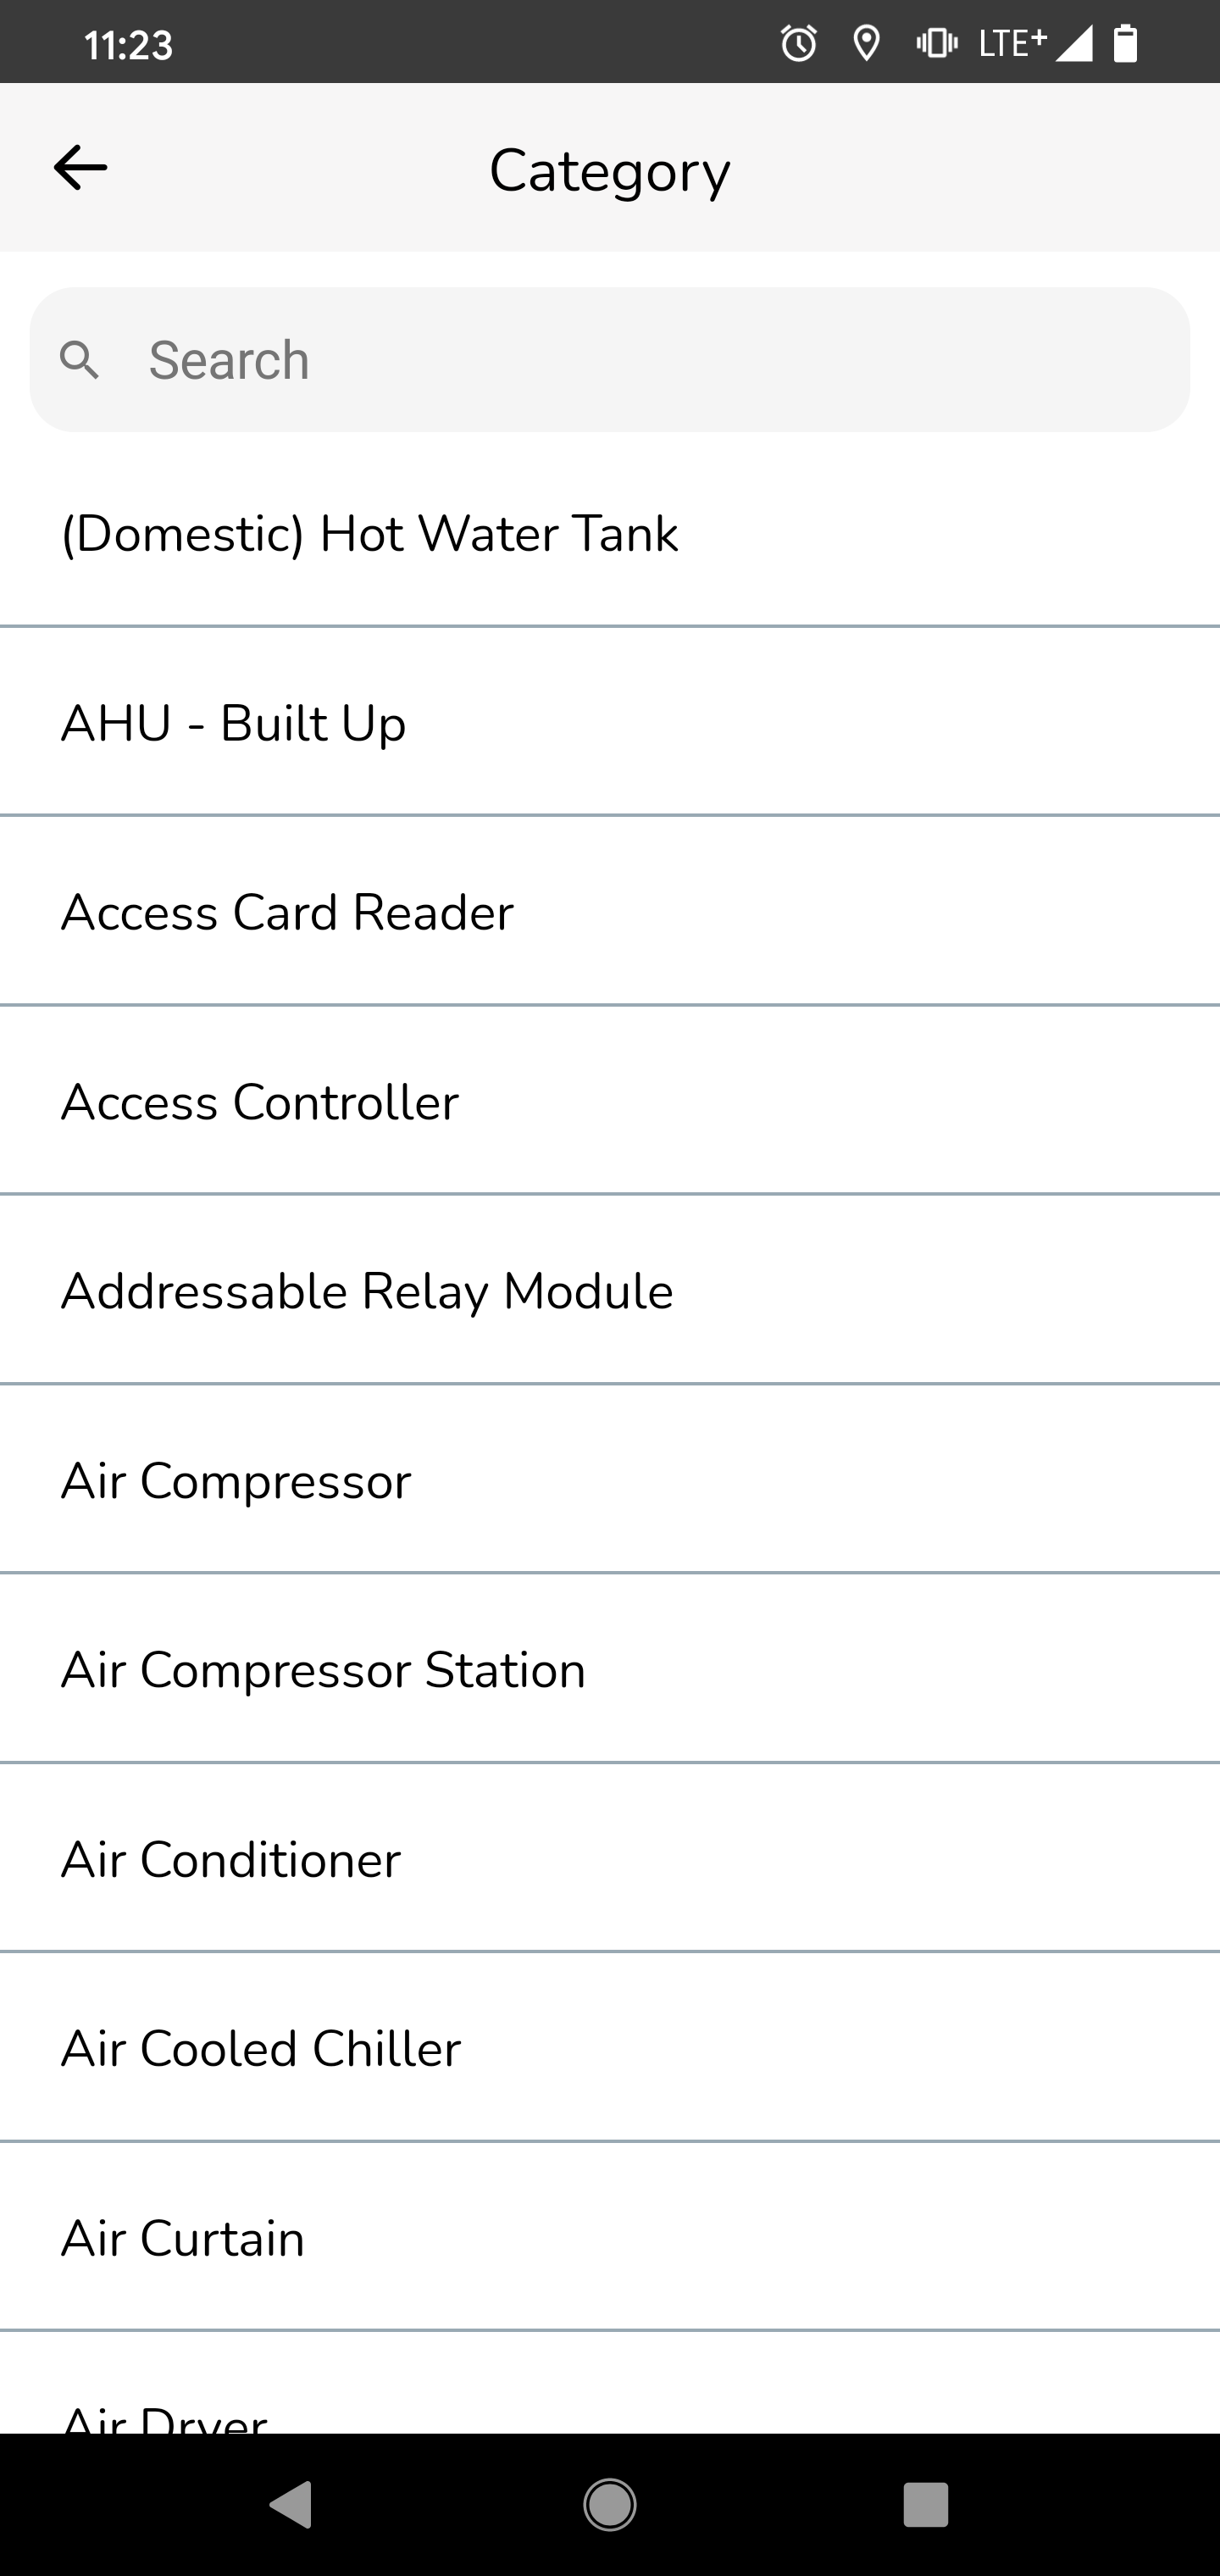
E - Category
Select from a list of asset categories. This field is very important so make sure you select the most accurate asset category here. Use the search function at the top to help you find the best category. If the category you are looking for is not in the list, please contact our support team and we can help you.
F - Description
Enter a description for the asset.
G- Location
This is the physical place where the asset is located and can be accessed for work or maintenance. It specifies exactly where you can find the asset itself. For example, an air conditioning unit installed on the roof or a control panel situated in a specific room. When filtering by location, both the asset's physical location and service locations are included, allowing you to find assets based on where they are situated.
H- Service Location
This refers to the list of rooms or areas that the asset serves or is connected to. It represents the spaces affected by or benefiting from the asset's operation. For instance, a rooftop unit might provide cooling to three commercial units, or an electrical panel in one room might supply power to an entire floor. You can select the service location to find which assets serve that room, making it easy to identify assets based on the areas they impact when filtering by location.
Adding new Assets
If you cannot find an asset, or if it hasn't been added to the system yet, you can easily create it yourself directly from the app.
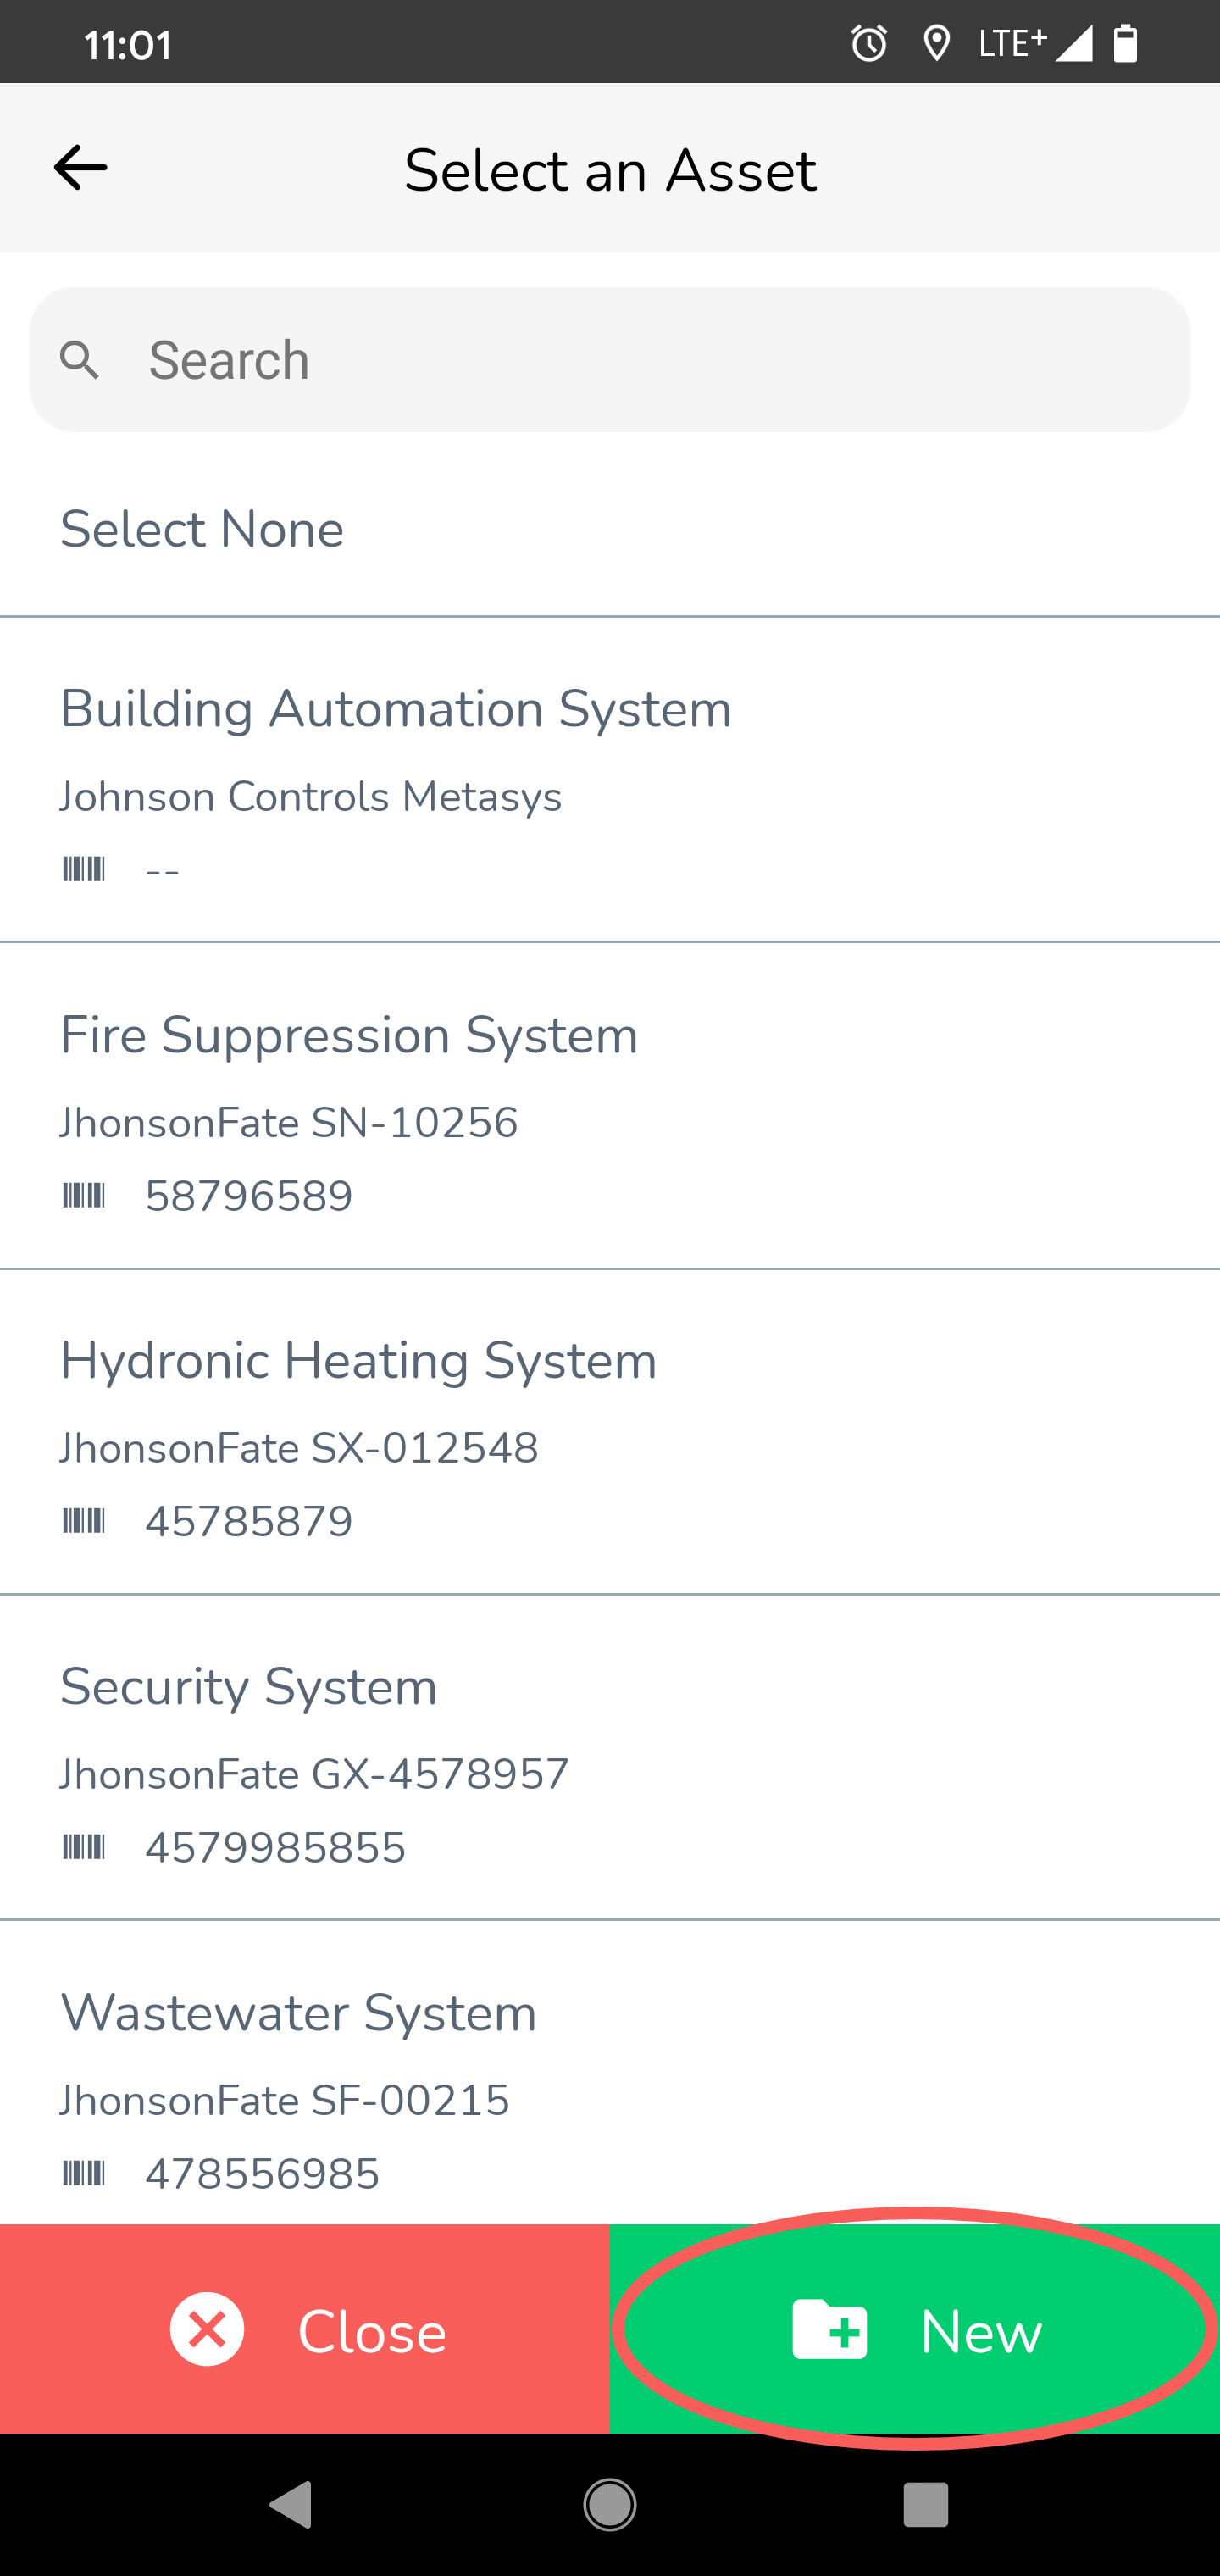
To do this, simply tap on Select Asset or the change asset area if you've already selected a different asset.

If you haven't selected an asset yet, simply tap "Select Asset" where you will have the ability to create a new asset.
You will be presented with the following screen. Use the search function at the top to ensure that the asset you want to add isn't in the system yet. Once you have confirmed that the asset doesn't exist, simply tap the New button in the bottom-right corner to launch the form that will allow you to create a new asset.
Fill out the required fields and tap Done when you are finished. In this example, we are going to create a new asset called "Demo New Asset".

A - Name
Enter the name of the asset here.
B - Make
Enter the make of the asset here (if you know it).
C - Model
Enter the model of the asset here (if you know it).
D - Serial Number
Manually enter the serial number of the asset here (if you know it), or tap the scan icon on the right to scan the barcode of the asset and retrieve the serial number automatically. This feature ensures that you will not be prone to human error and possibly mistype the serial number.
E - Category
Select from a list of asset categories. This field is very important so make sure you select the most accurate asset category here. Use the search function at the top to help you find the best category. If the category you are looking for is not in the list, please contact our support team and we can help you.
F - Description
Enter a description for the asset.
G- Location
This is the physical place where the asset is located and can be accessed for work or maintenance. It specifies exactly where you can find the asset itself. For example, an air conditioning unit installed on the roof or a control panel situated in a specific room. When filtering by location, both the asset's physical location and service locations are included, allowing you to find assets based on where they are situated.
H- Service Location
This refers to the list of rooms or areas that the asset serves or is connected to. It represents the spaces affected by or benefiting from the asset's operation. For instance, a rooftop unit might provide cooling to three commercial units, or an electrical panel in one room might supply power to an entire floor. You can select the service location to find which assets serve that room, making it easy to identify assets based on the areas they impact when filtering by location.
After you tap Done, your new asset will be created and you will be able to select it from your list of assets in that building.
.png "image(2).png")
Was this article helpful?